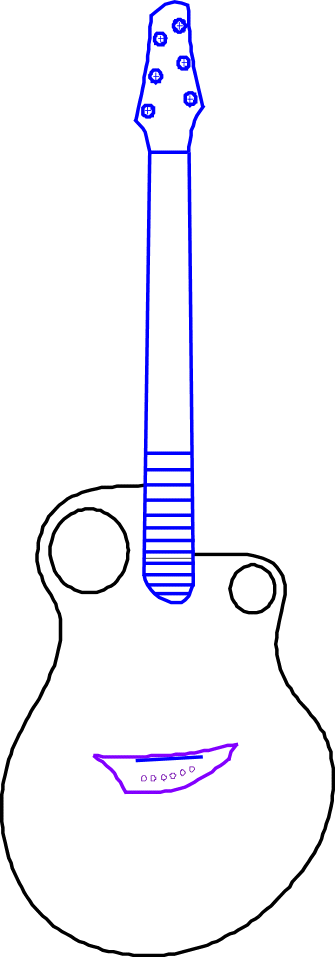
Design Concept
At right you can see the original design concept for a guitar to be built for Chuck,
my brother-
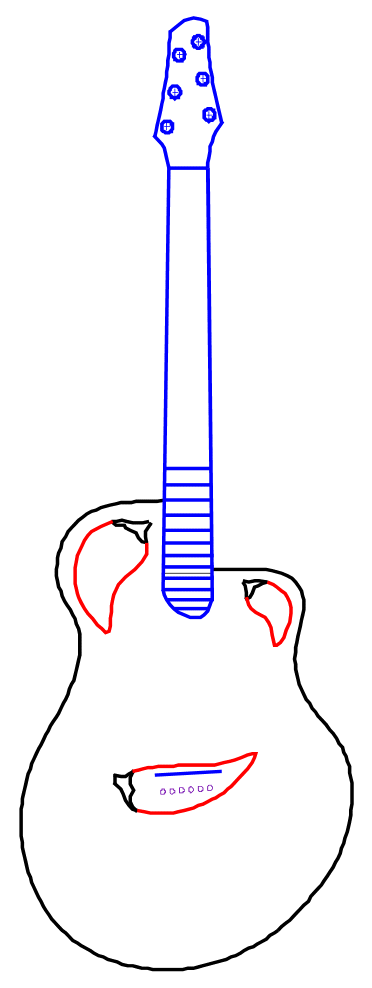
When Chuck looked at the design, he liked it. As he is in the chile business, his only comment was that it would be even better if it incorporated a chile theme. After at first rejecting this notion as crazy, but then playing around with the idea for a while, I came up with this concept you see at the right. I decided to use chile shaped sound holes and bridge. I will use blood wood (obviously red) for the bridge, fretboard, bindings, and decorative trim. I haven’t yet decided what to use as wood for the chile stems, as I don’t know of a green colored wood, and I don’t think I don’t want to use dye. My current idea is to use ebony (black).
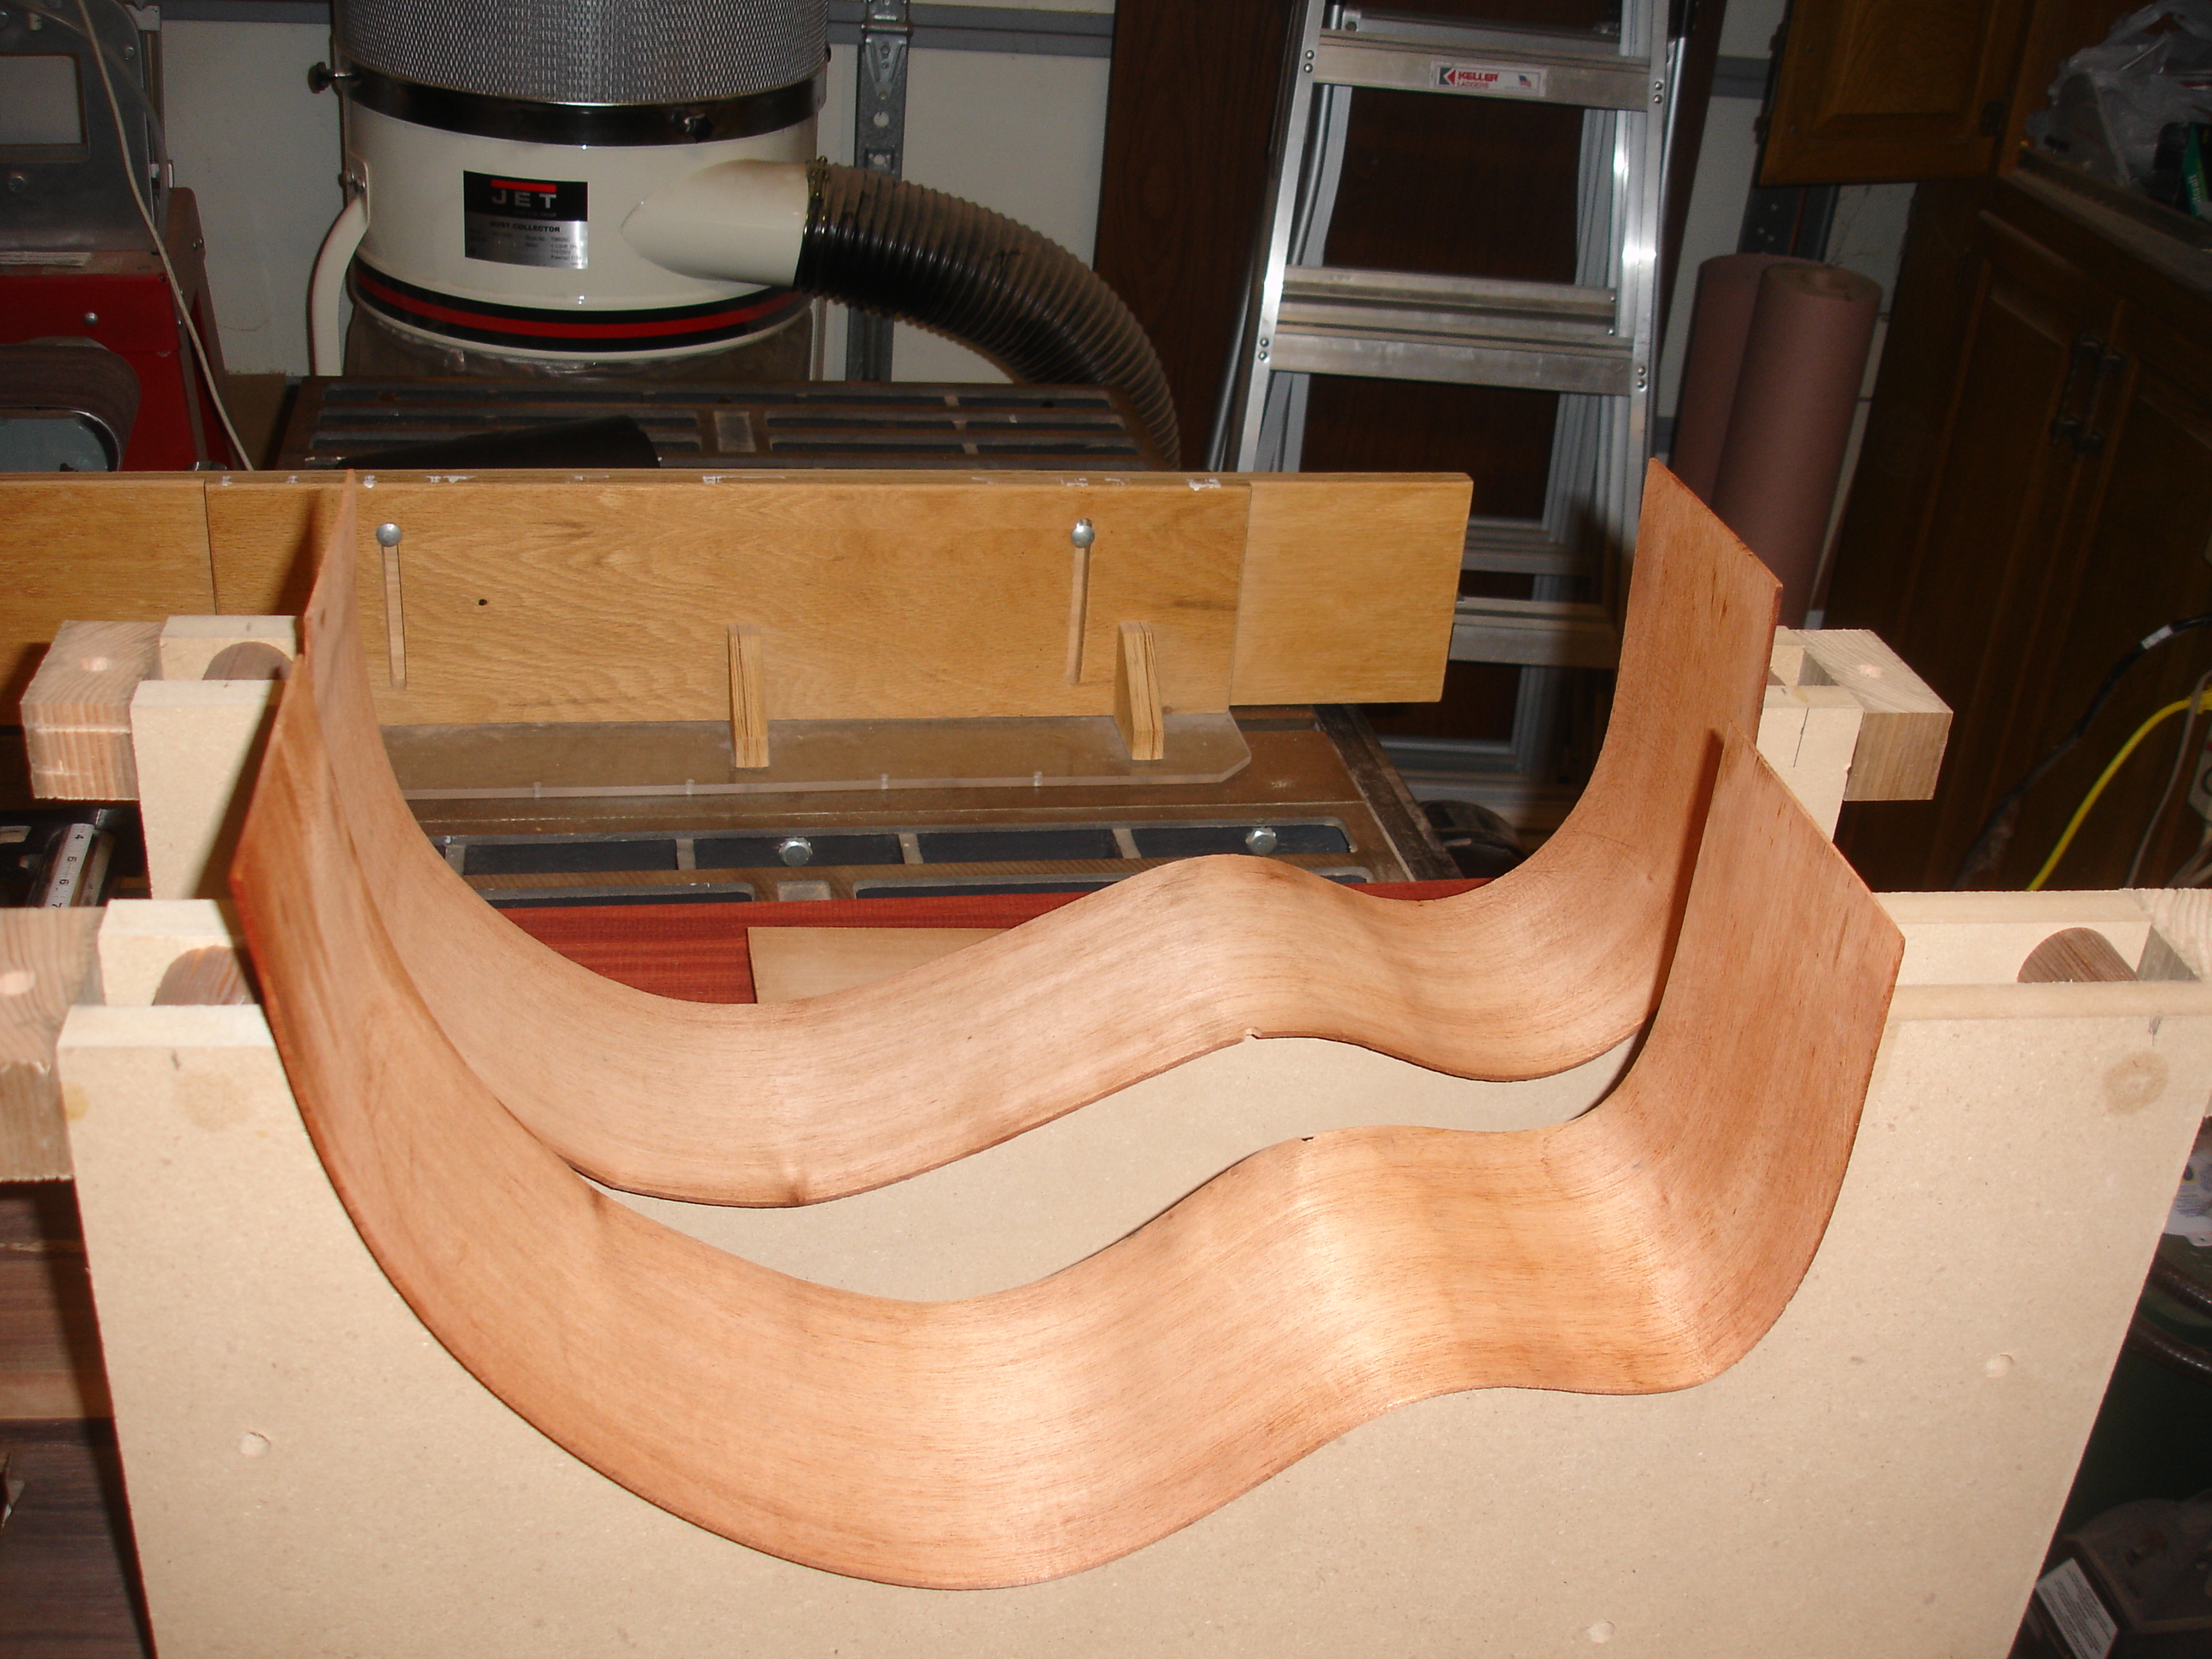
Bending the Sides
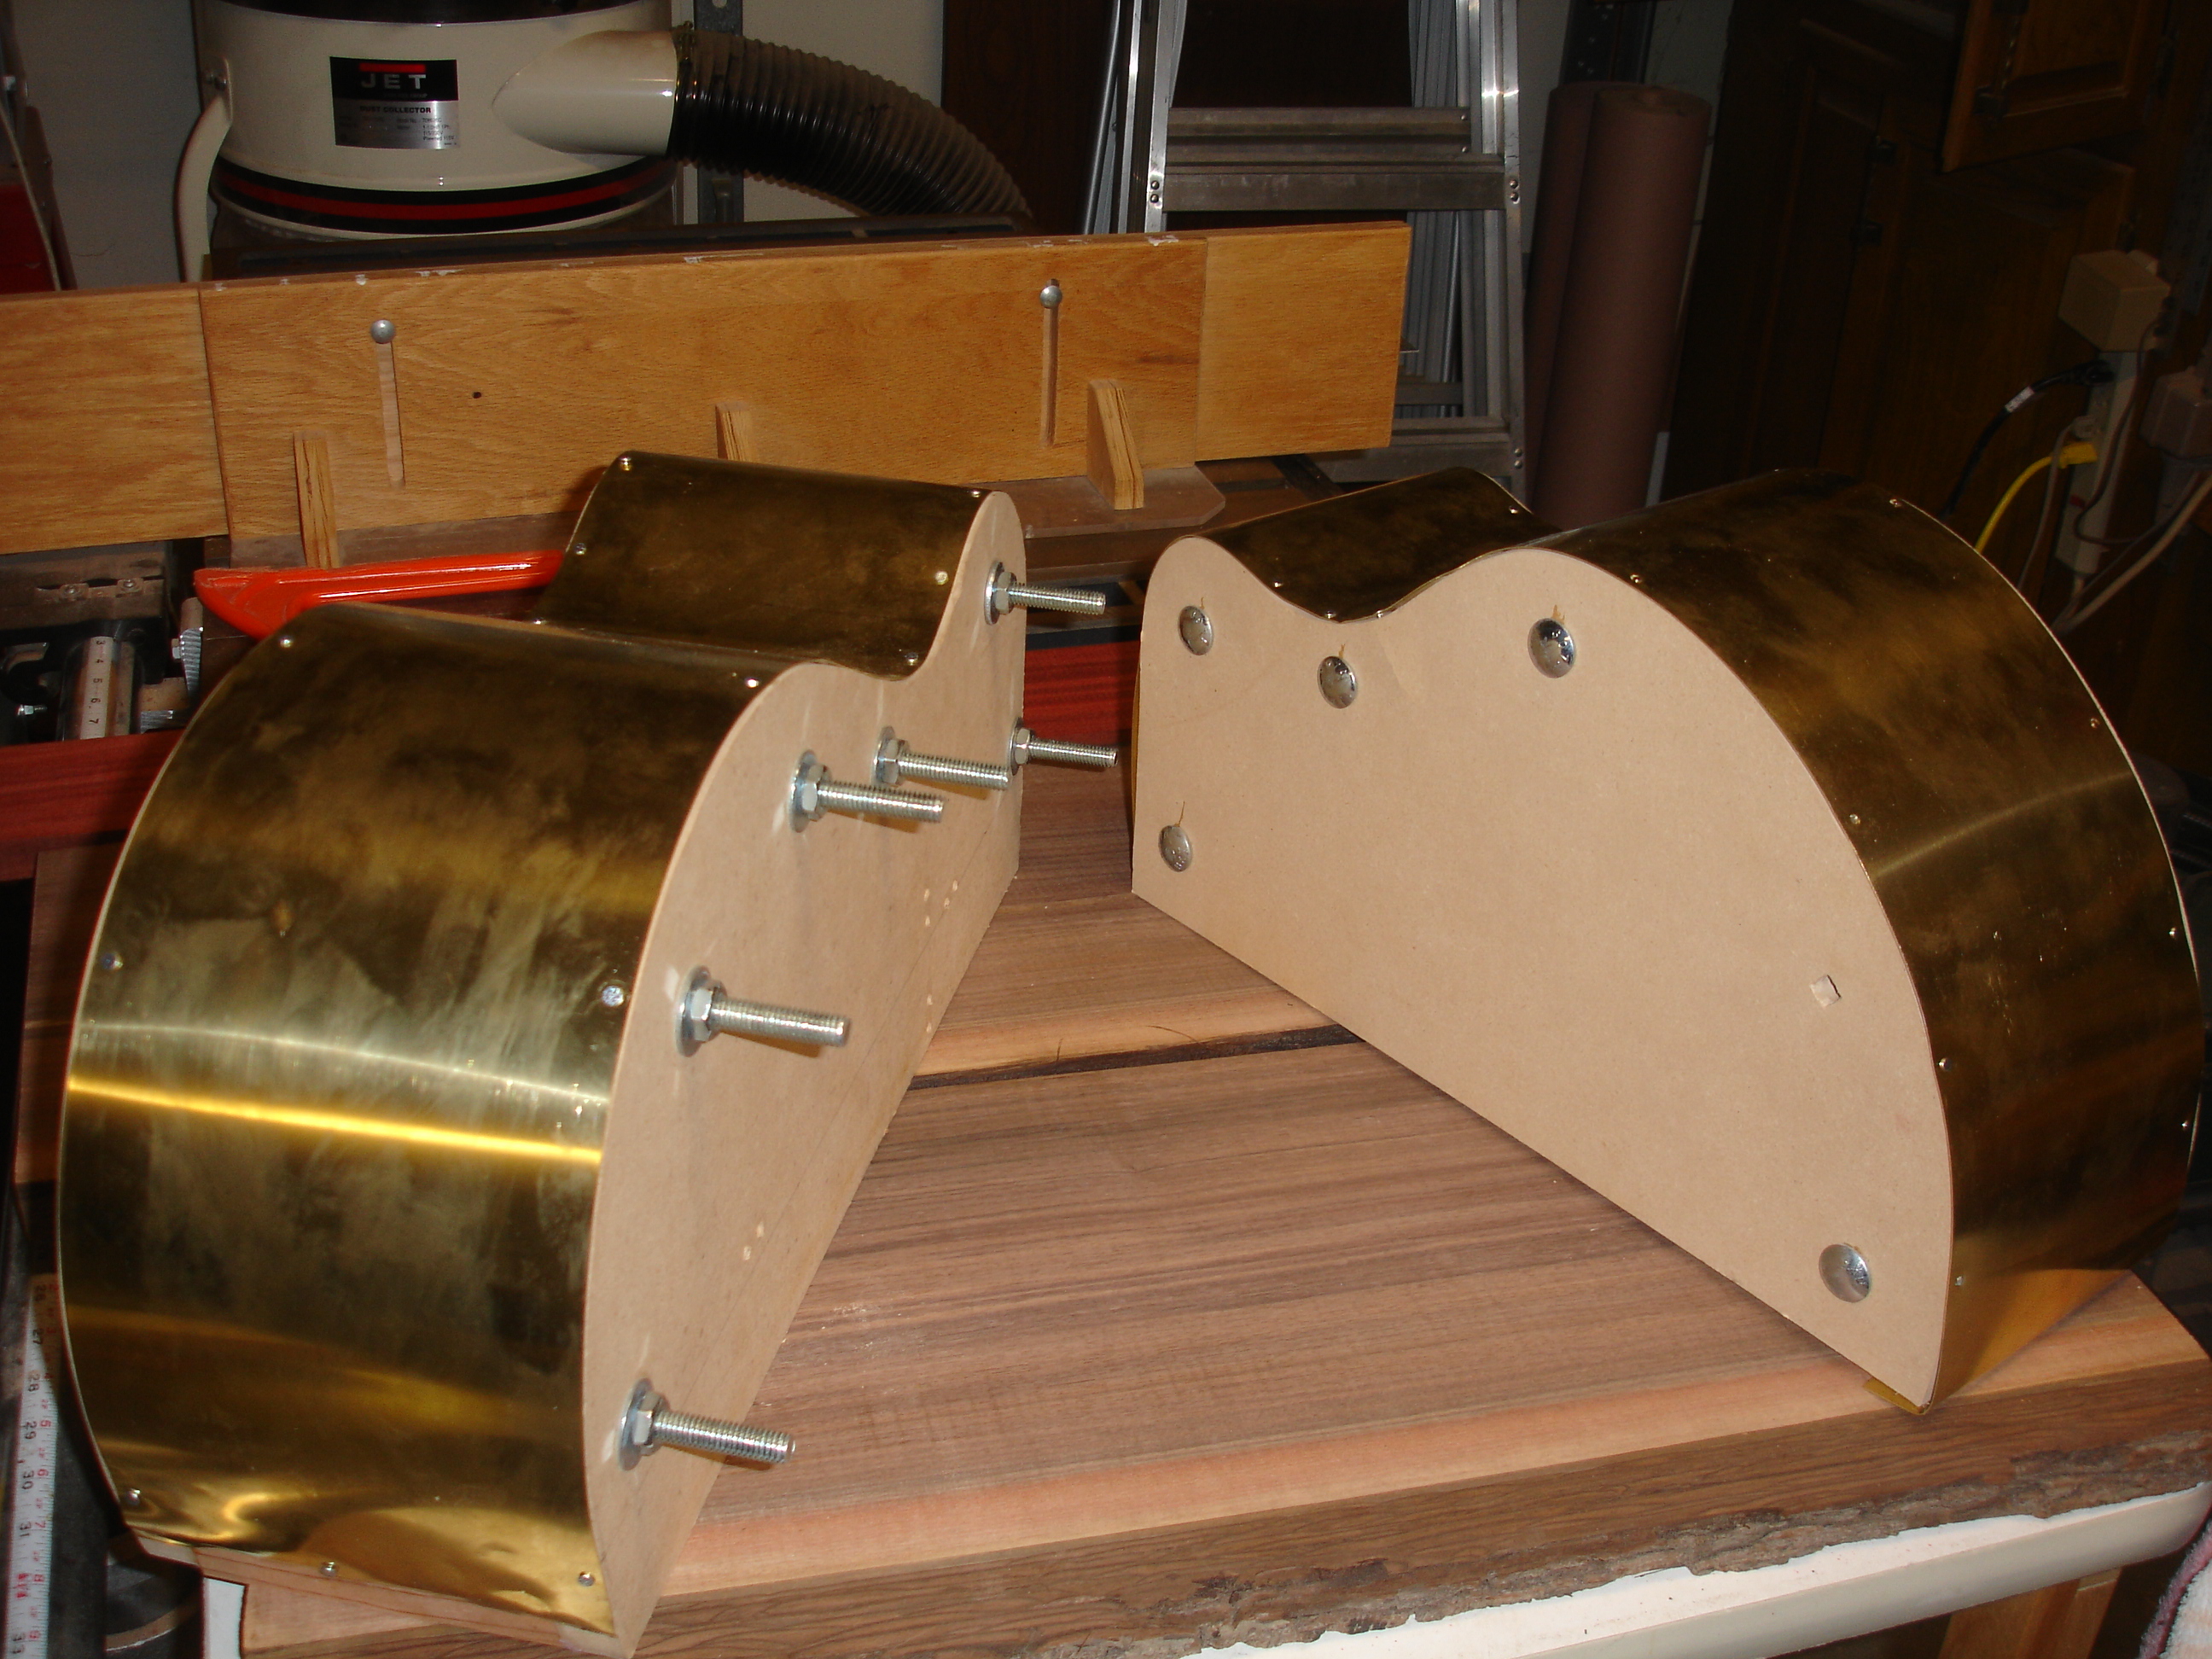
Here is a picture of the bending forms that I made for this project. These will be used in my heated bender for forming the sides. Note that because of the body asymmetry, I need two forms.
I also have a hot pipe that I have used to bend sides by hand. I still use it for touching up, but the forms are quicker and give a more consistent result.
To the right is a picture of the outside form. This will be used as a work form to hold the side shape after bending. This really shows the discontinuity in the body at the neck joint.
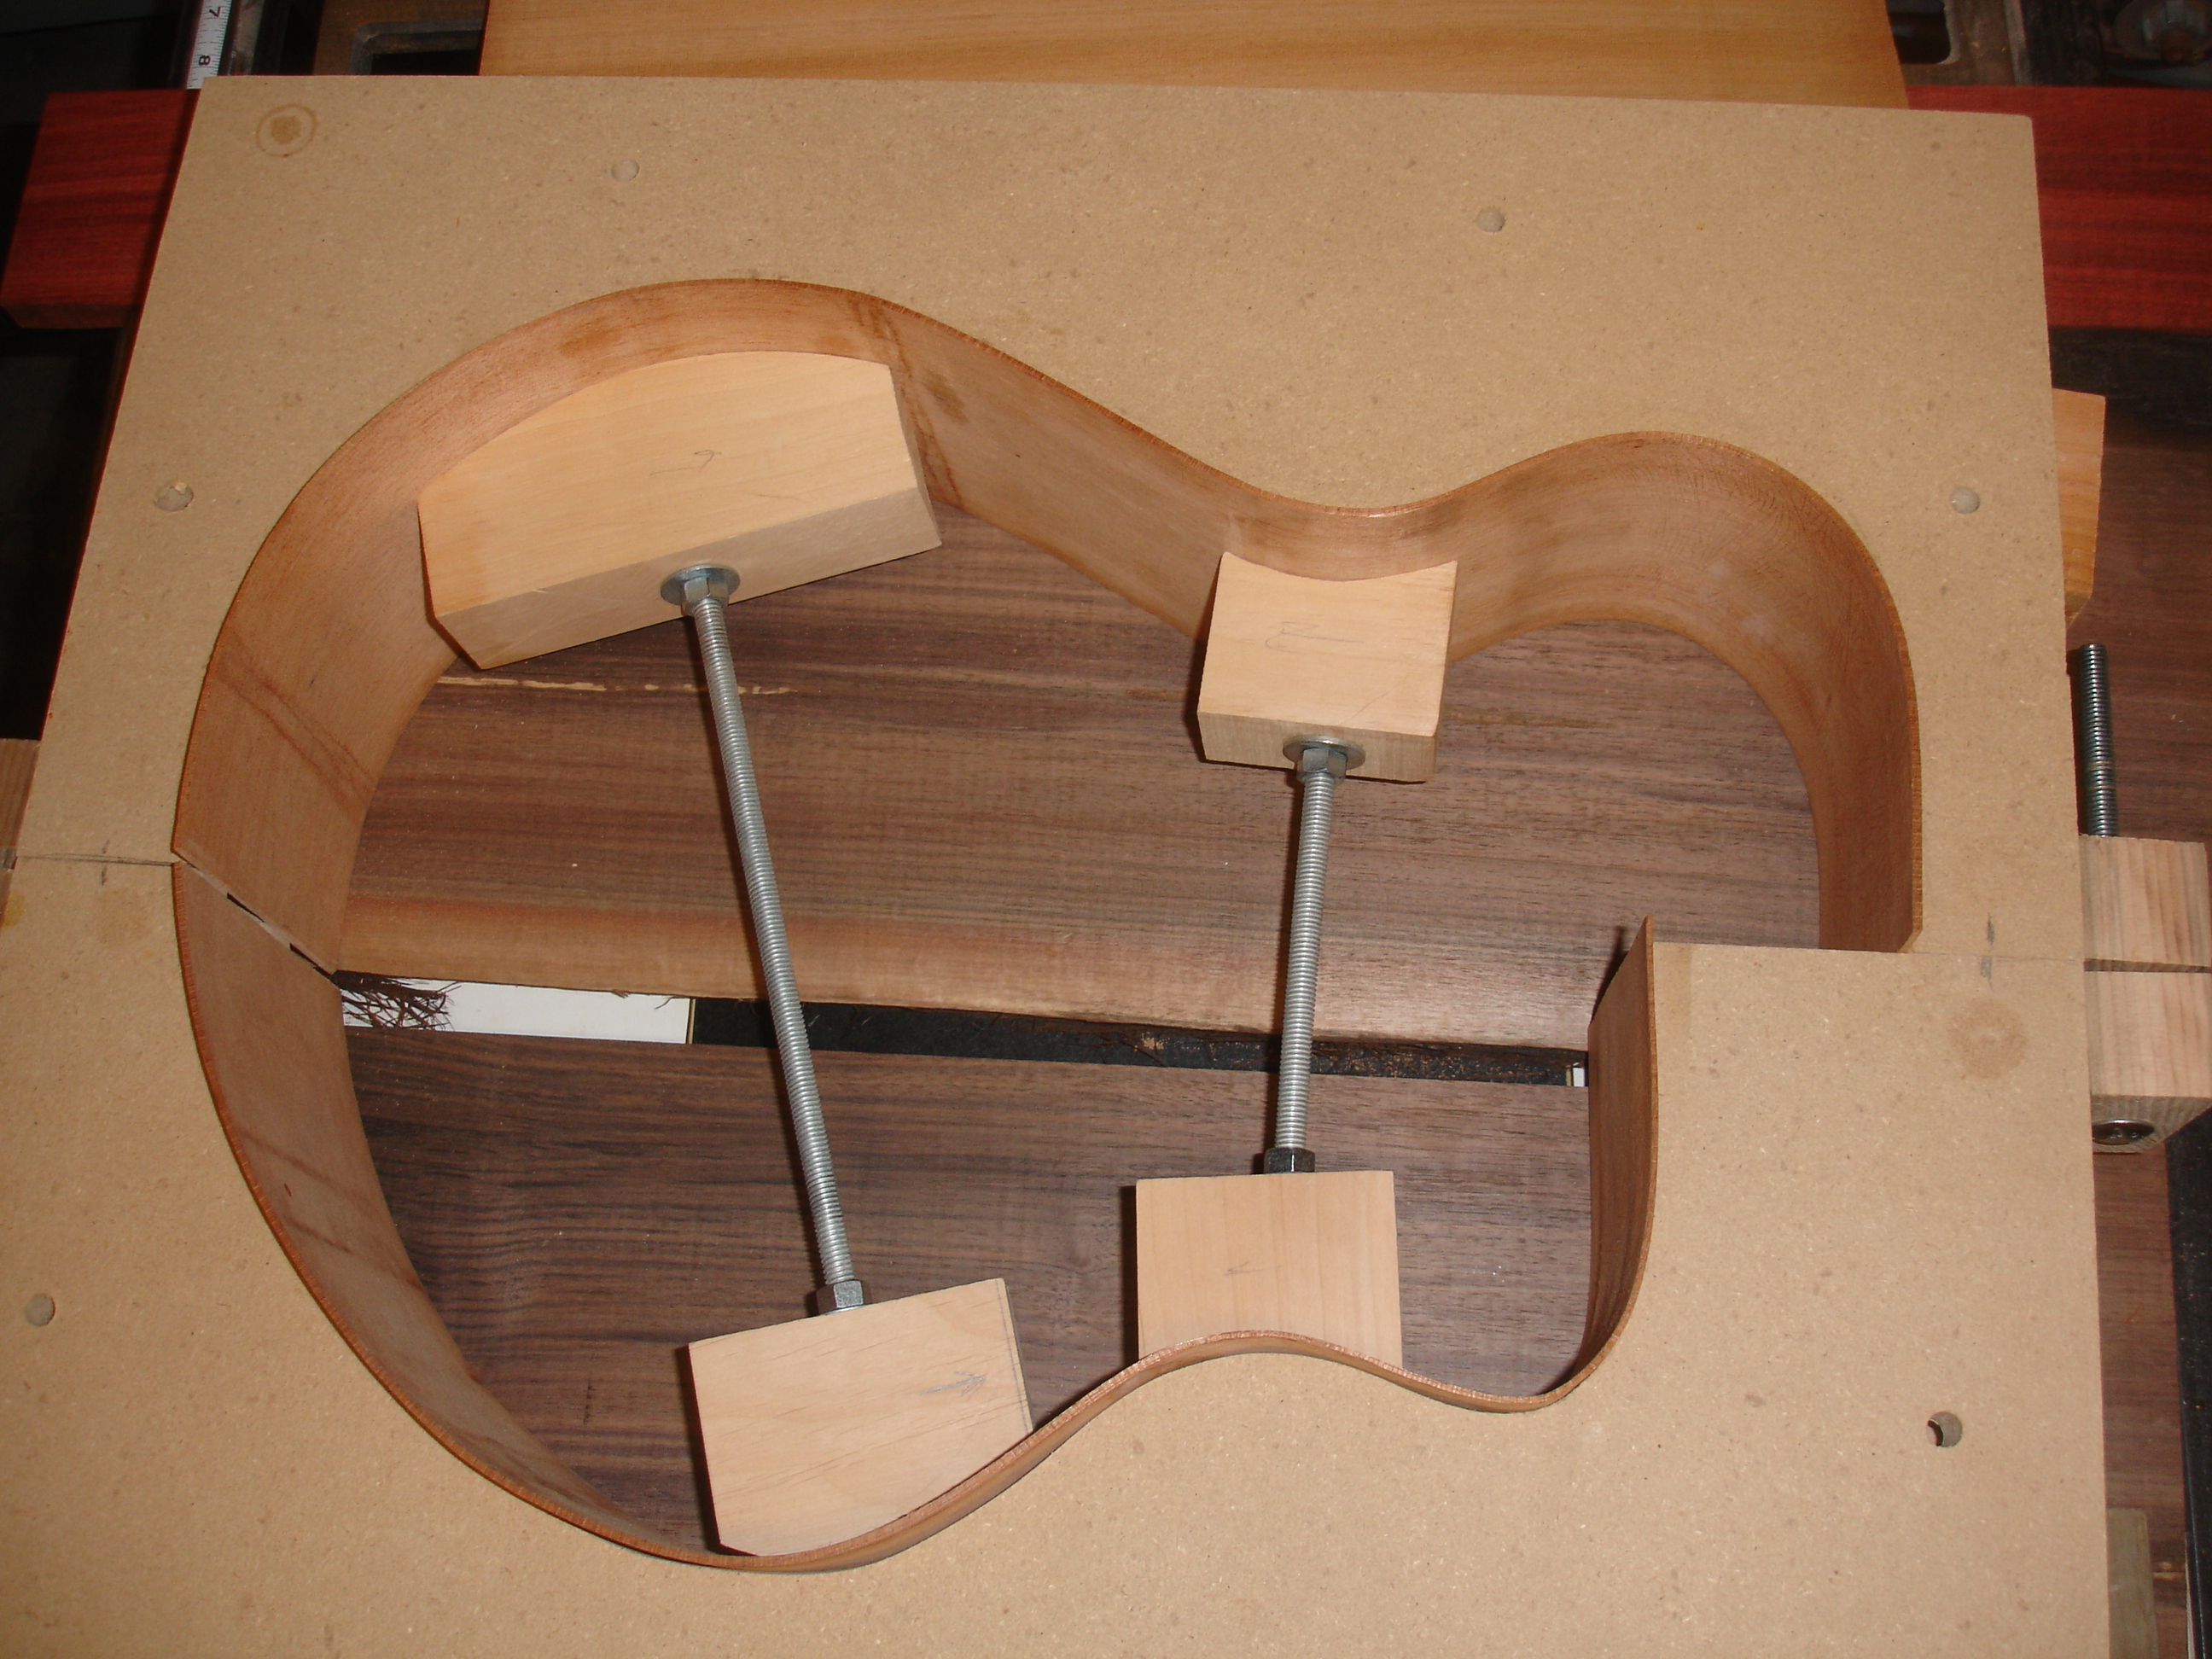
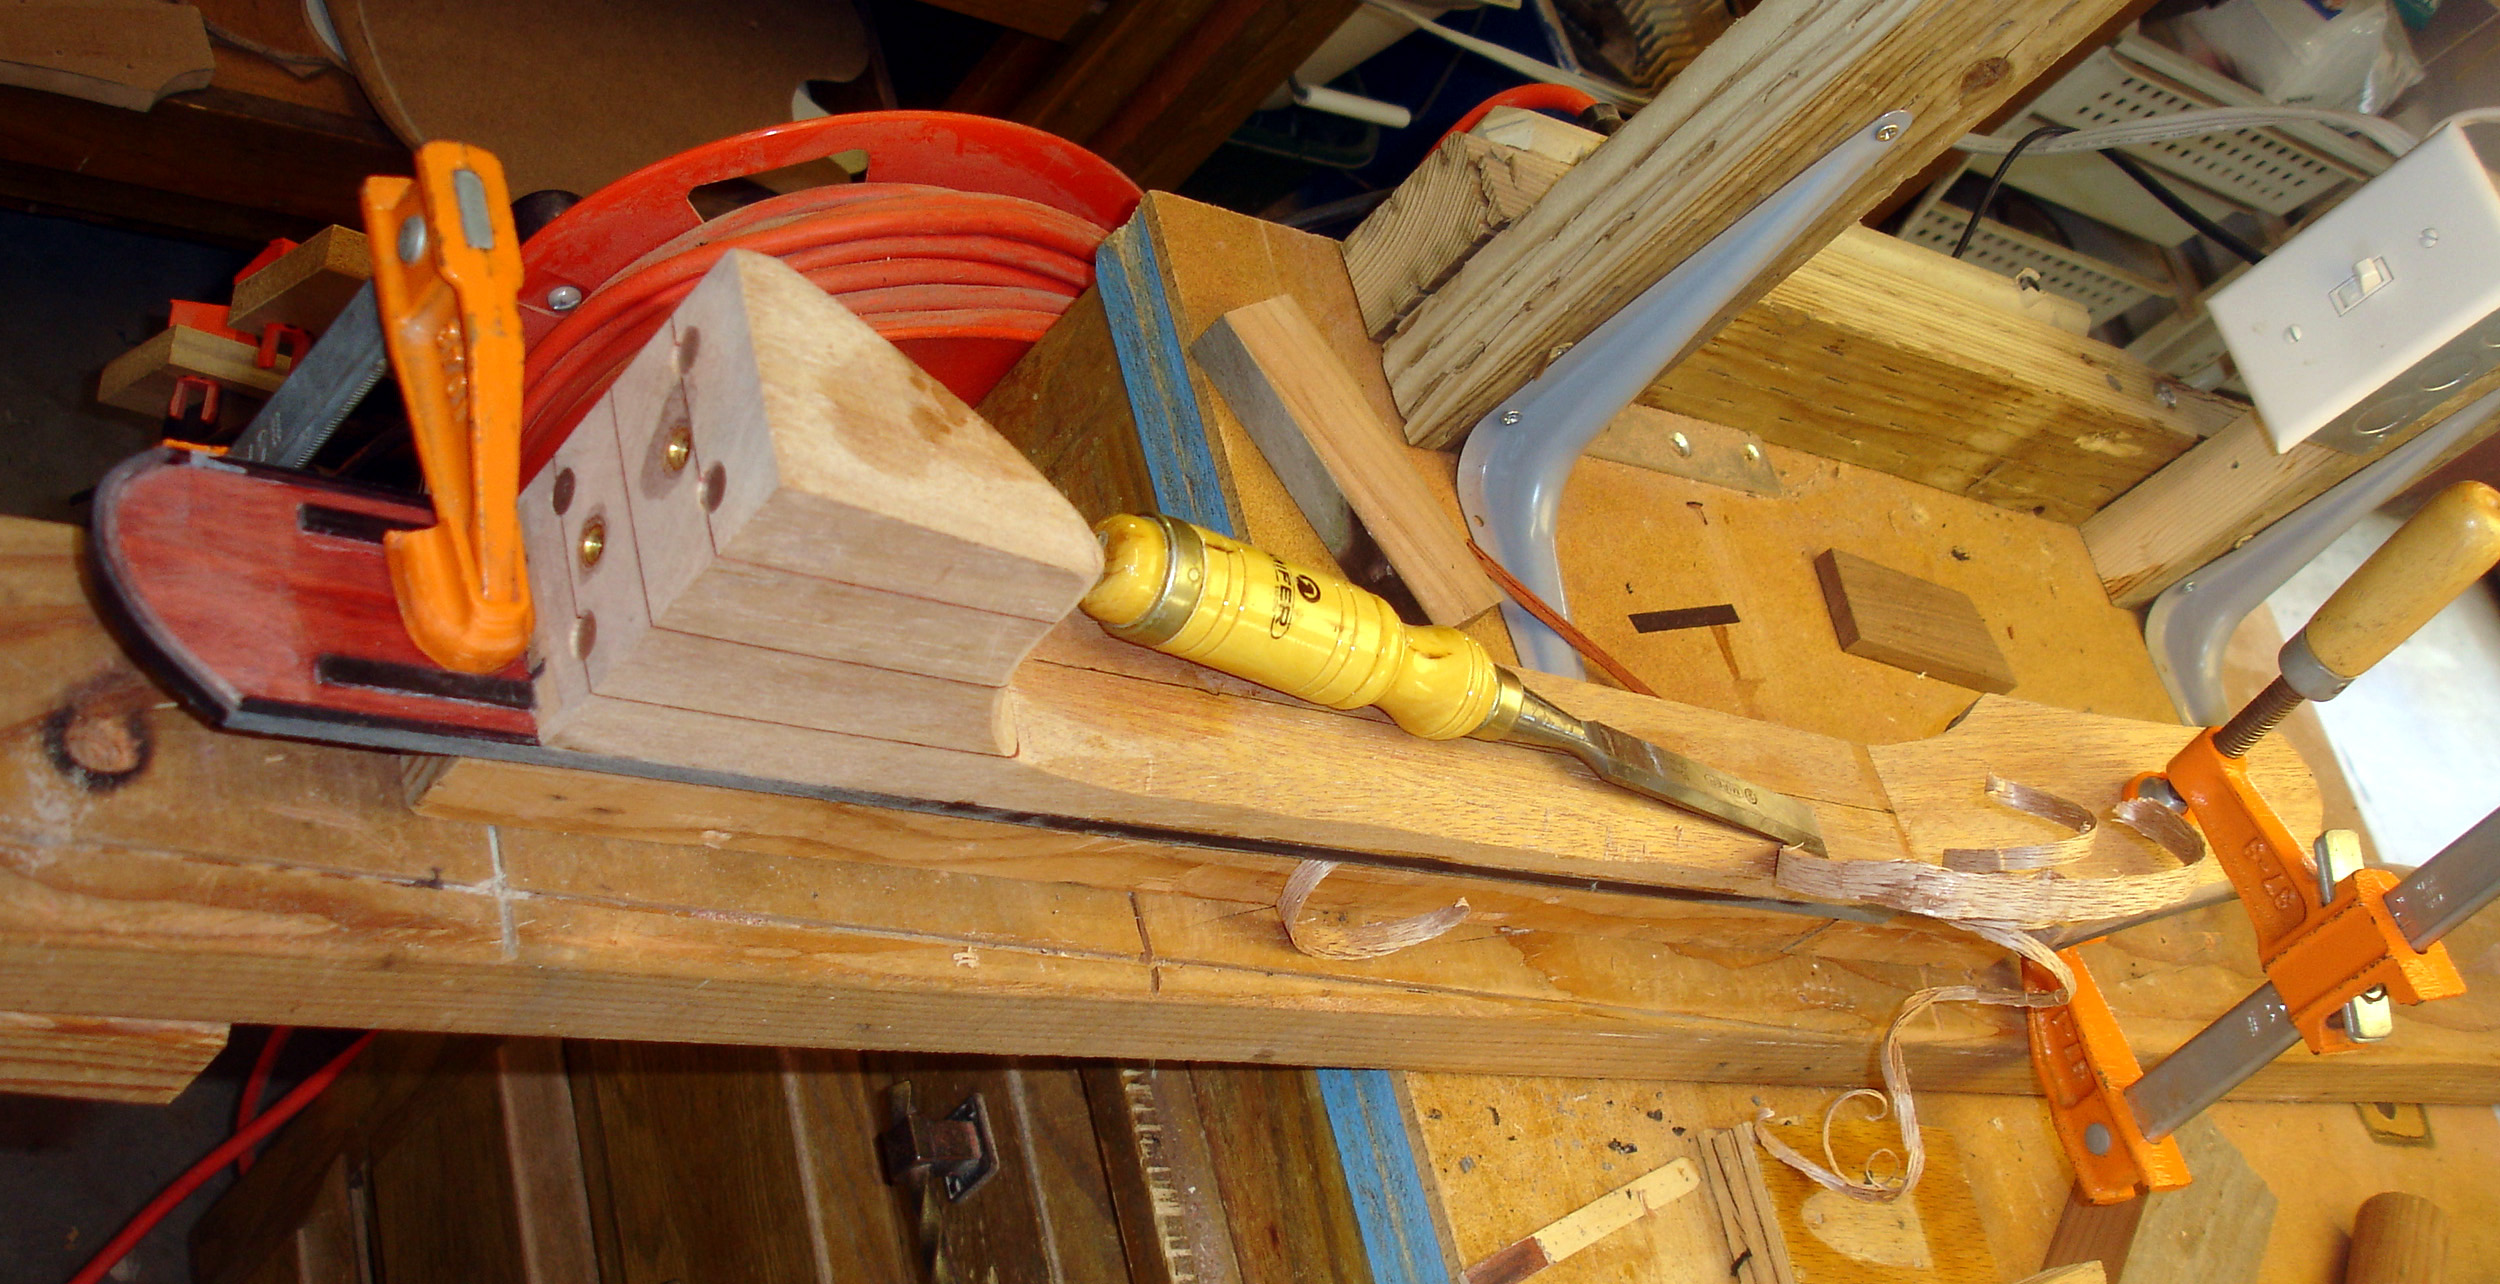
Since I am incorporating a number of new features in this design, I decided to do a prototype using some of my large stock of mahogany rather than risk something more exotic. In particular, I was worried about the tight upper bout bend on the right side. The picture to the right shows the side in the bender. Everything went pretty well. There are some small cracks at the tightest part of the bend. These will be completely repairable. I will go a little slower here when bending the next go around.
This picture shows the left side in the bender. Note that the wood is not visible here; it is lightly moistened, wrapped in aluminum foil and bent. The bender incorporates two 200 W light bulbs; a 50 W heating blanket is on the outside. The sides are heated to about 300° F and bent over a period of several minutes (slow enough to not crack the wood, fast enough to prevent scorching – it requires some feel).
This shows the sides resting in the two halves of the form before assembling. This continues to be an amazing process for me. Bending wood like this still seems like a miracle. The pieces will have to be trimmed to length to fit together in the form. Note there is some discoloration from the water heating. This will clean up nicely during the sanding.
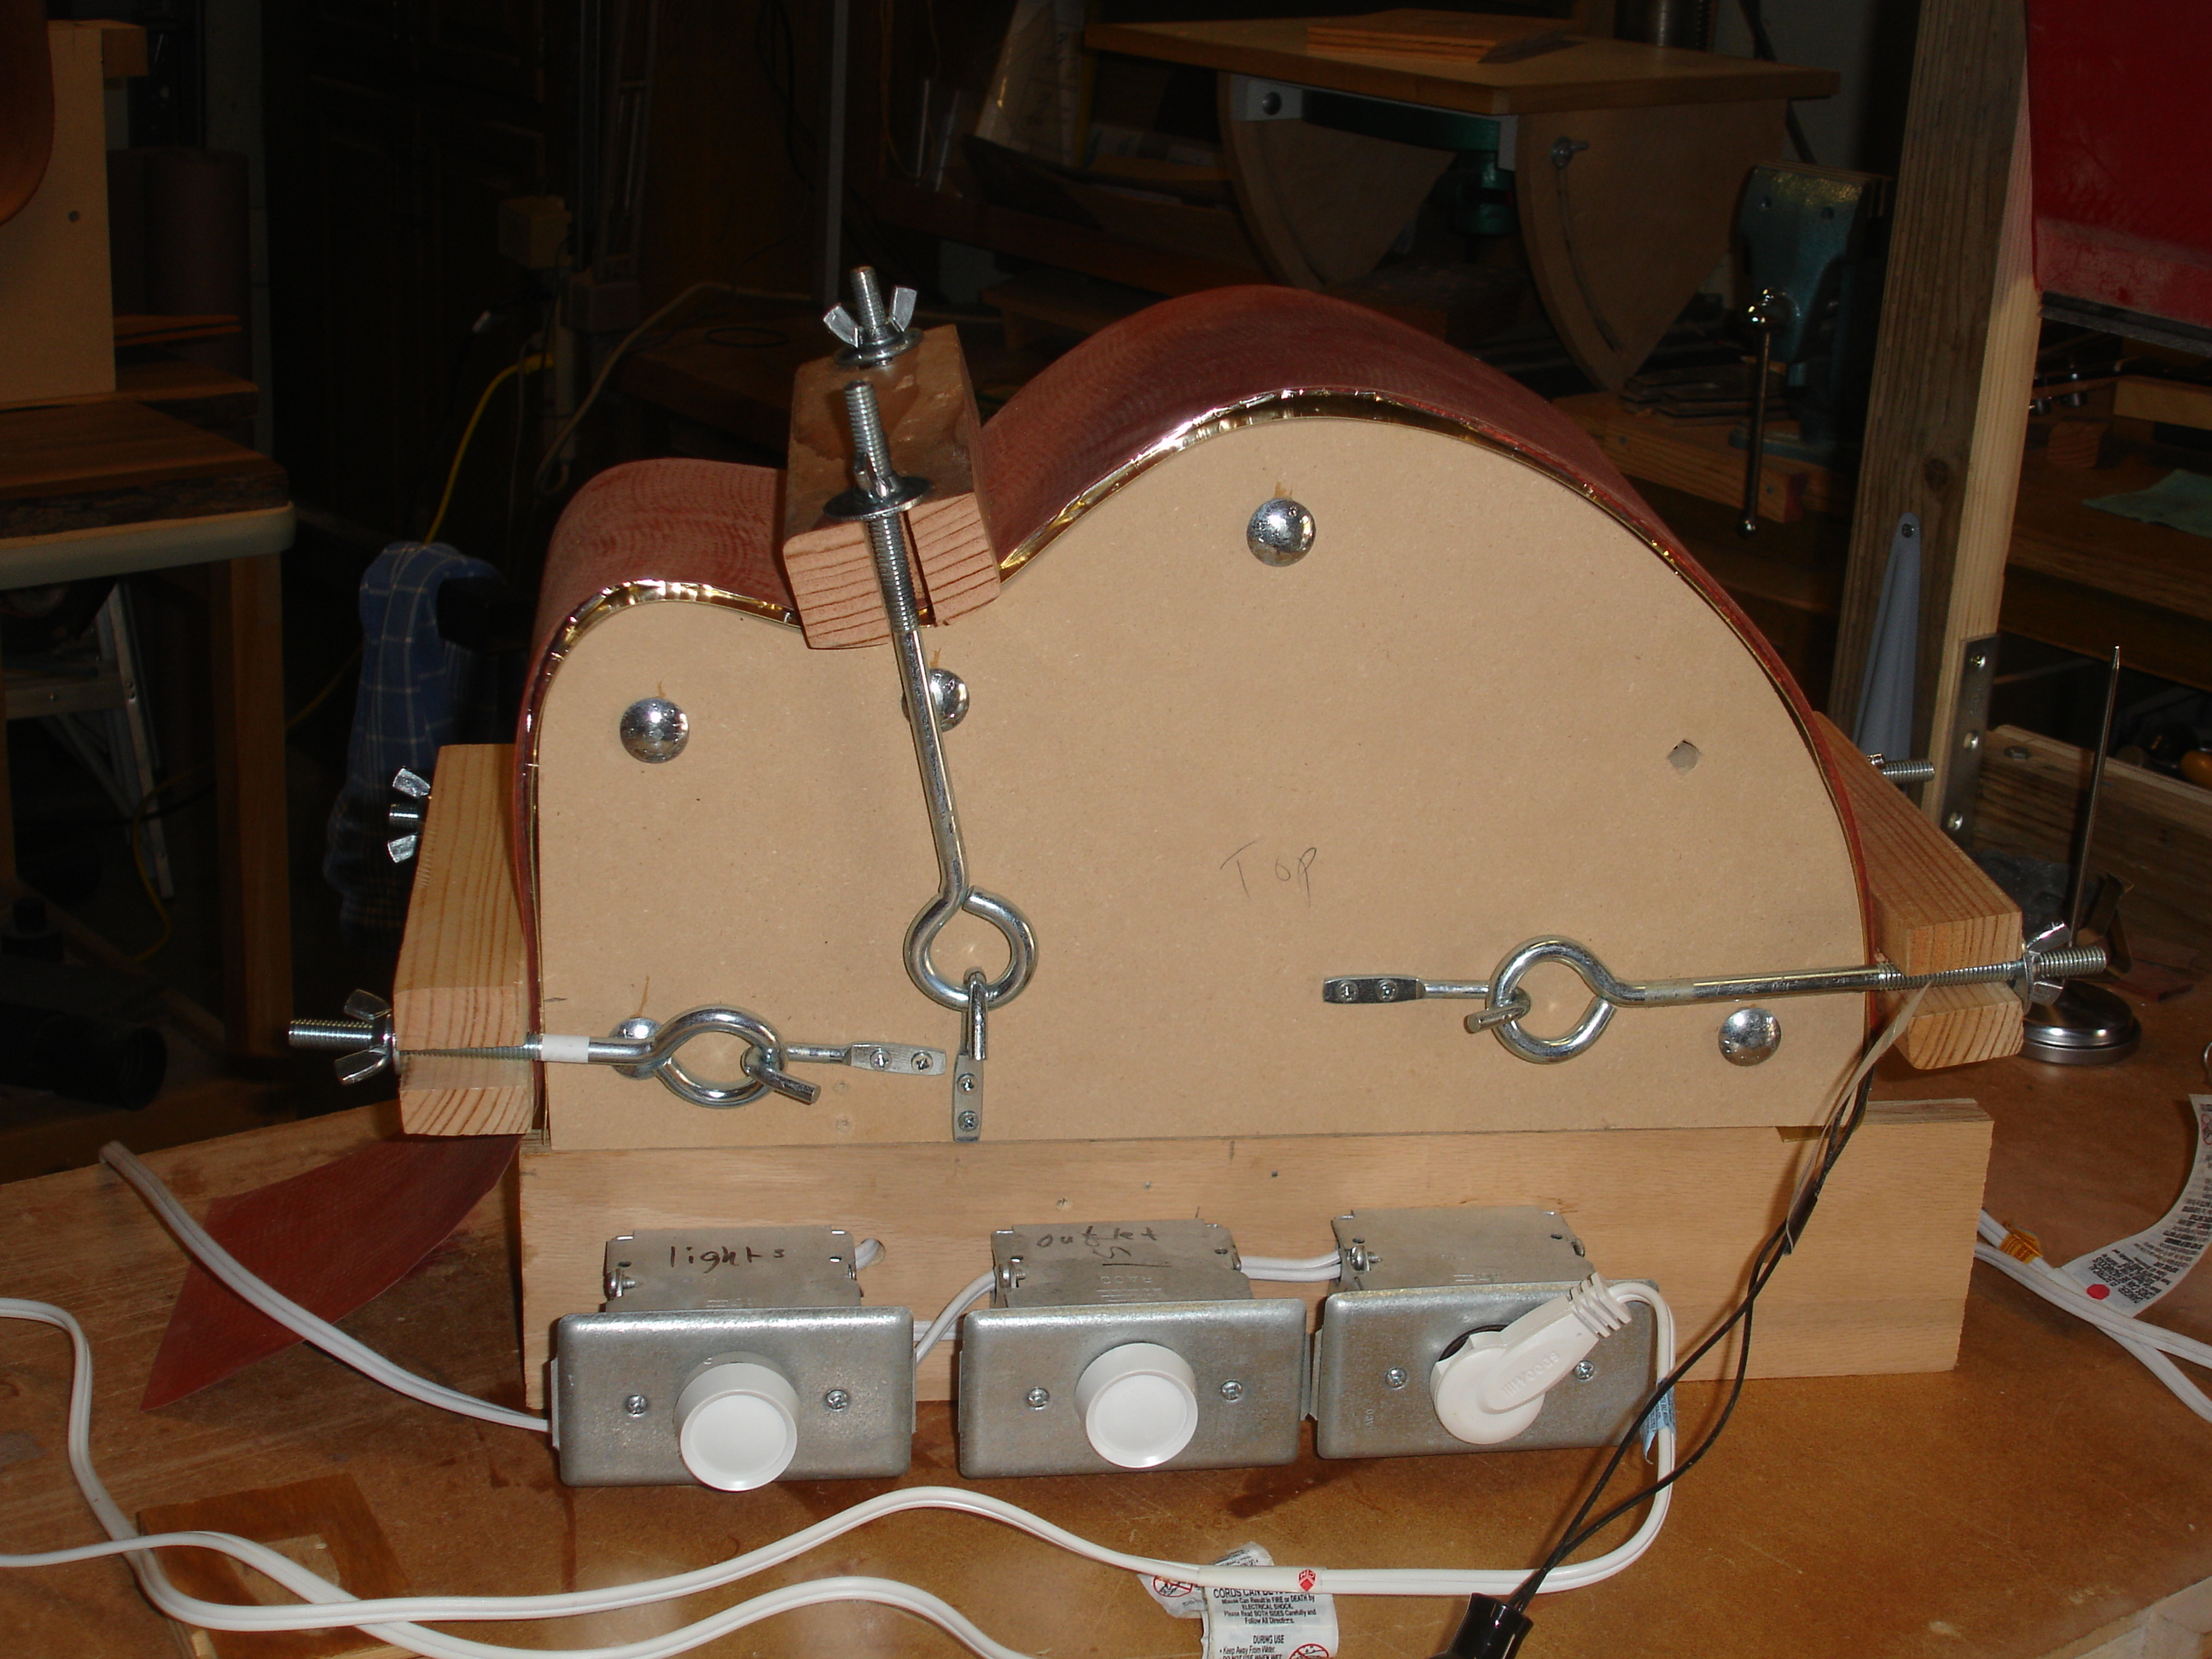
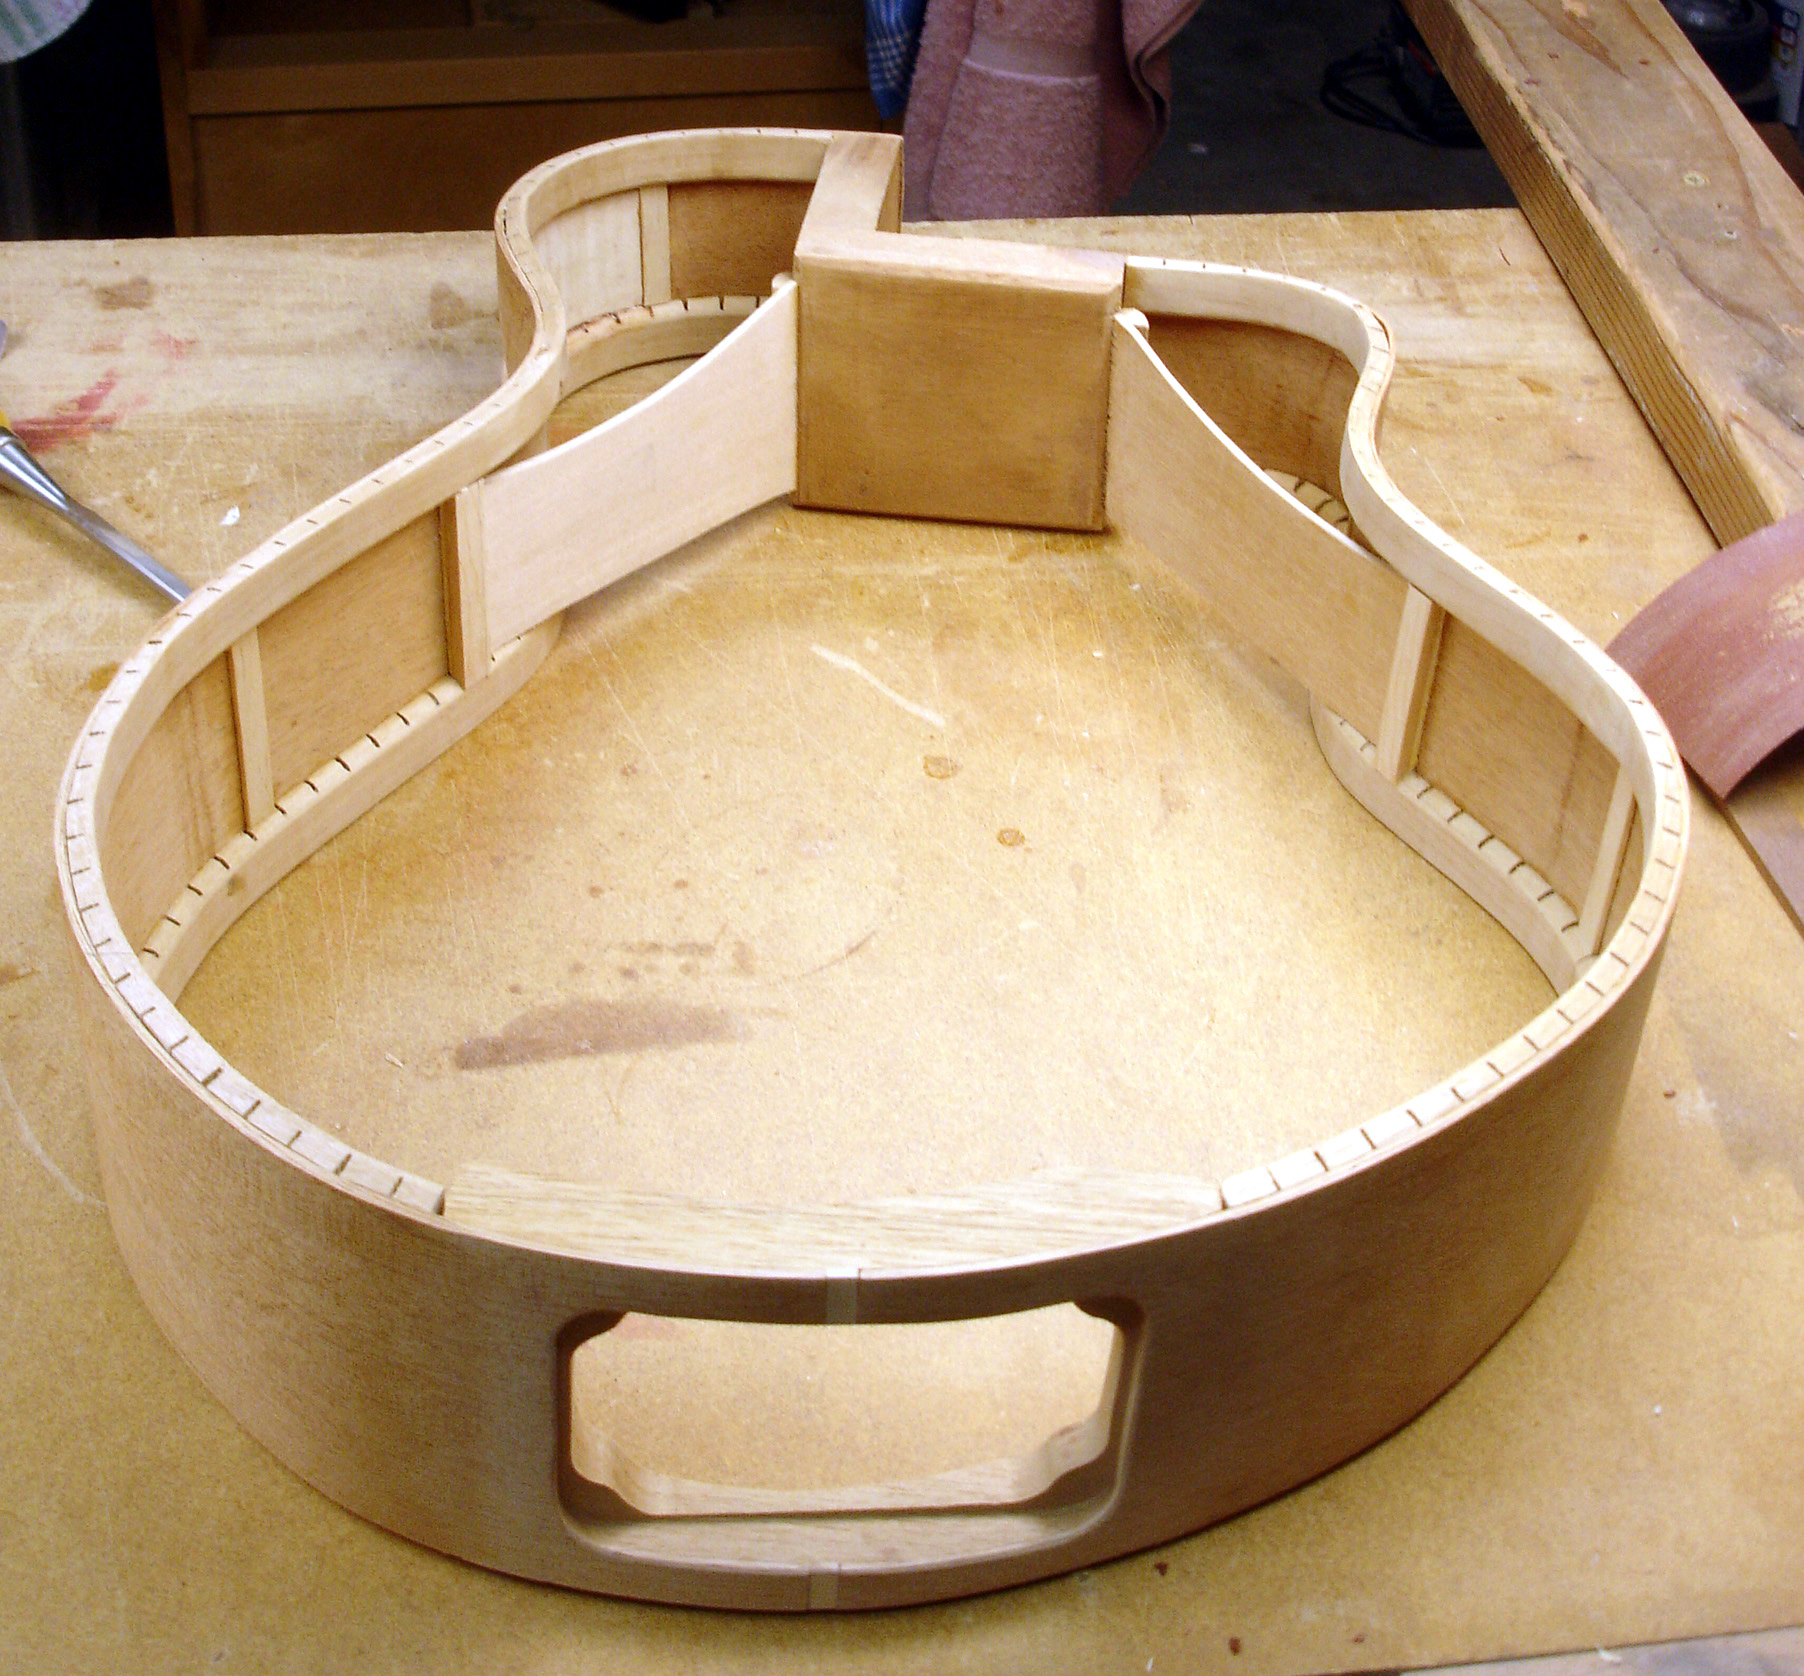
Completing the Rims
Here the sides have been installed in the form after rough trimming. Head and heel blocks will now be fitted to attach the two sides and provide a base for neck attachment and rear access panels. After the heat bending, the wood wants to spring back a bit. Some persuasion is required to hold it to shape.
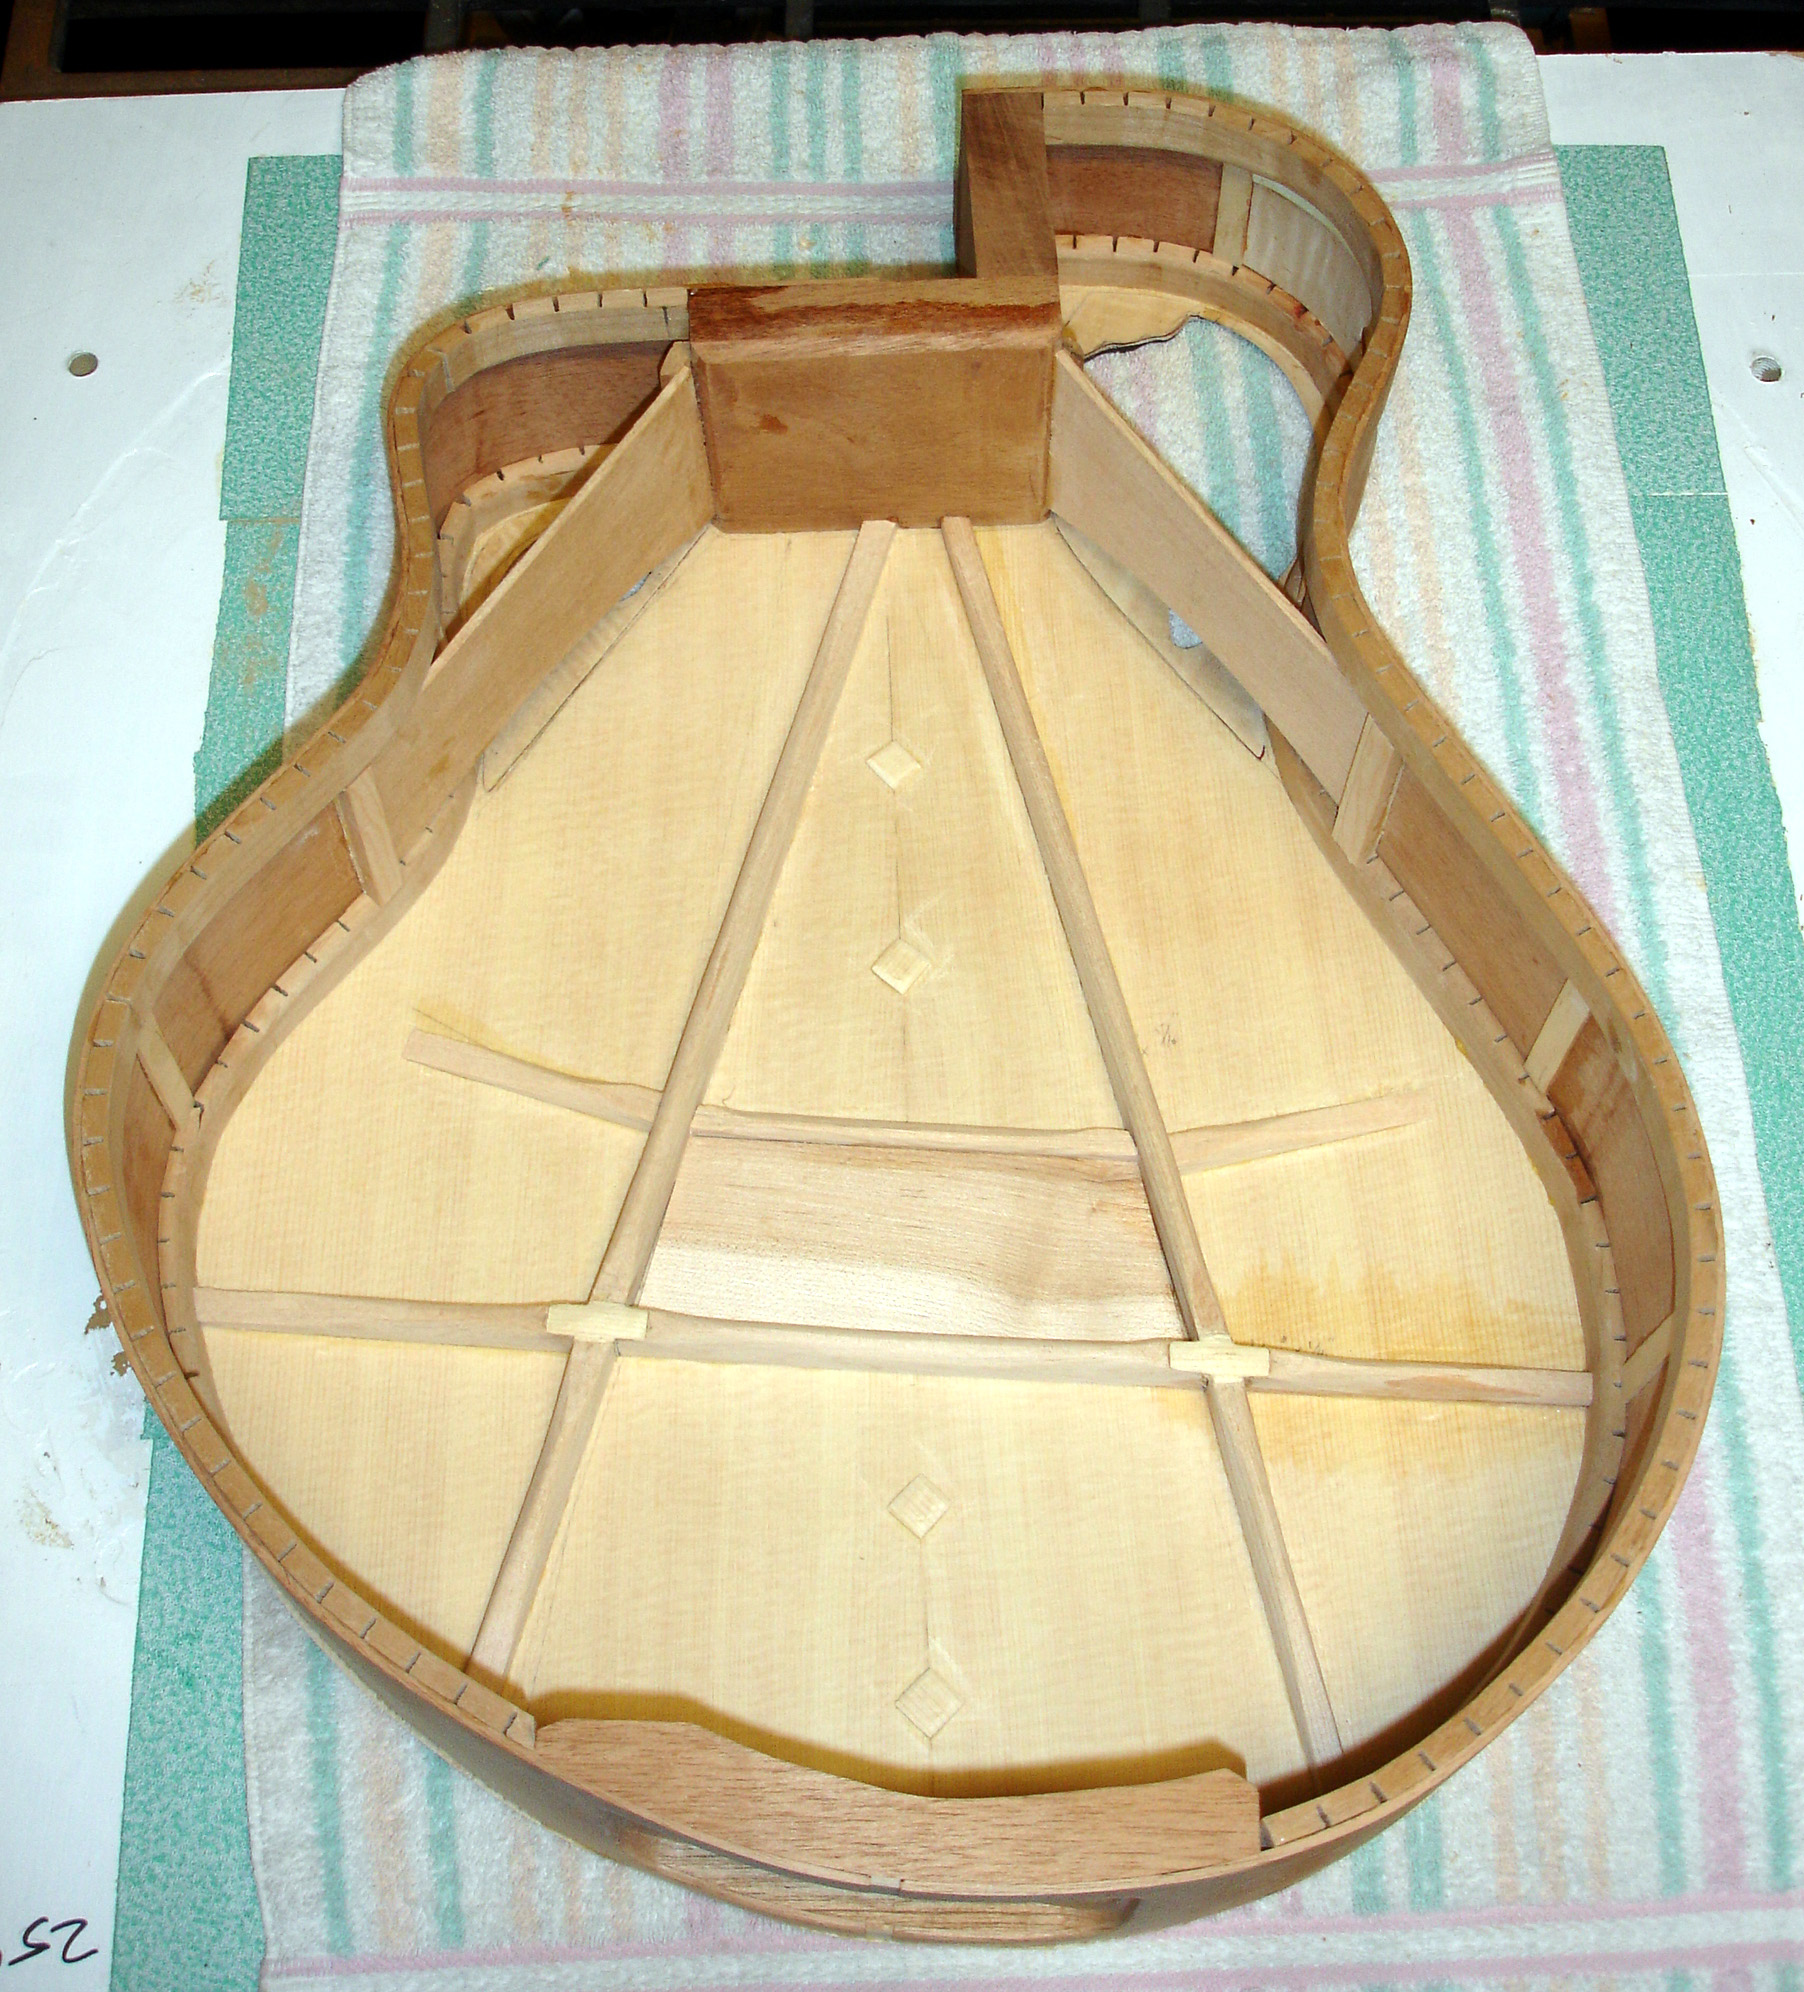
The head and heel blocks have now been installed, even though they are not very visible in this picture. This shows linings being glued in. The linings are used as a joint between the sides top and back.
In this picture you can see the kerfed linings (alder) and head and tail blocks. At this point the sides are quite rigid; they can be removed from the form without loosing their shape. I keep it in the form for ease of working, and for protection.
Next steps before working on the top and back: final trimming of the head block, fitting of flying buttress braces, cutting the tail block for the rear access panel, and cutting a side port (another new thing on this guitar).
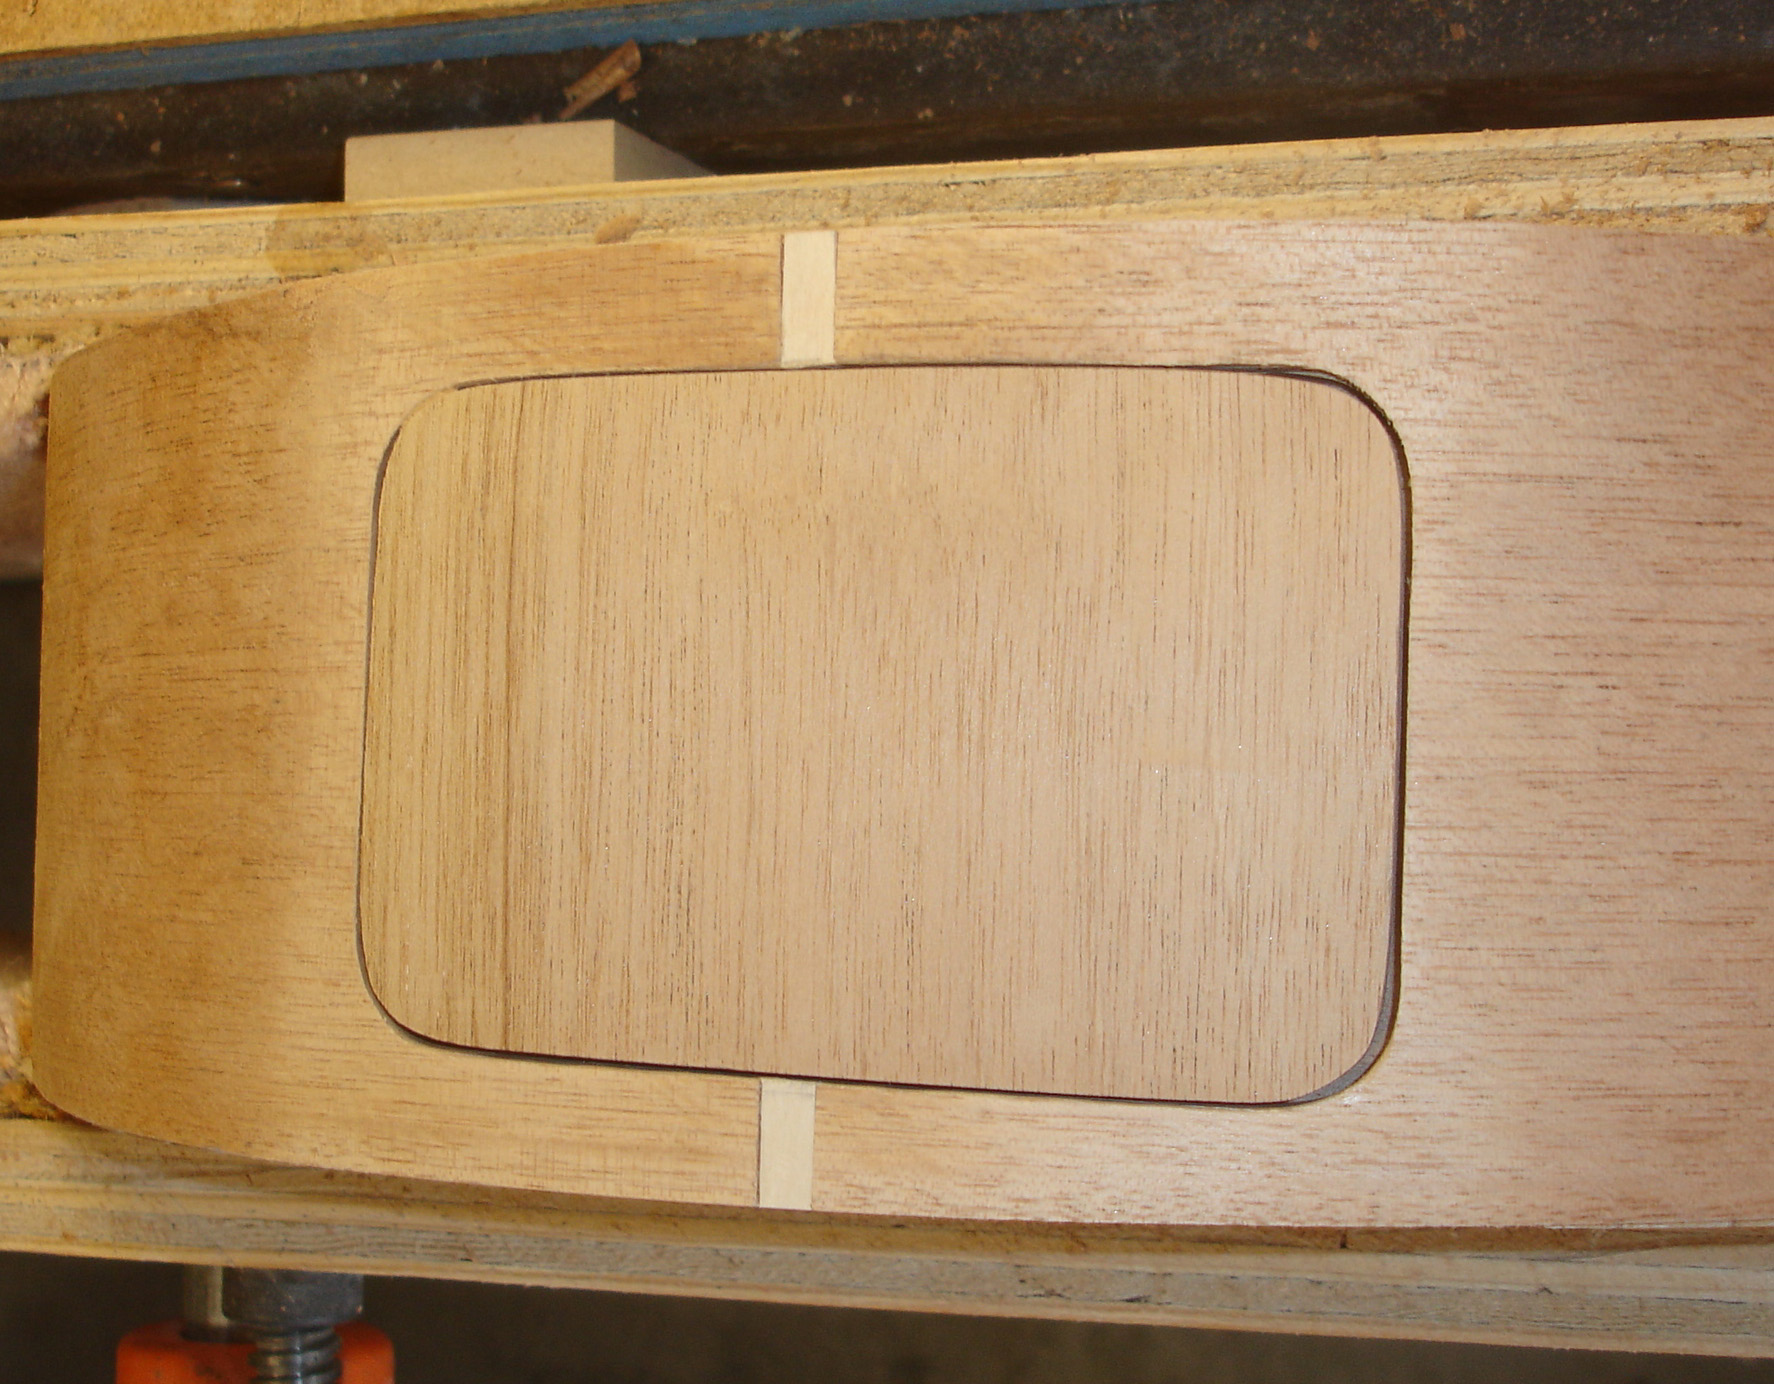
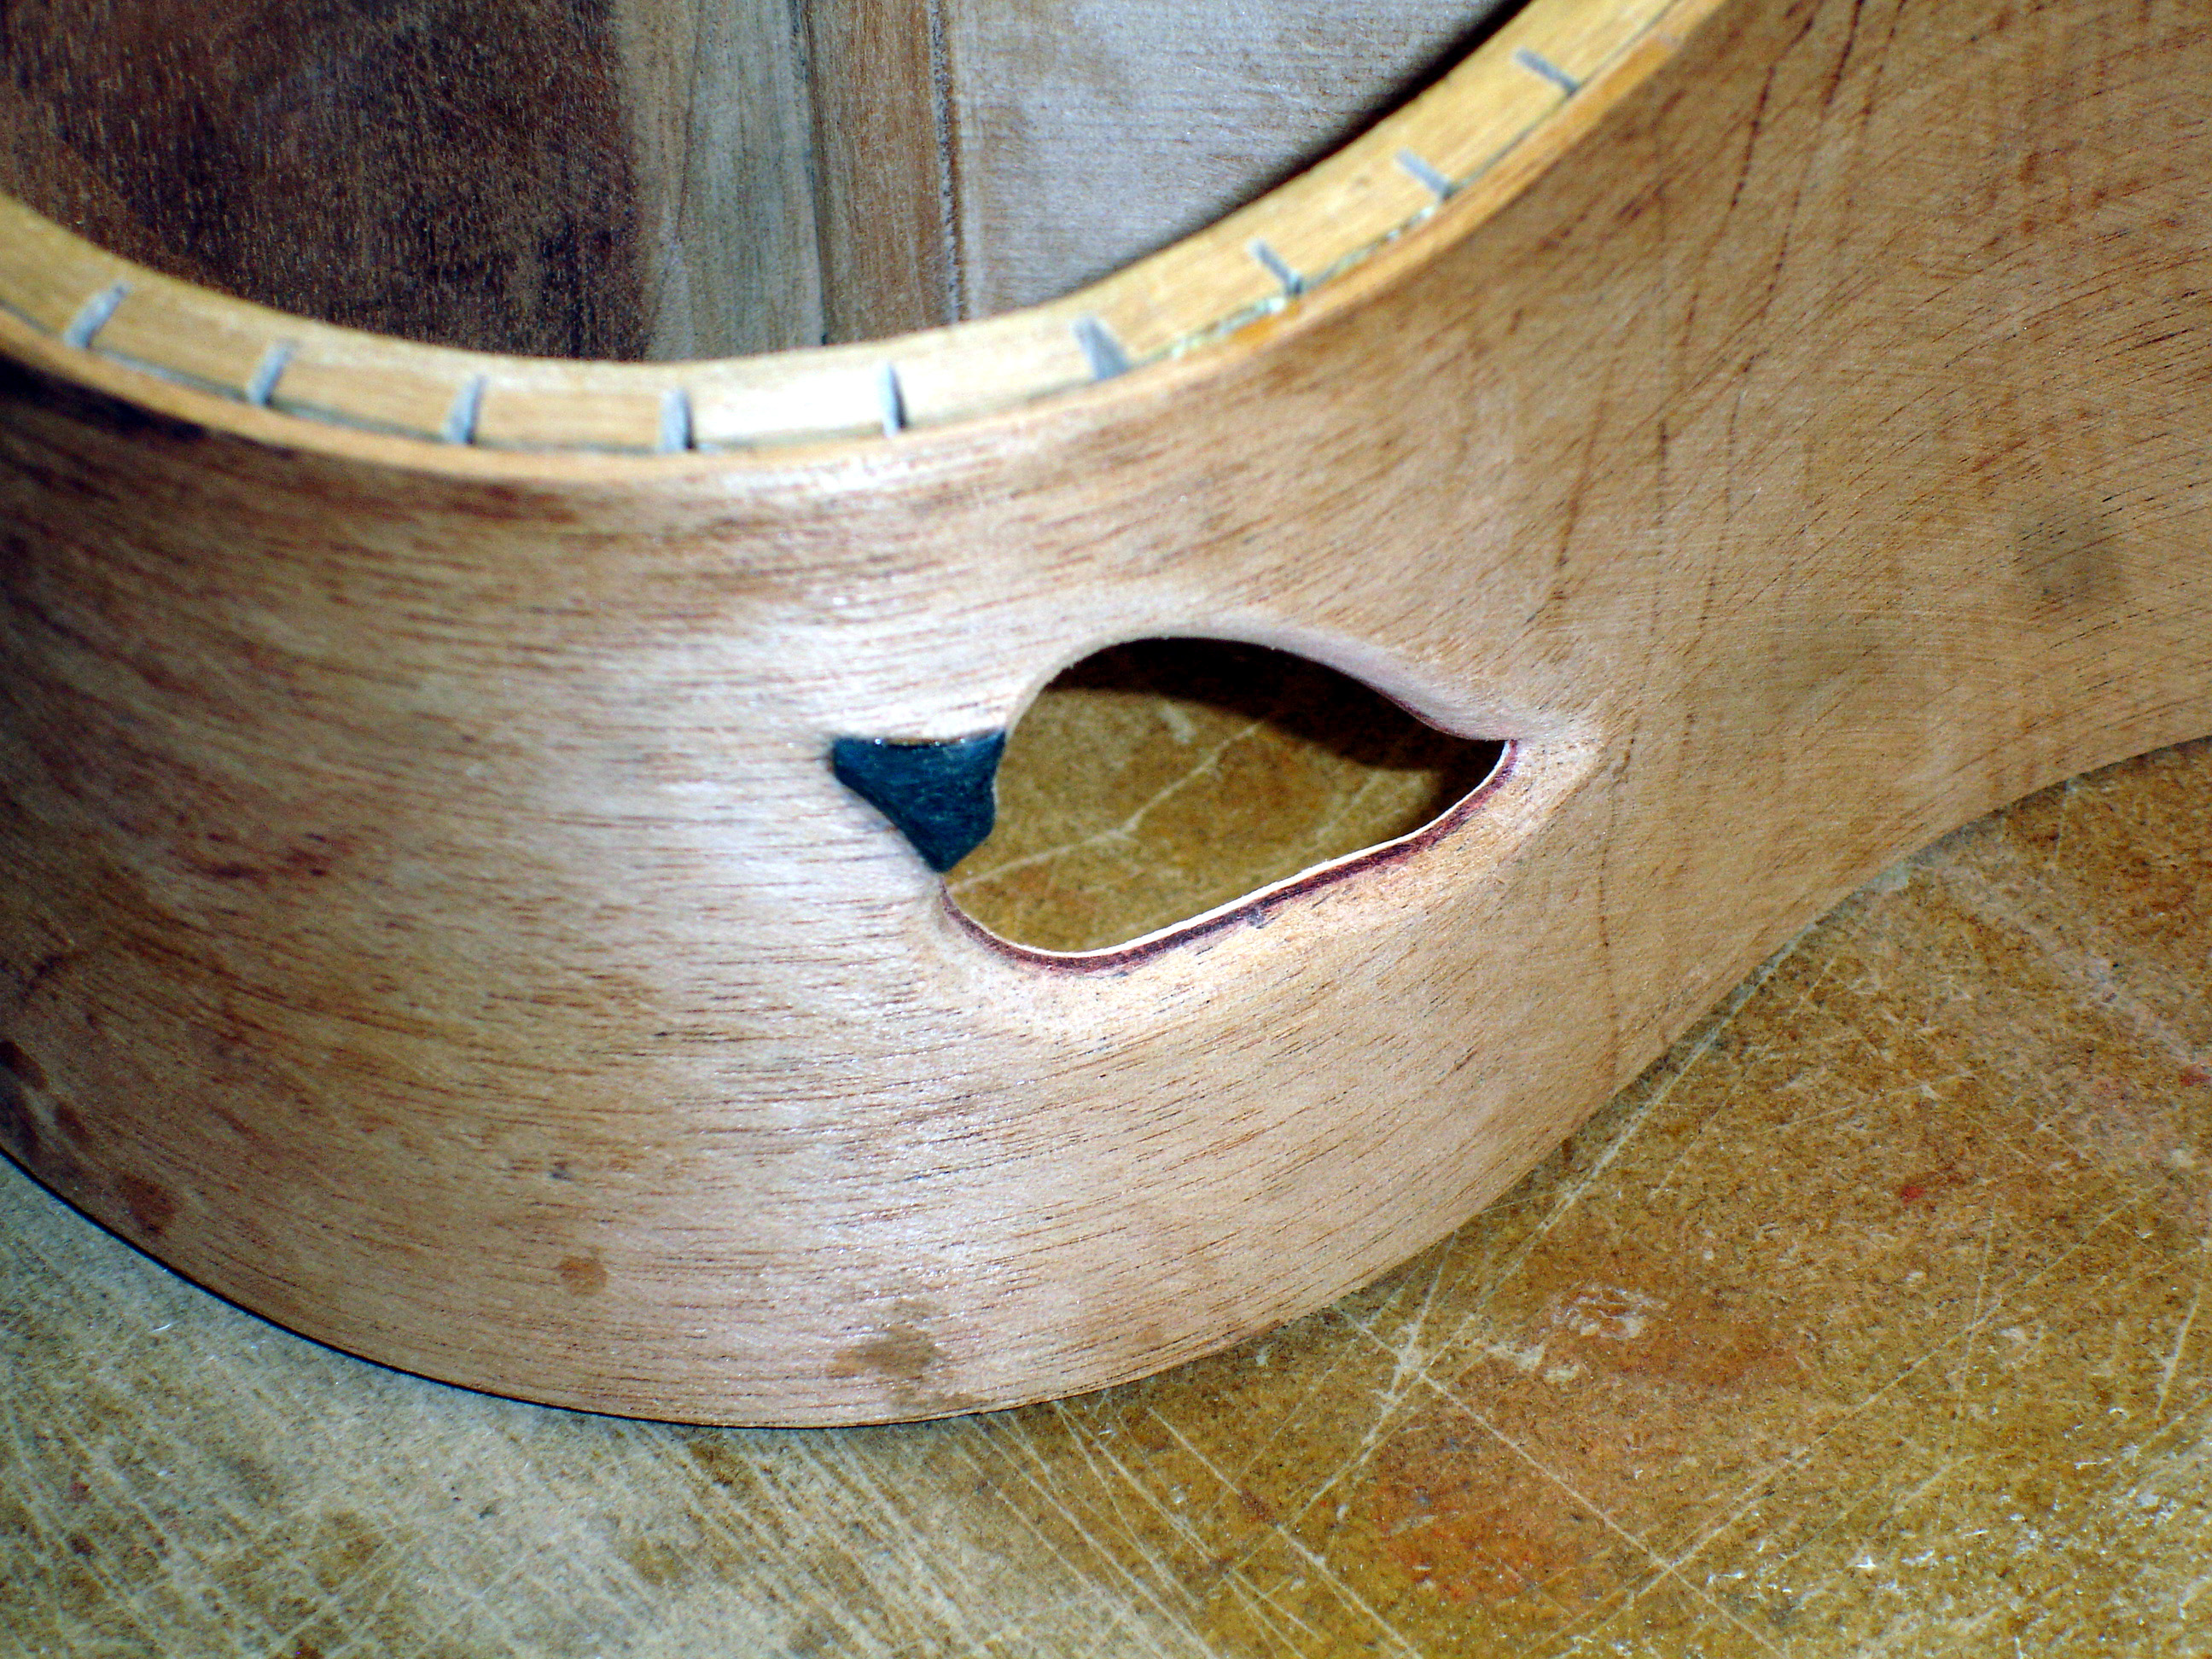
I have cut the rear access port, and roughed out a port cover, shown at the right. This will get drilled for screws to secure it. I decided to have the grain direction of the port cover run perpendicular to the grain direction of the sides. It would be impossible to do a perfect grain match, so I figure it is better to introduce a deliberate discontinuity to make it look like it was done on purpose (which I guess it was). The light wood (birch) used as a spline for gluing the sides to the tail block will be gone in the final product. A bloodwood decorative end graft will tie the panel cover into the sides, and the birch spline will be removed in the process. The port is also shown without the cover.
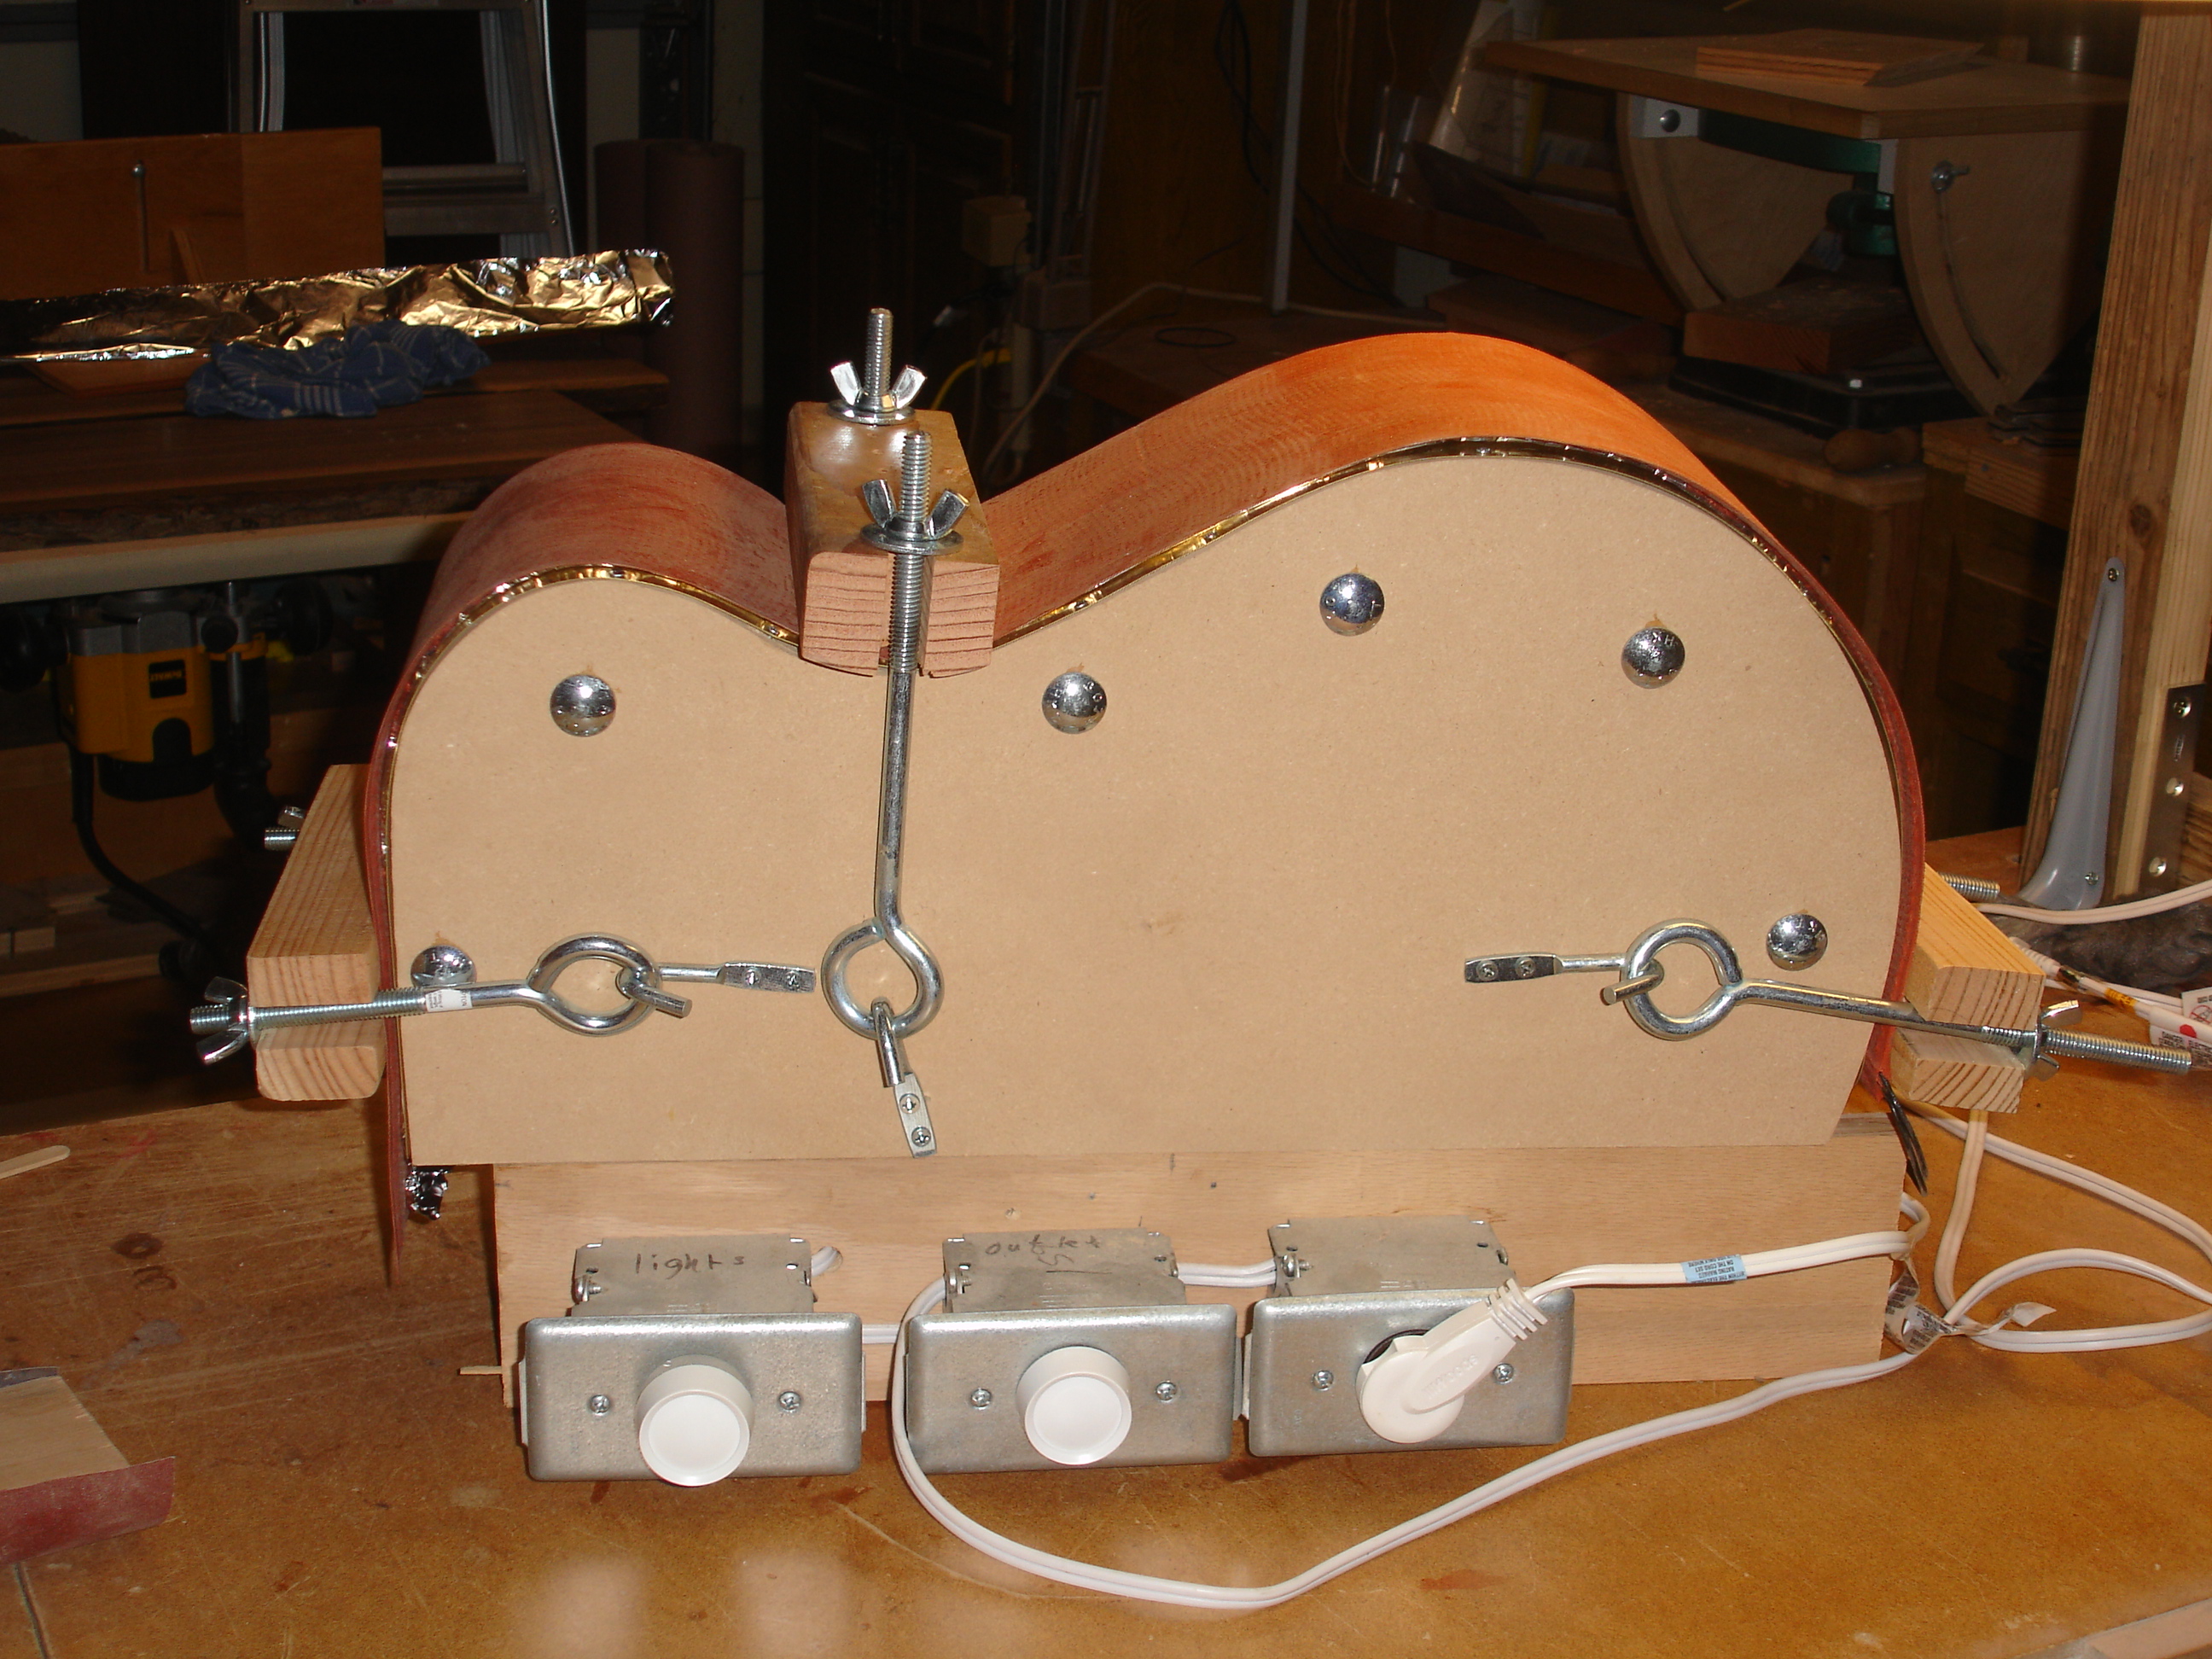
Little by little it is starting to look like a guitar body. On to the side port (after a few prototype tests) and the flying buttress braces.
The rims are complete. I have installed the ribs and flying buttress braces that you see here. These will support the head block, neck and top against the torque exerted by the string tension.
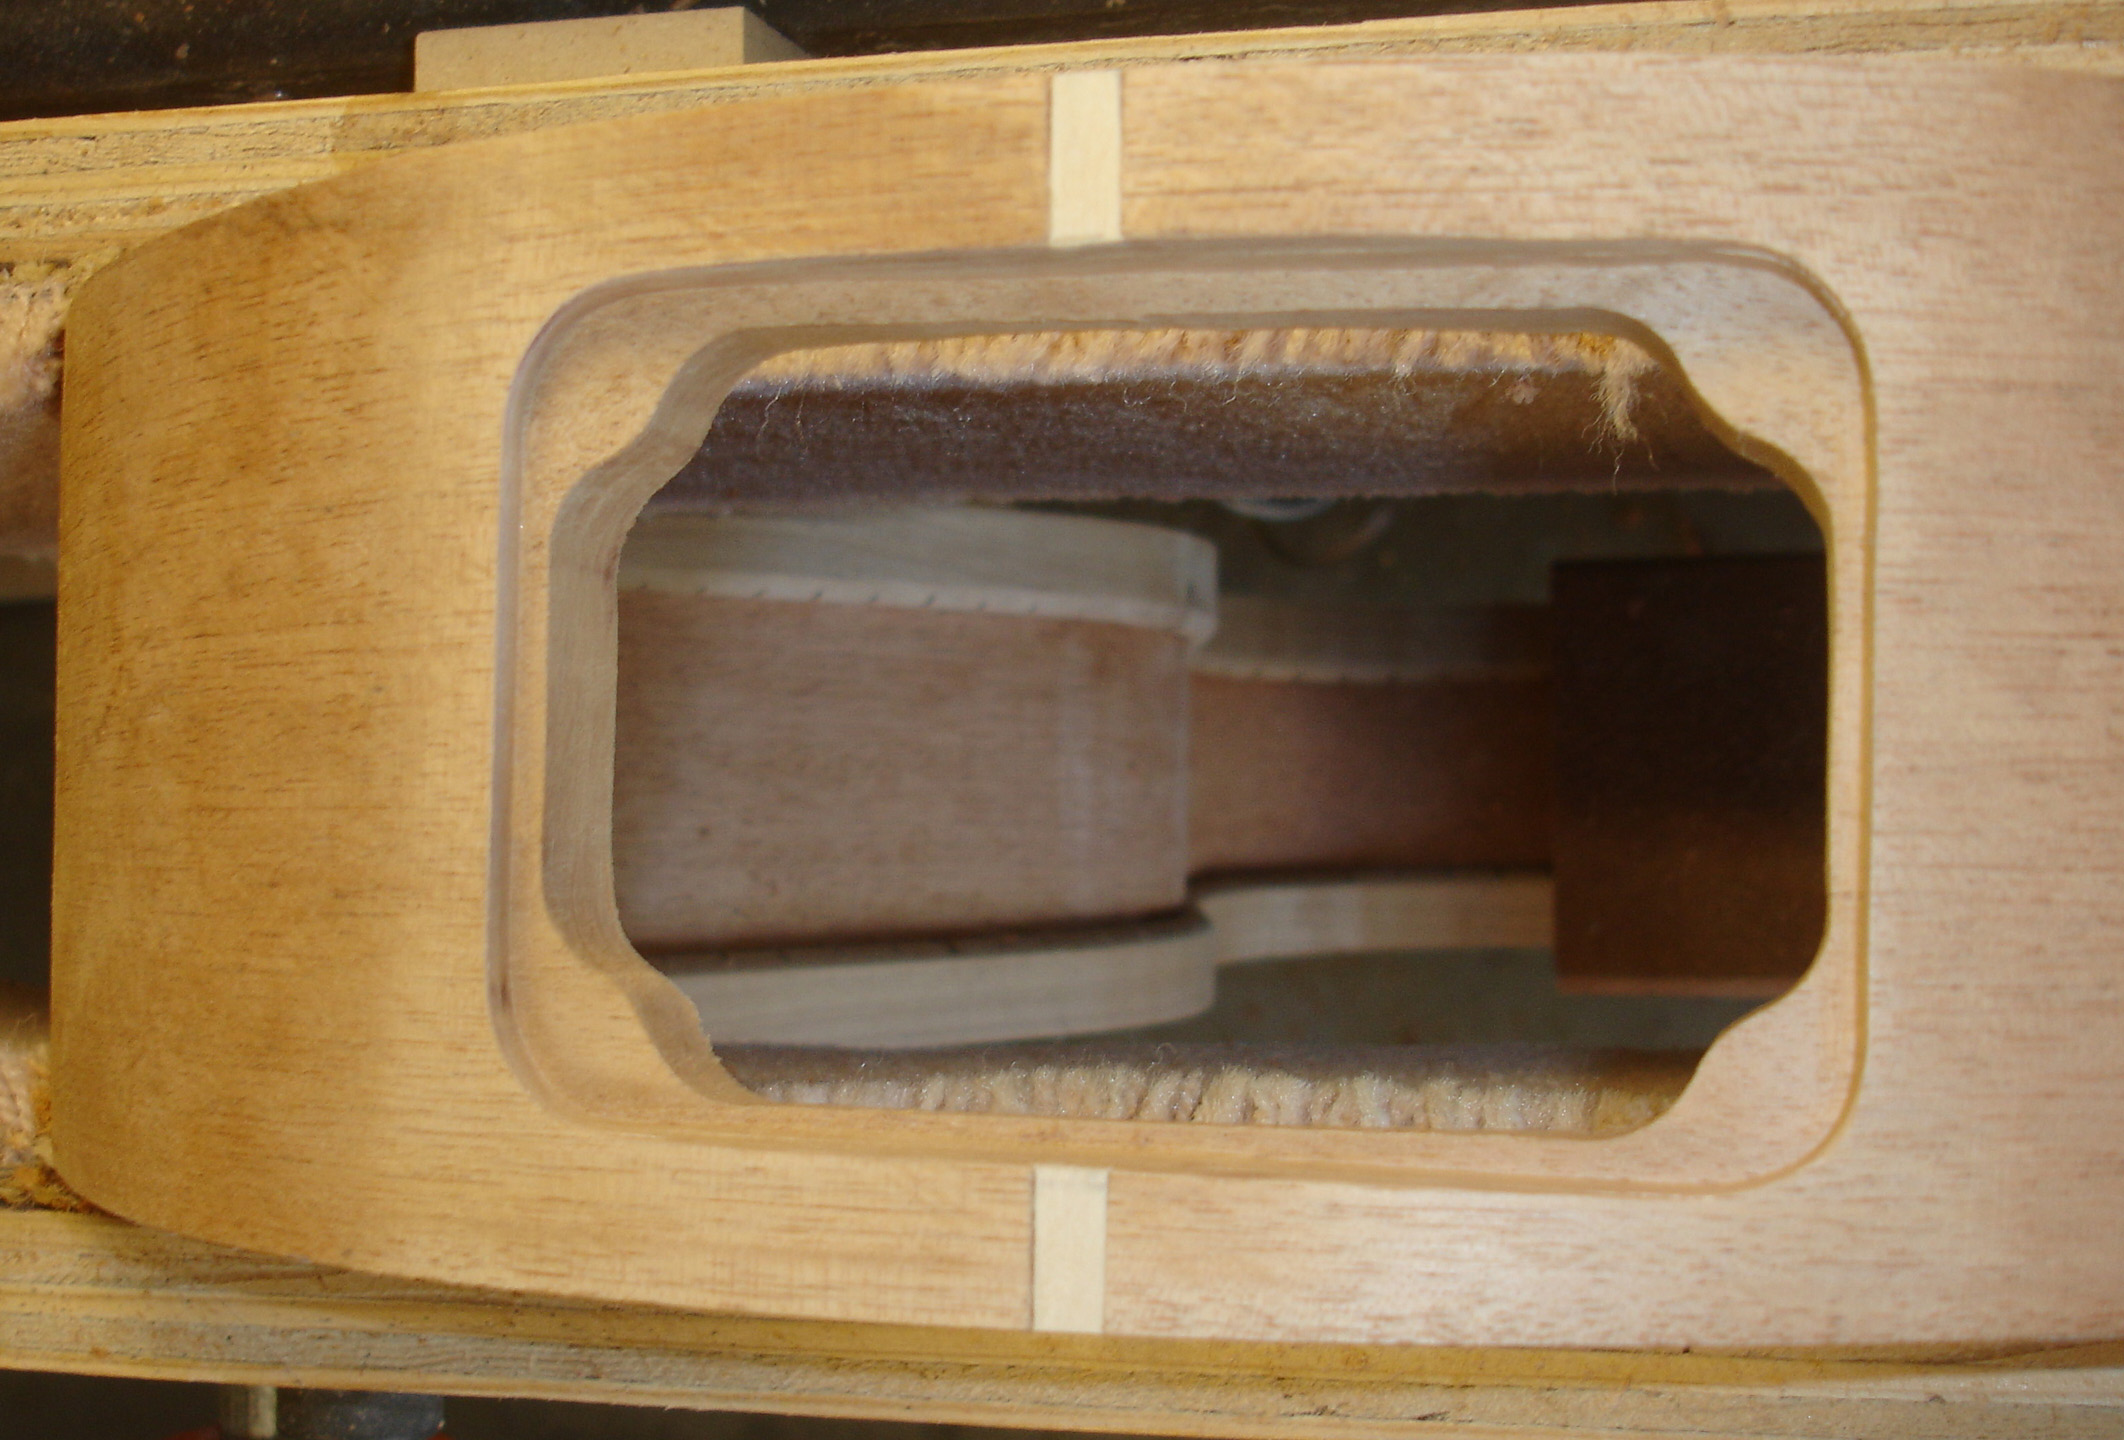
A new feature that I am incorporating for the first time on this guitar is a side port. A side port reputedly projects more sound to the player without affecting the forward sound projection. Of course, the port is shaped as a chile, as per the theme of this guitar. The stem is formed by a piece of ebony (I can’t find a naturally green wood). The red accent around the opening is formed by blood wood veneer and maple veneer under the mahogany. I may experiment with some air brushed red tinted shellac during the finish give a bit more chile red to the opening.
The next step is to begin work on the top.
The Top
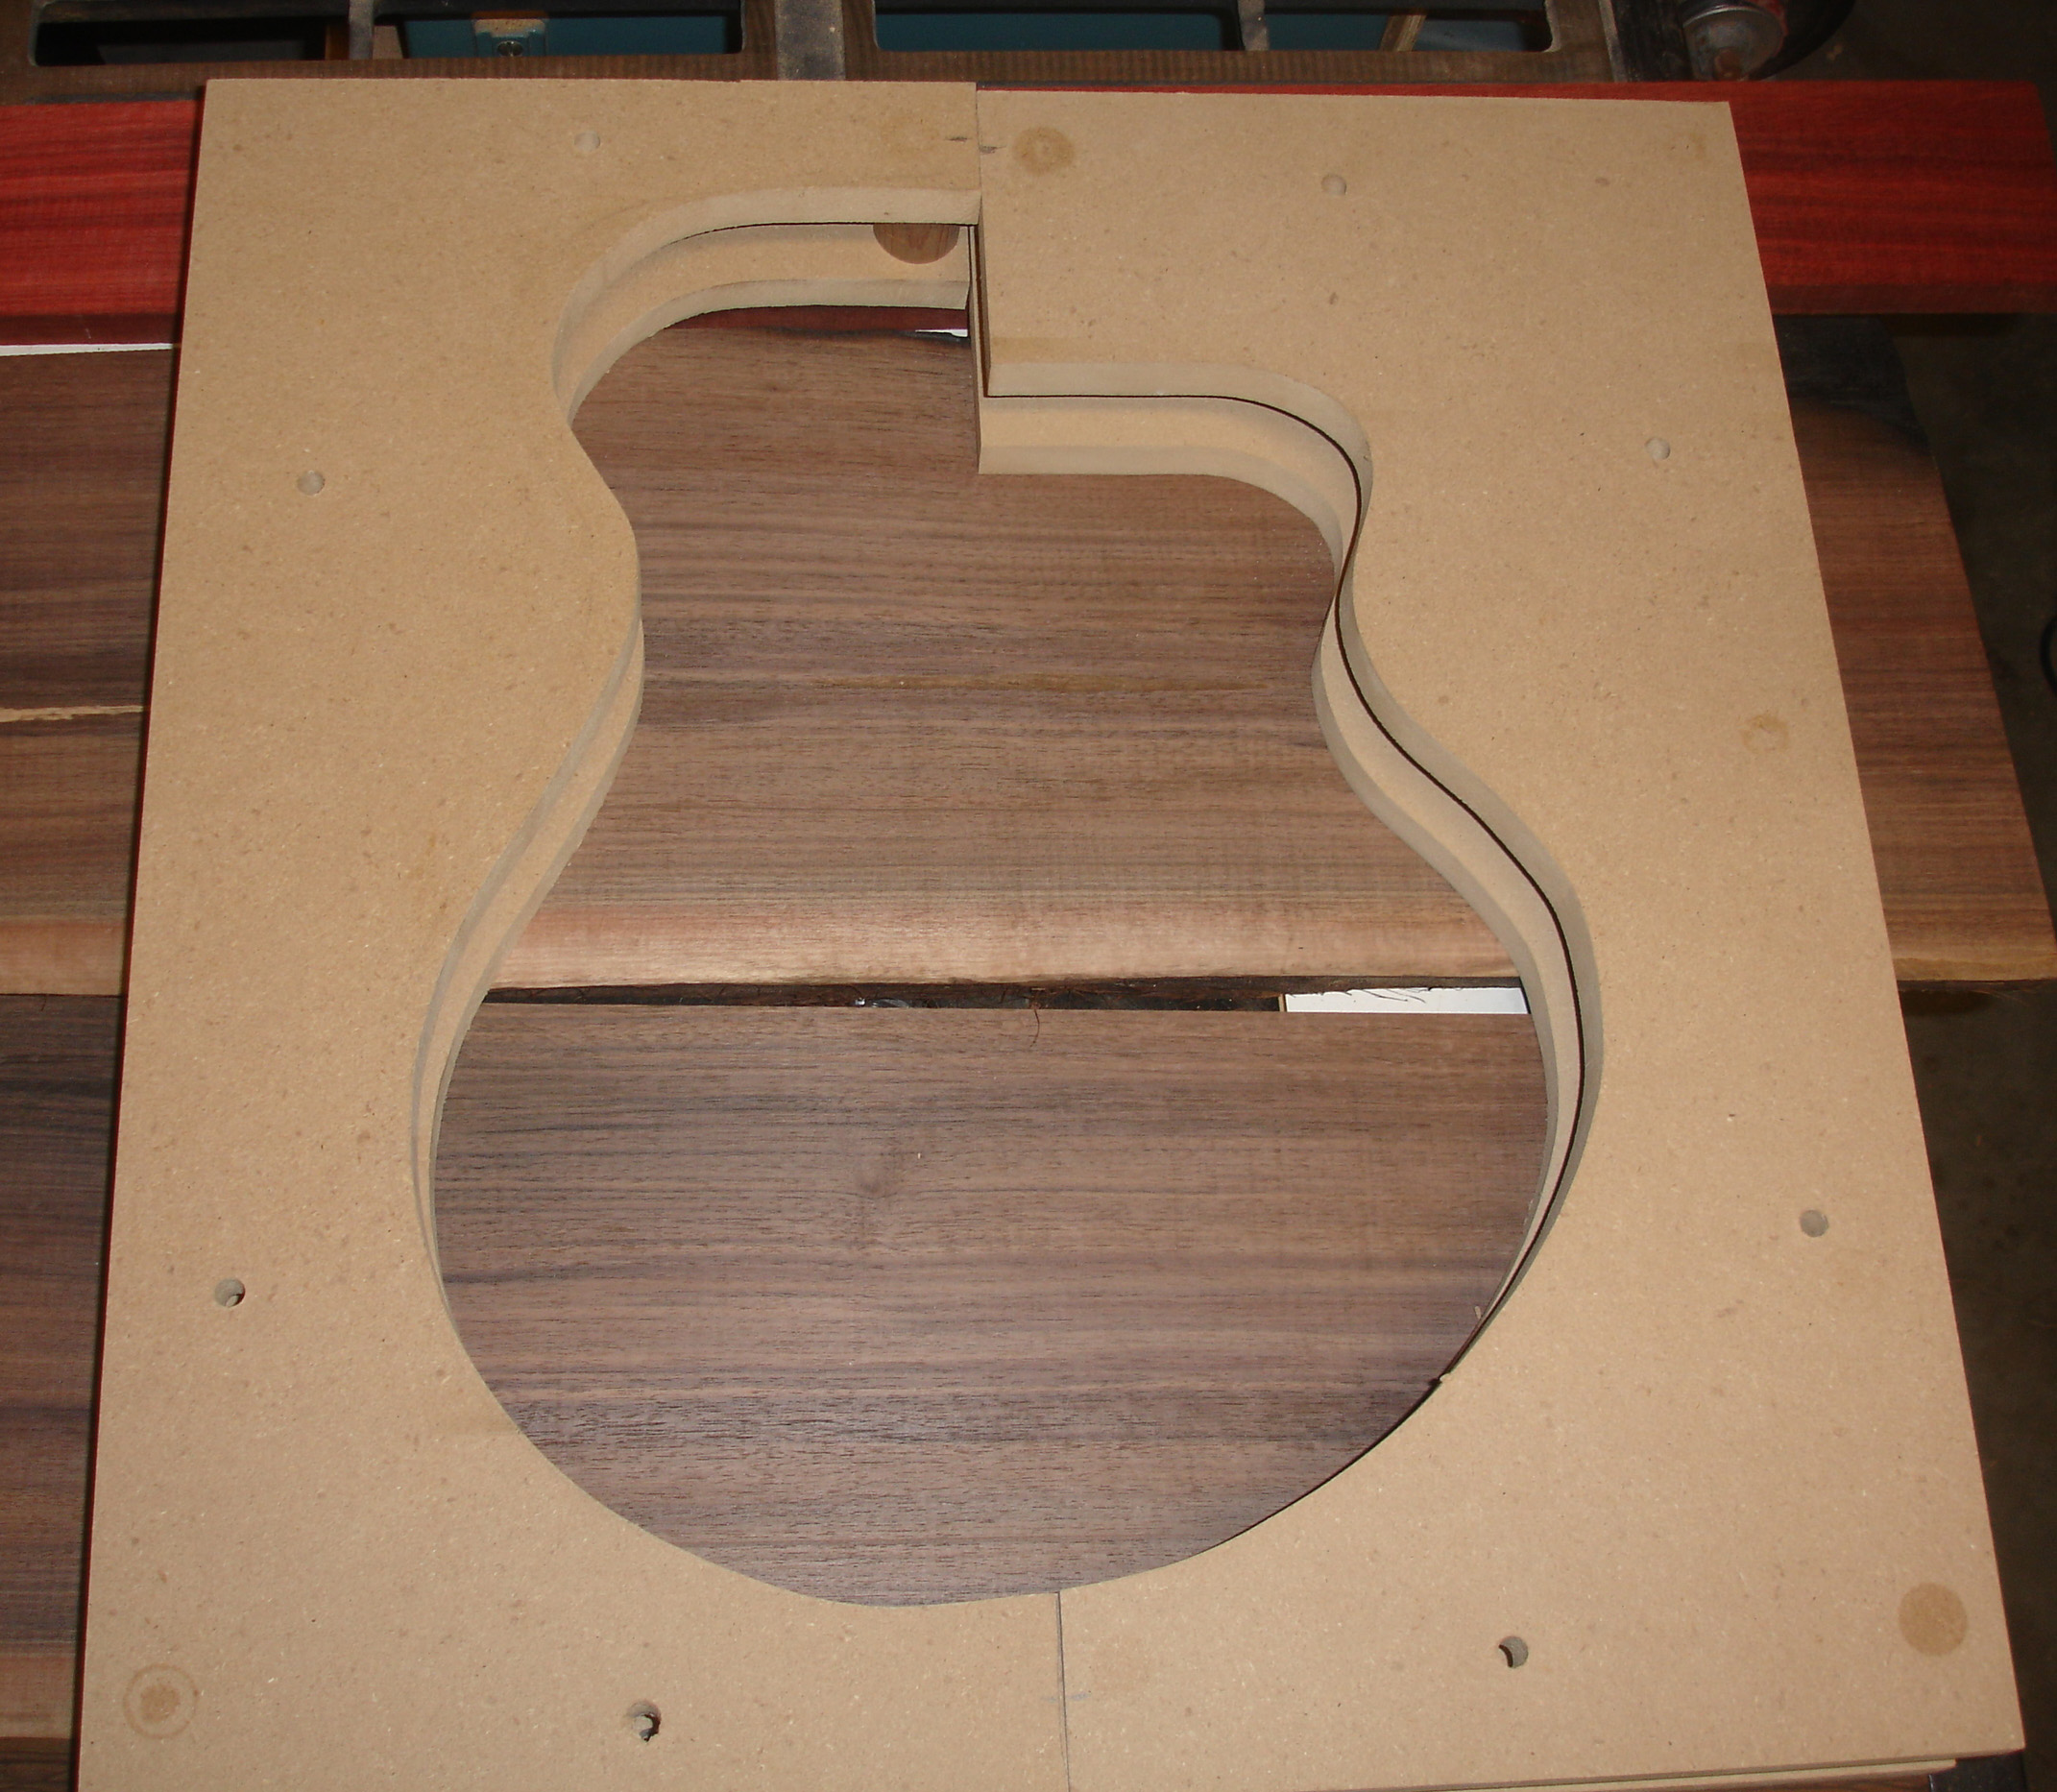
The top plates (sitka spruce) have been joined and brought to proper thickness. Rough
chile holes have been cut and reinforced with back-
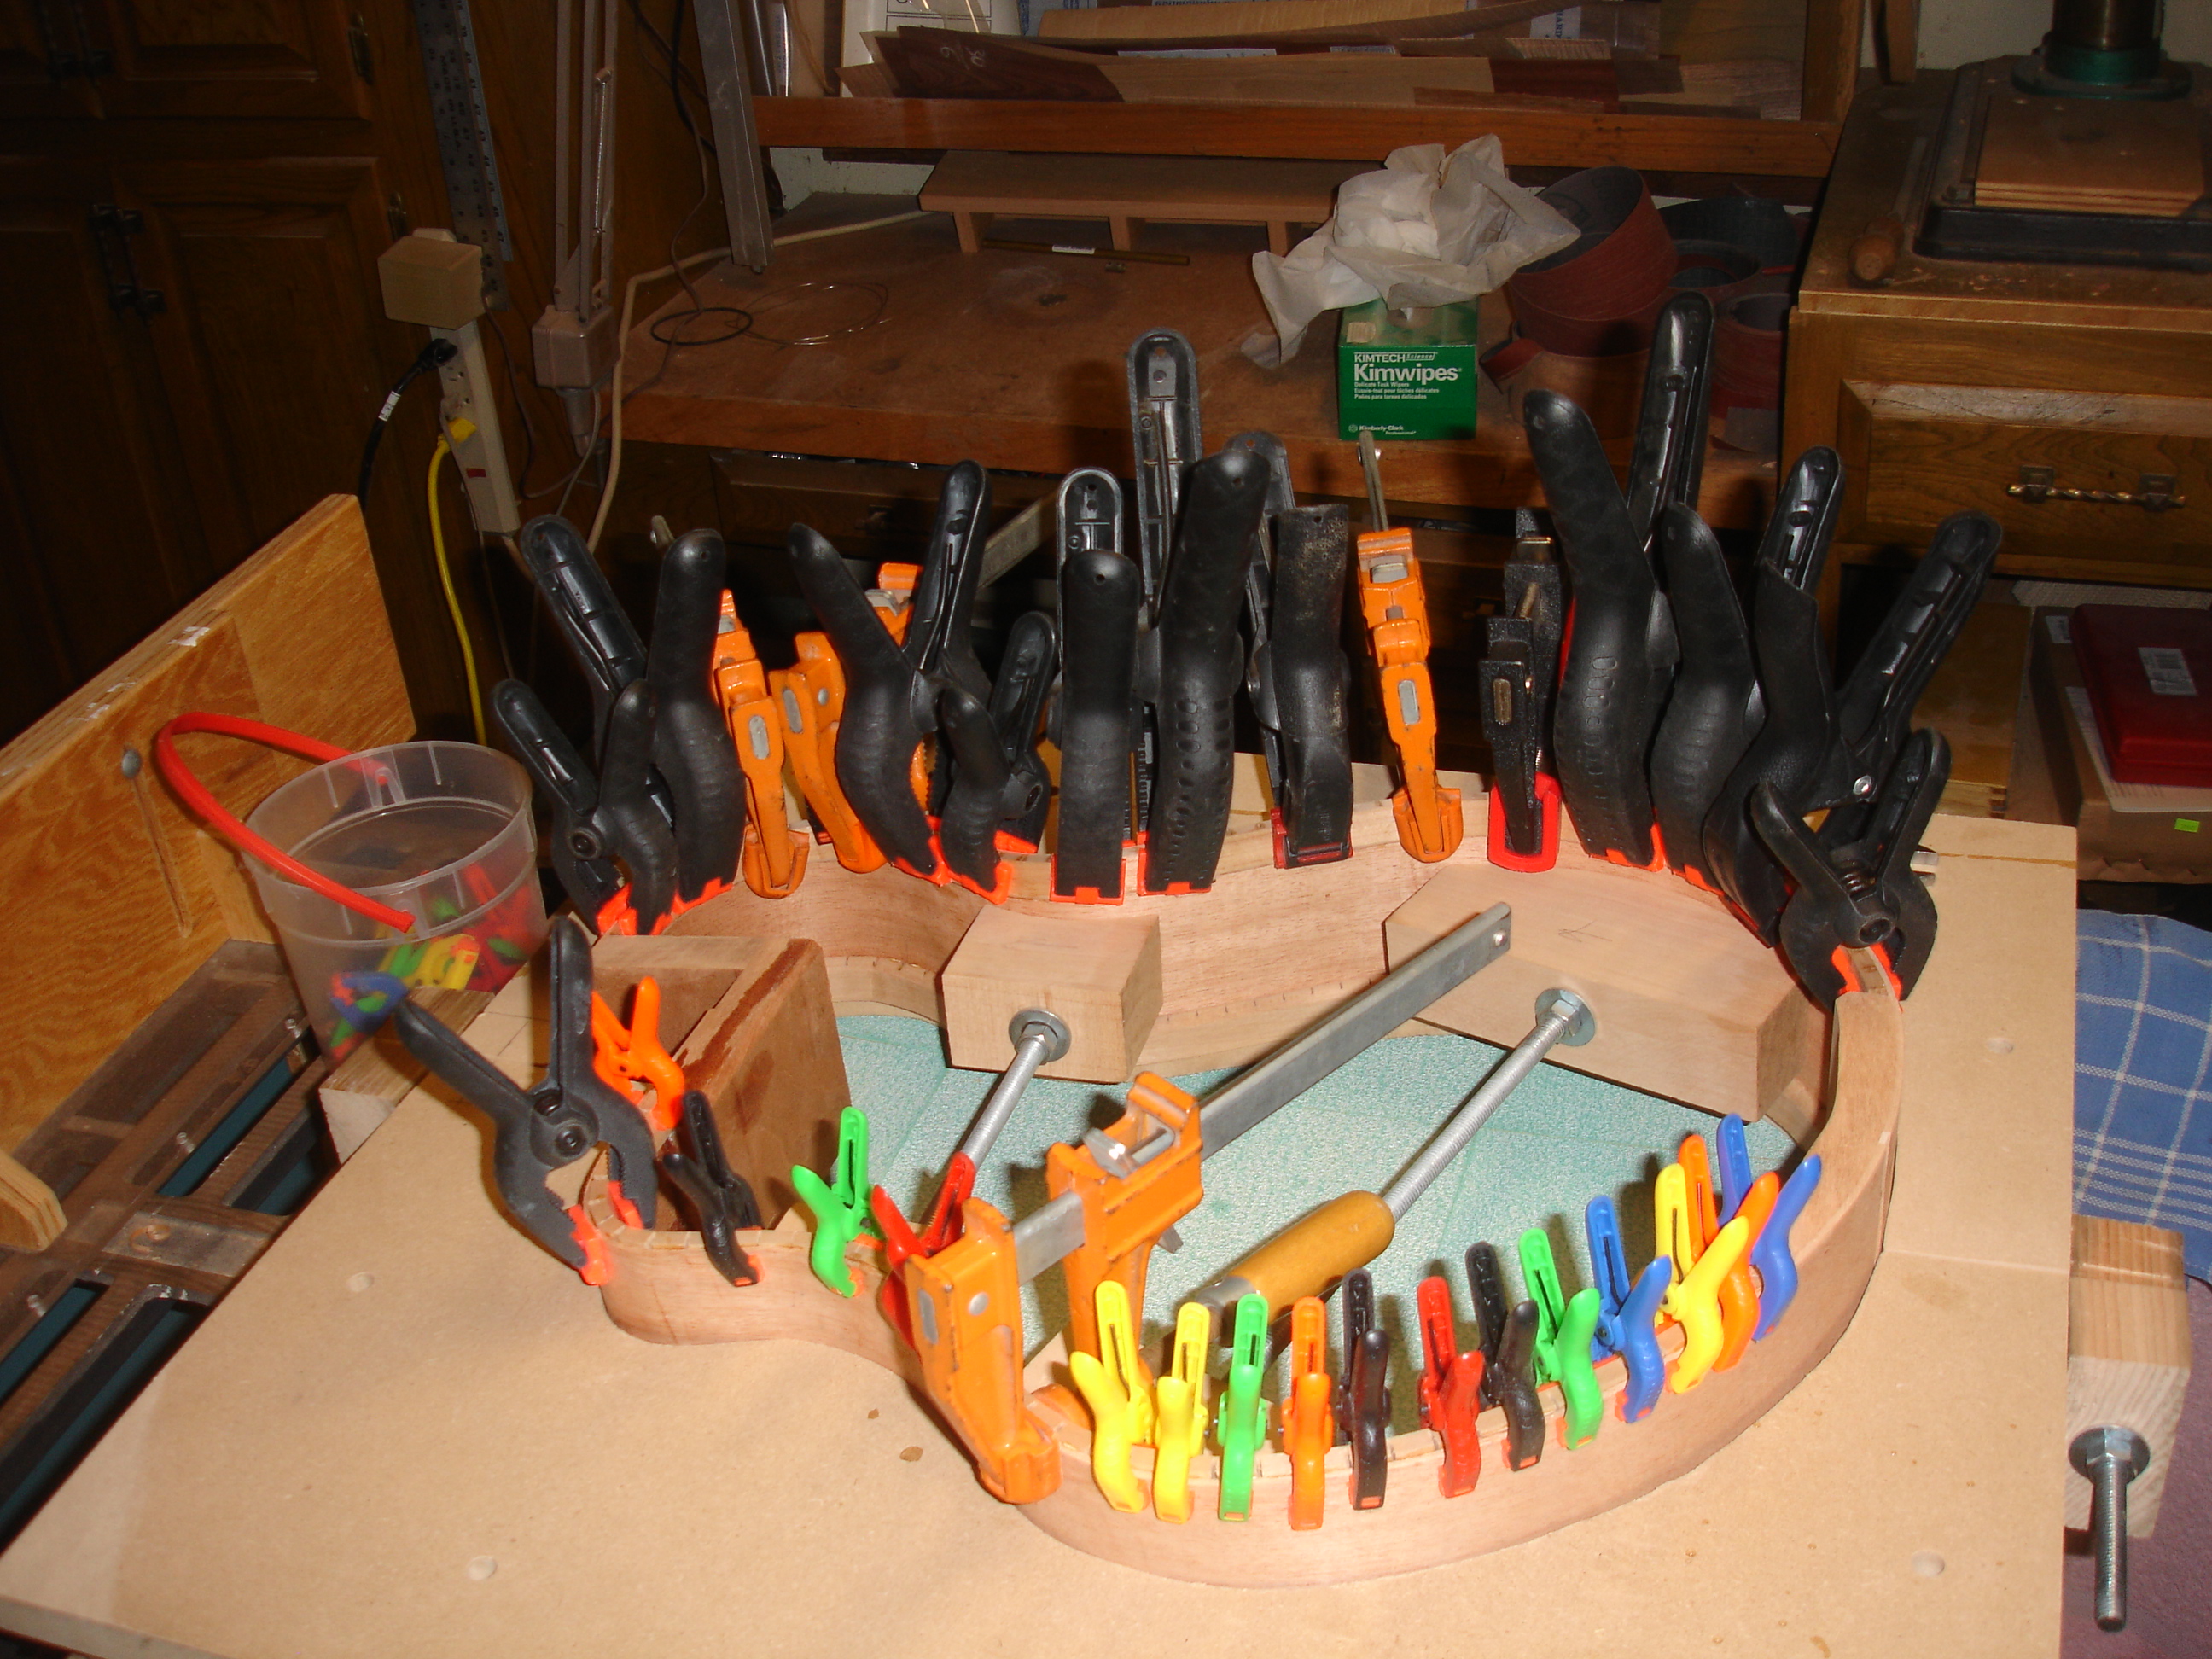
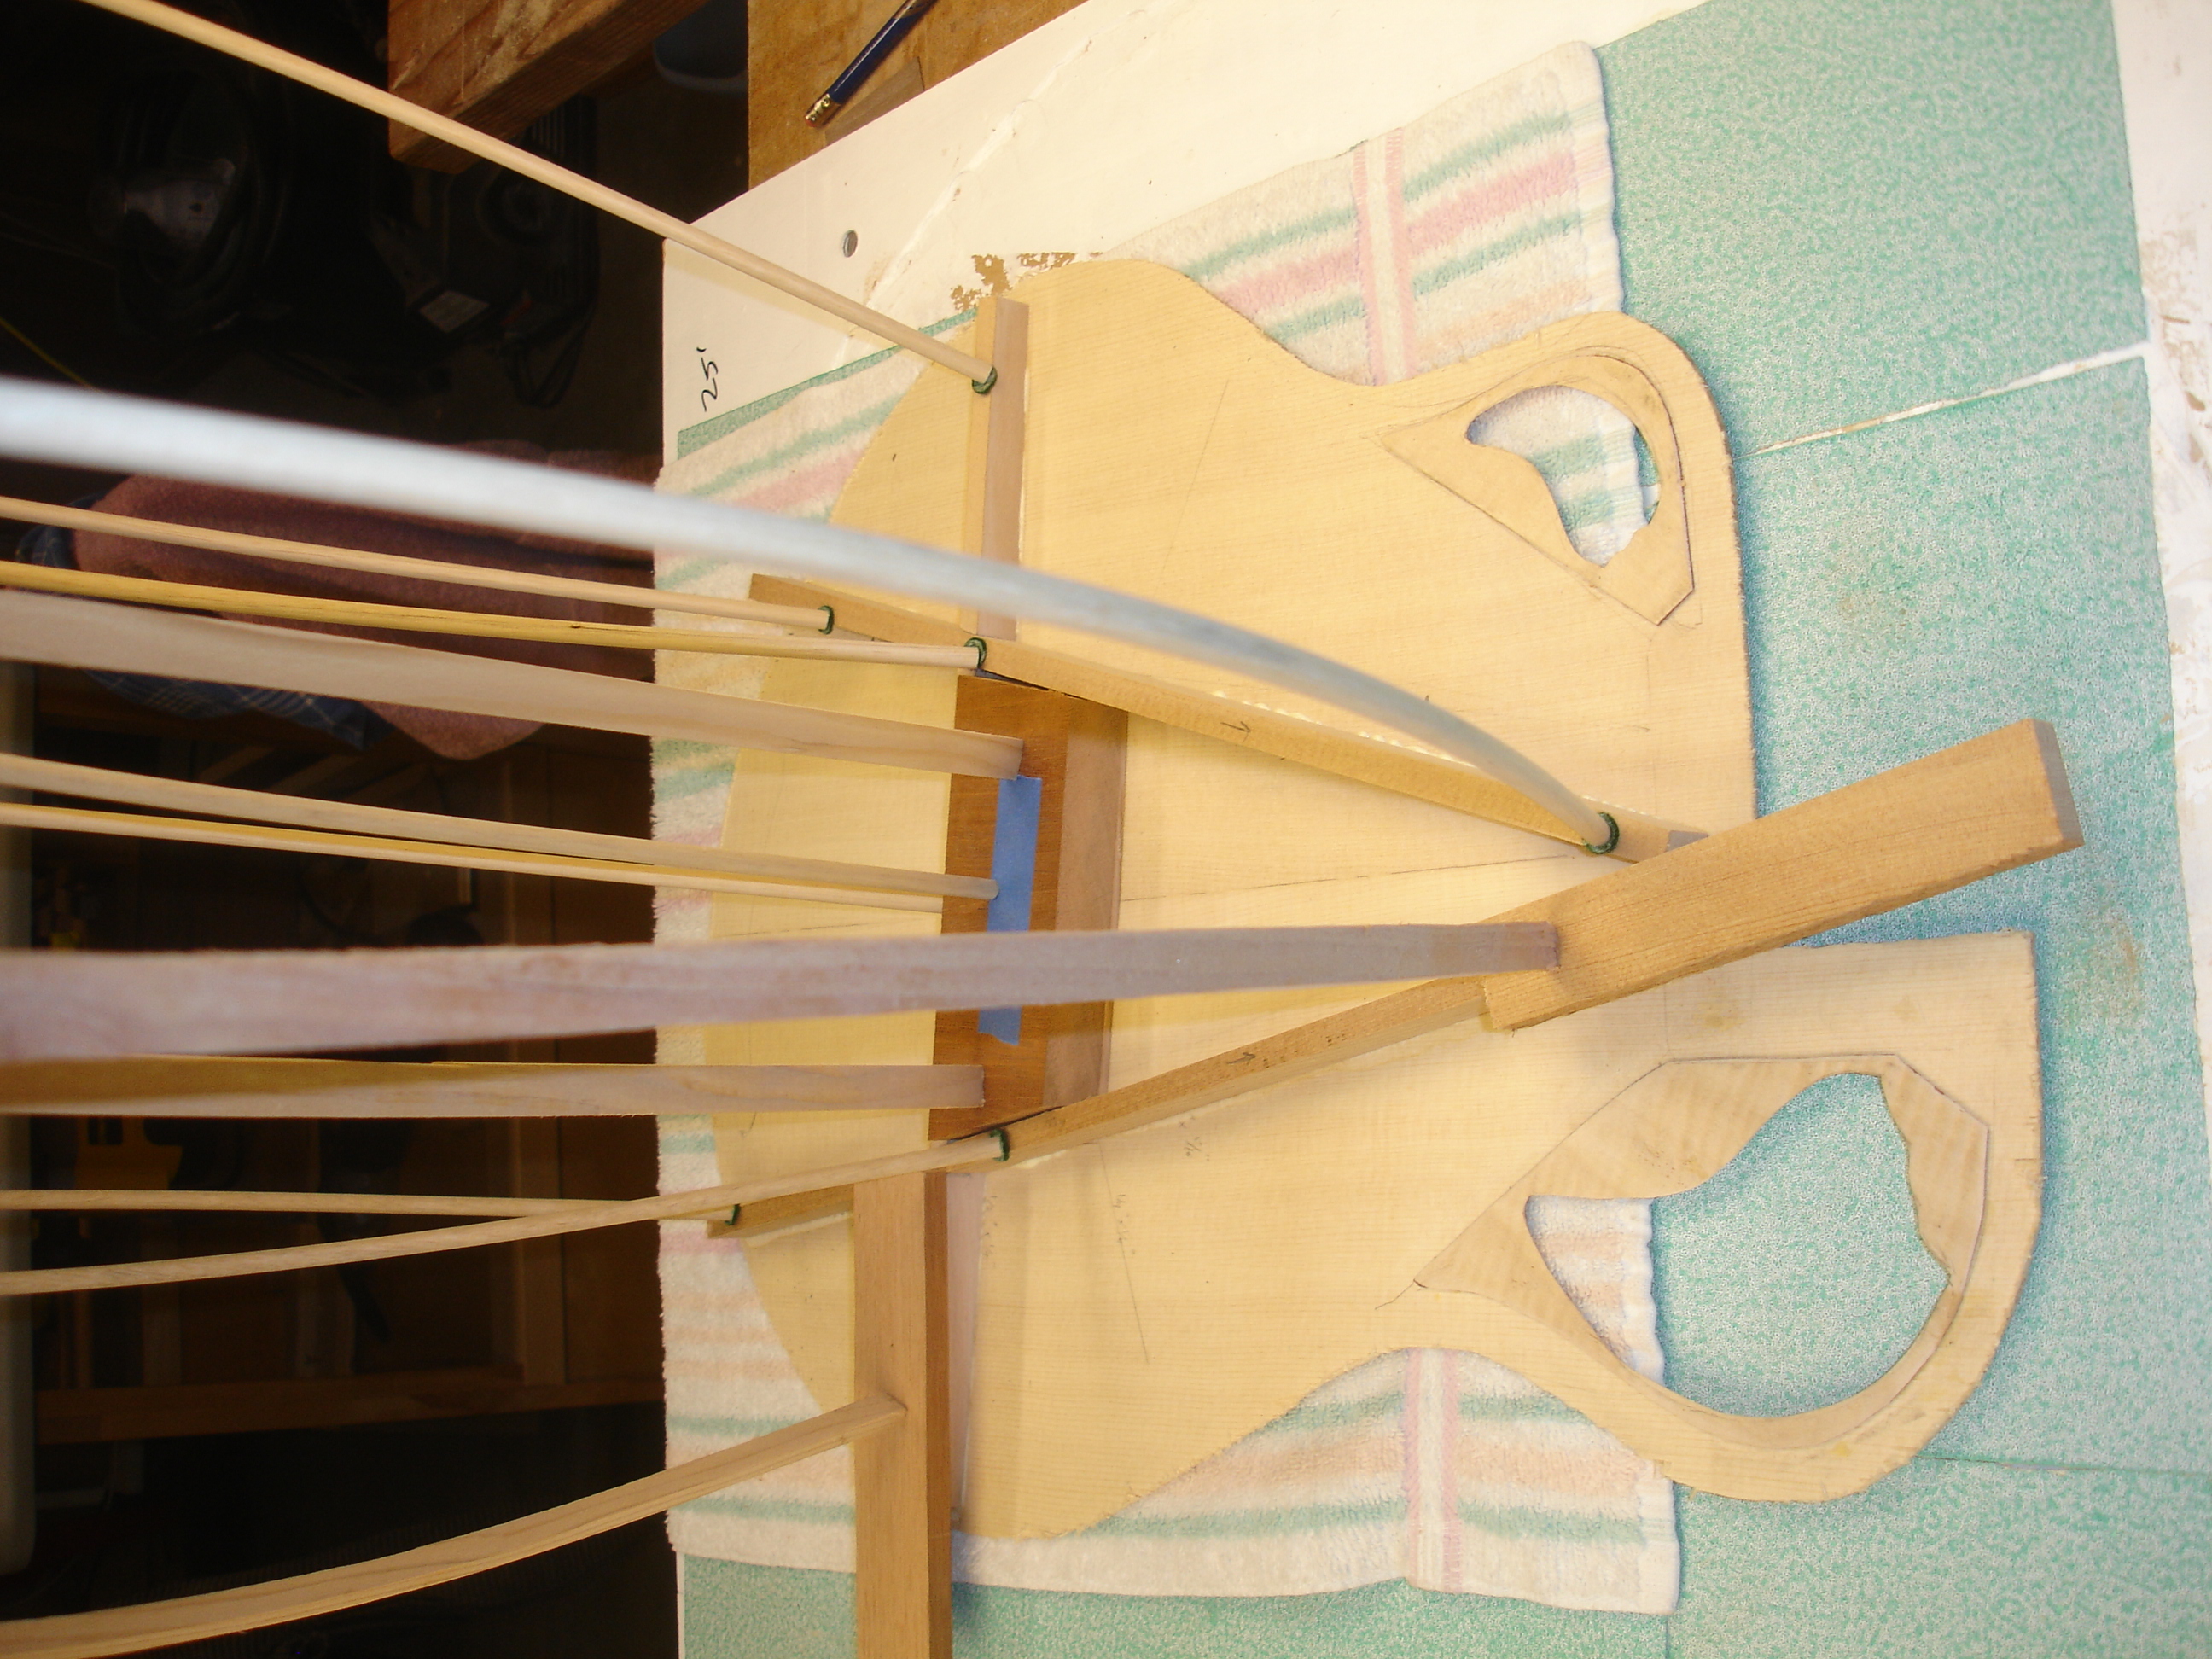
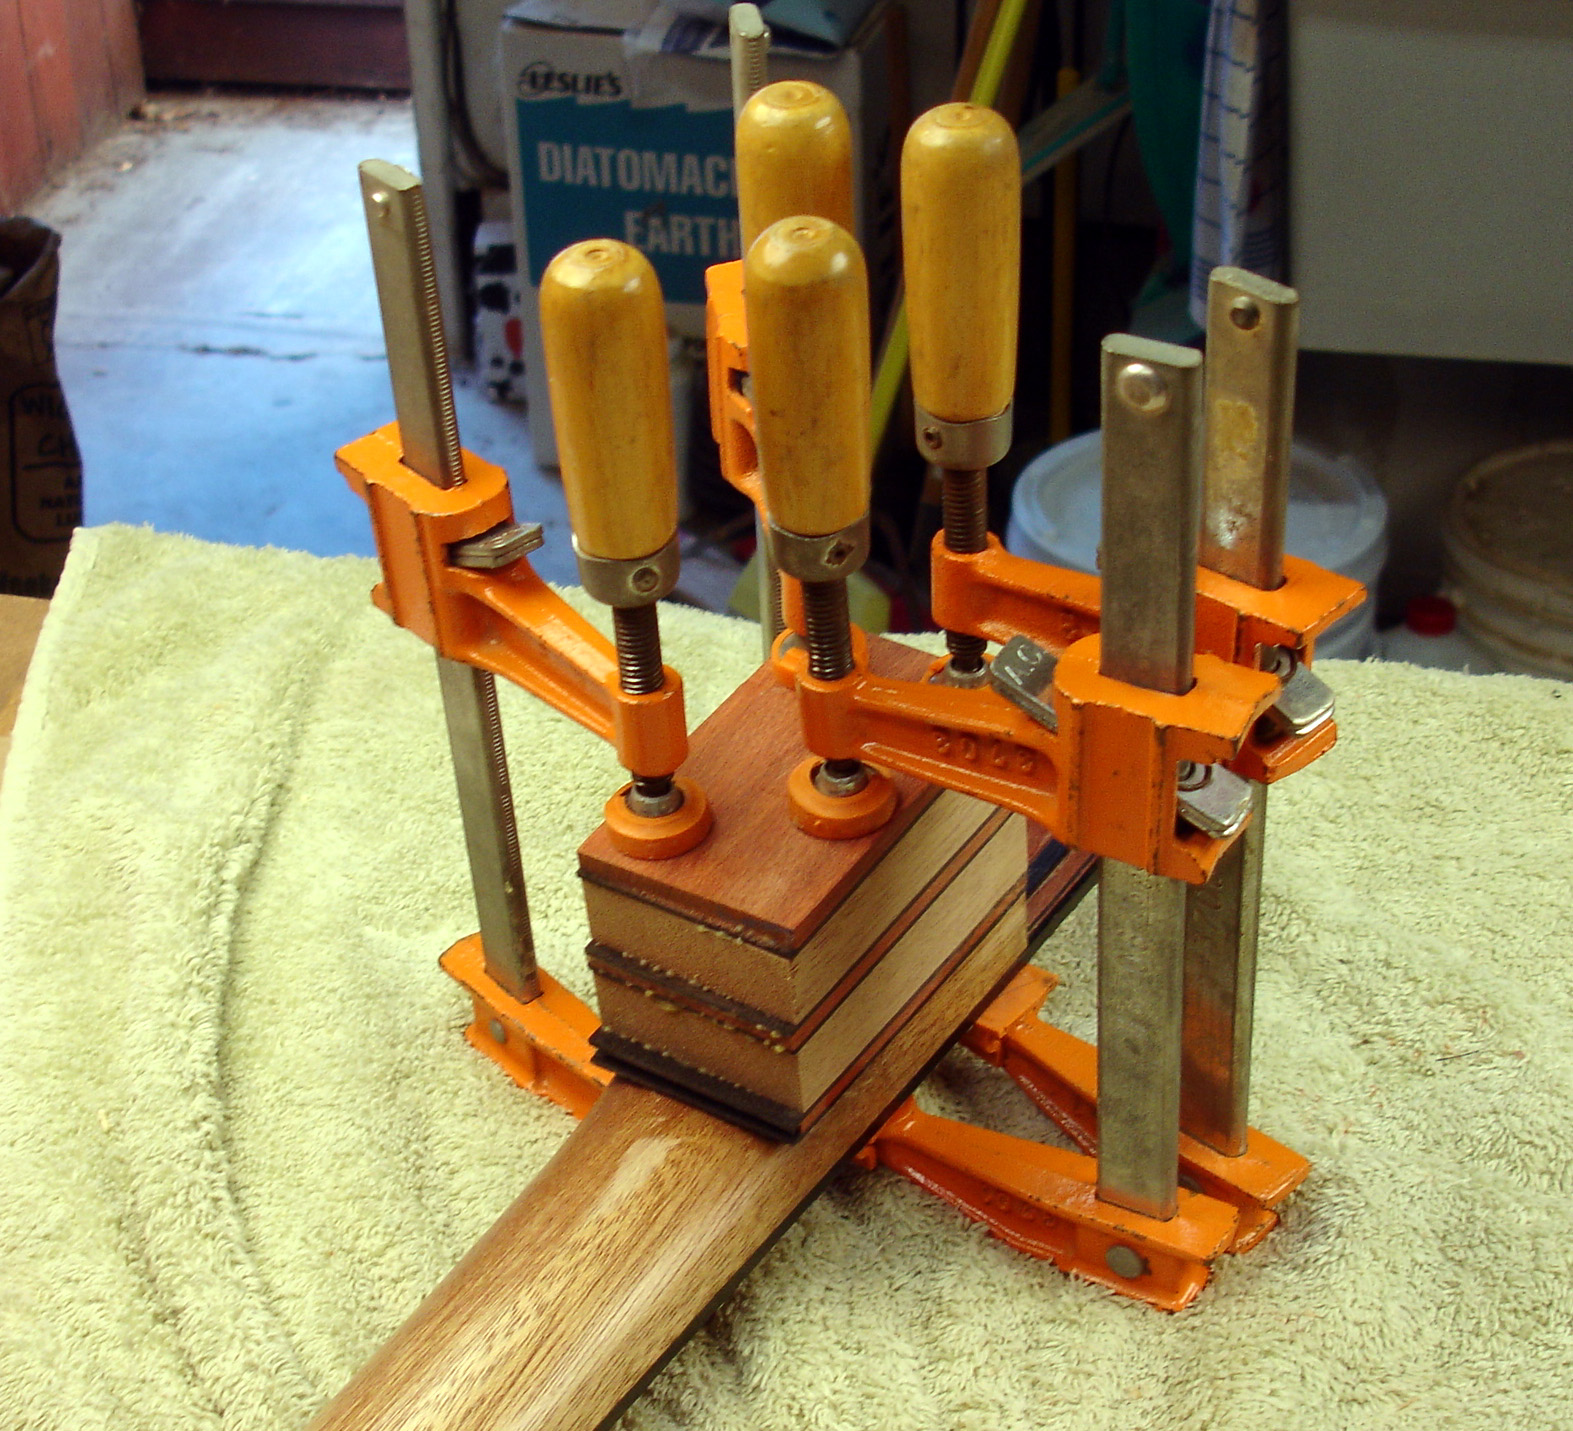
After thinning and shaping the braces to final form (the rear access port allows for fine tuning after everything is complete) and inlets are cut in the rims for the braces, the top is glued to the rims, as seen at the right (you can never have too many clamps).
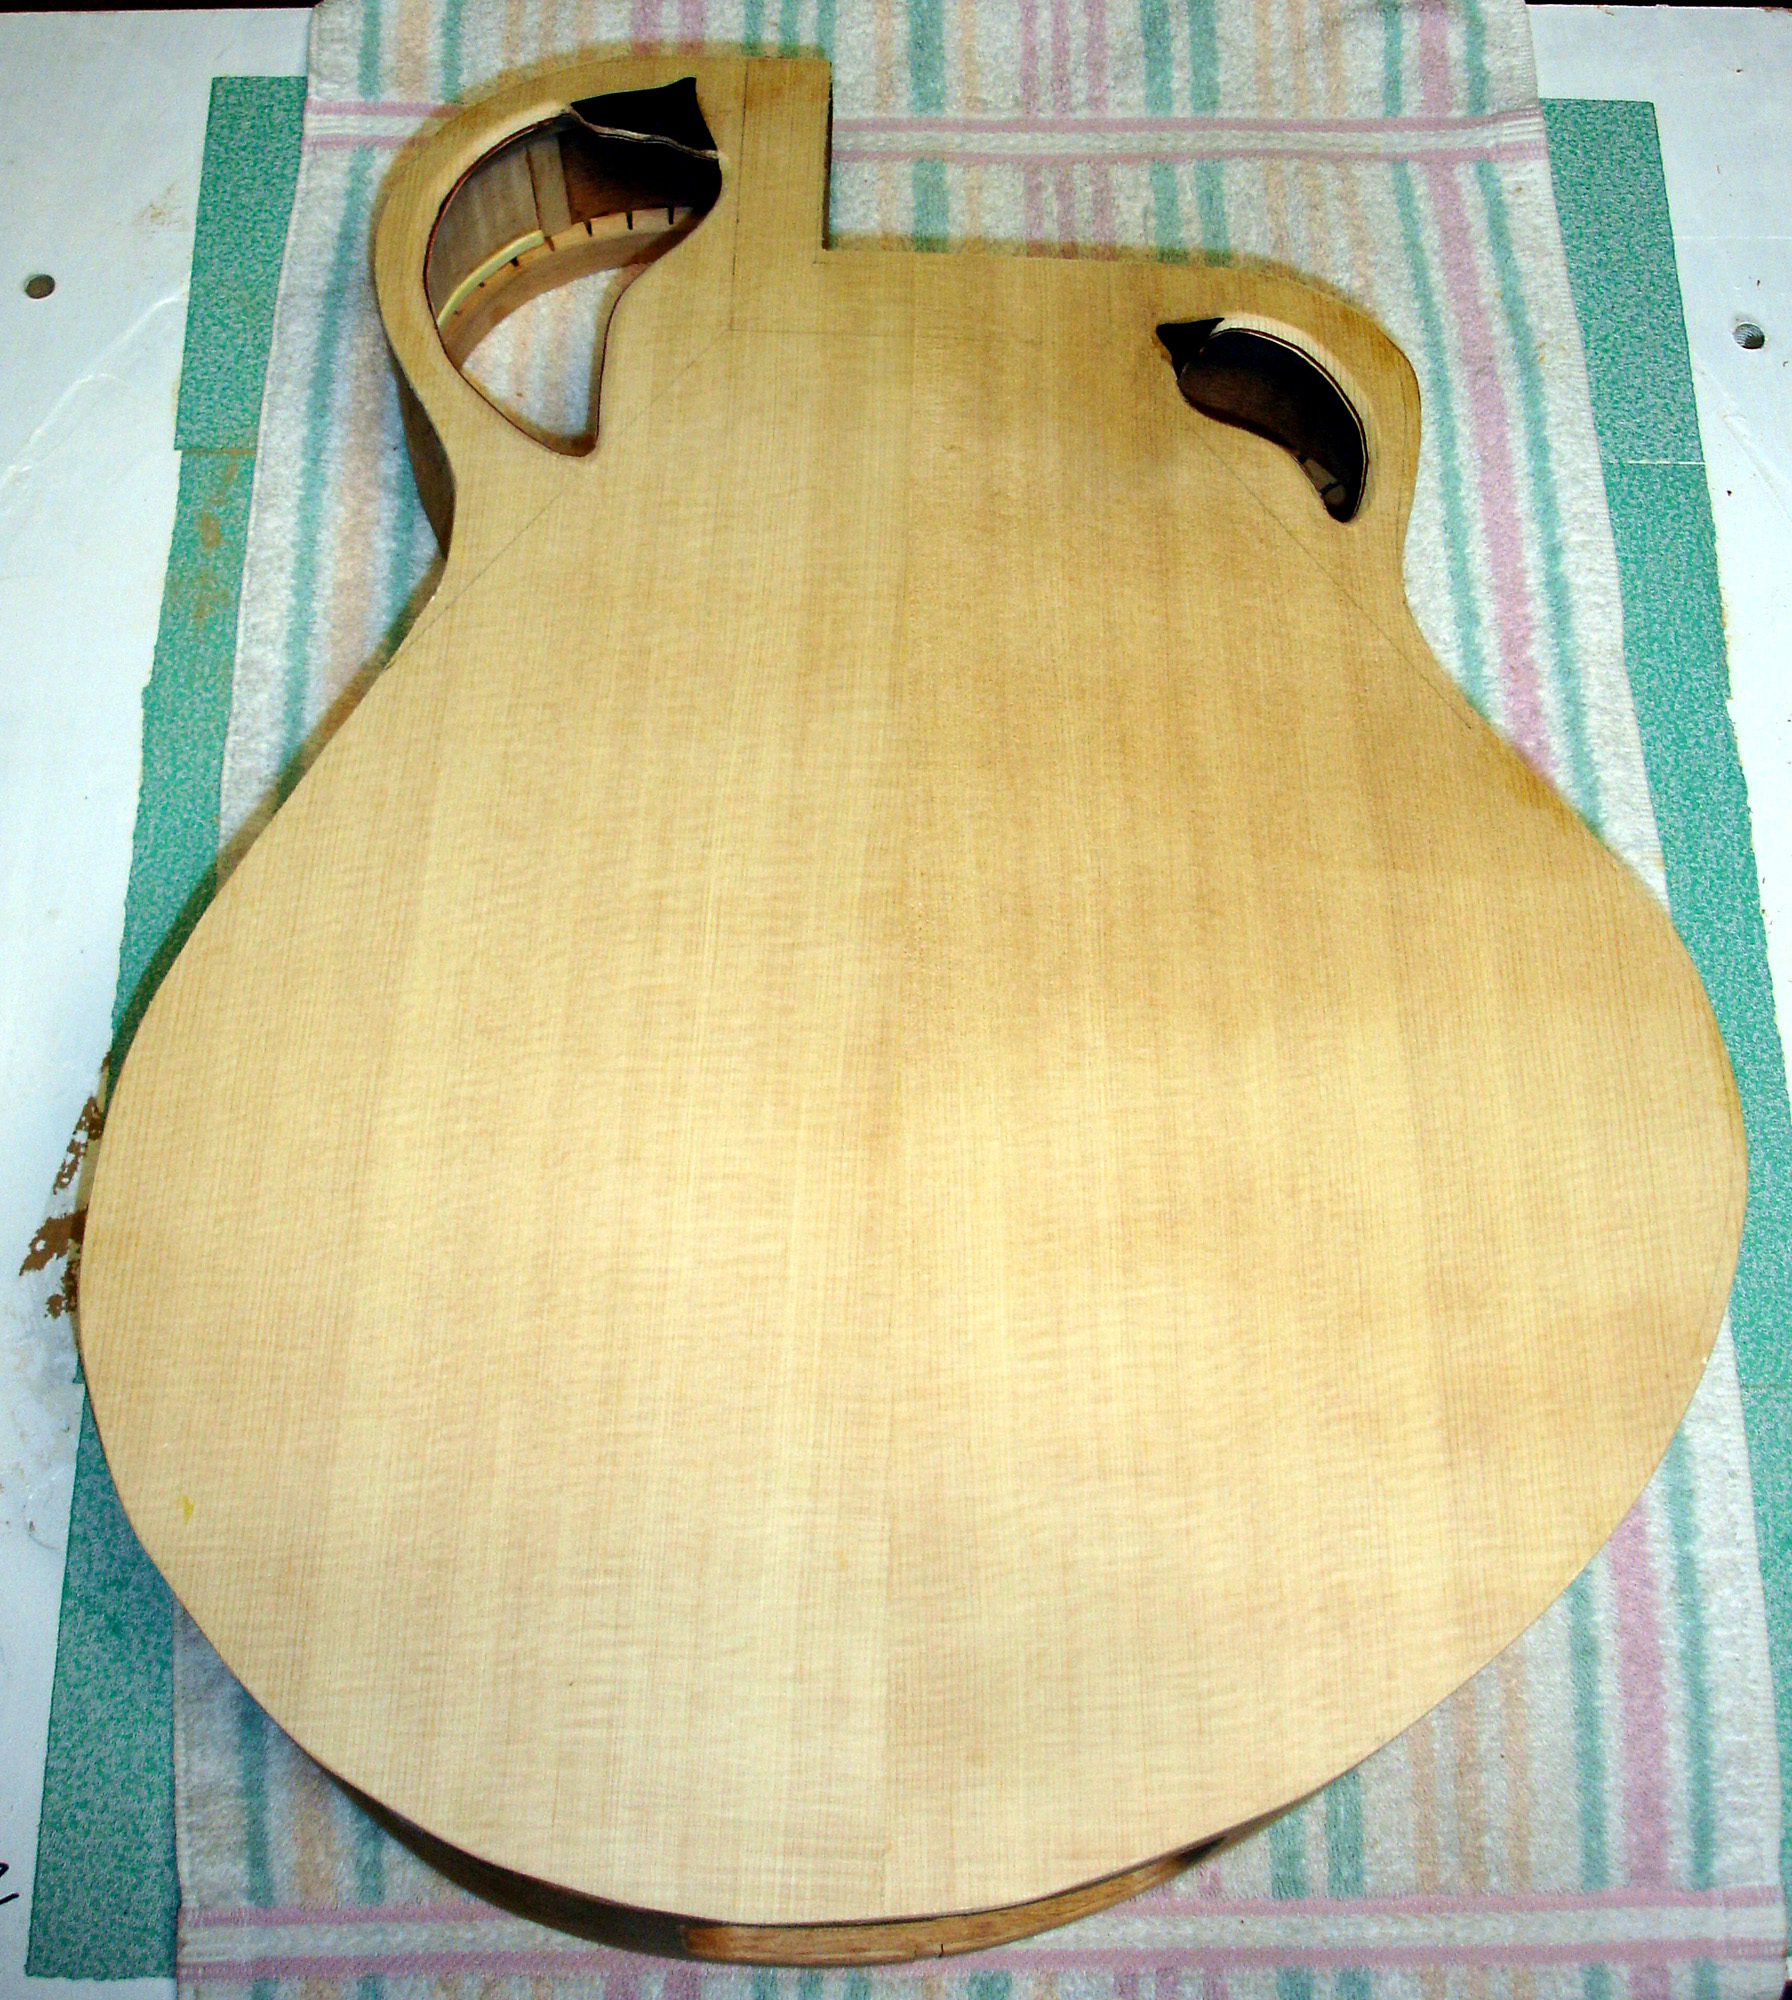
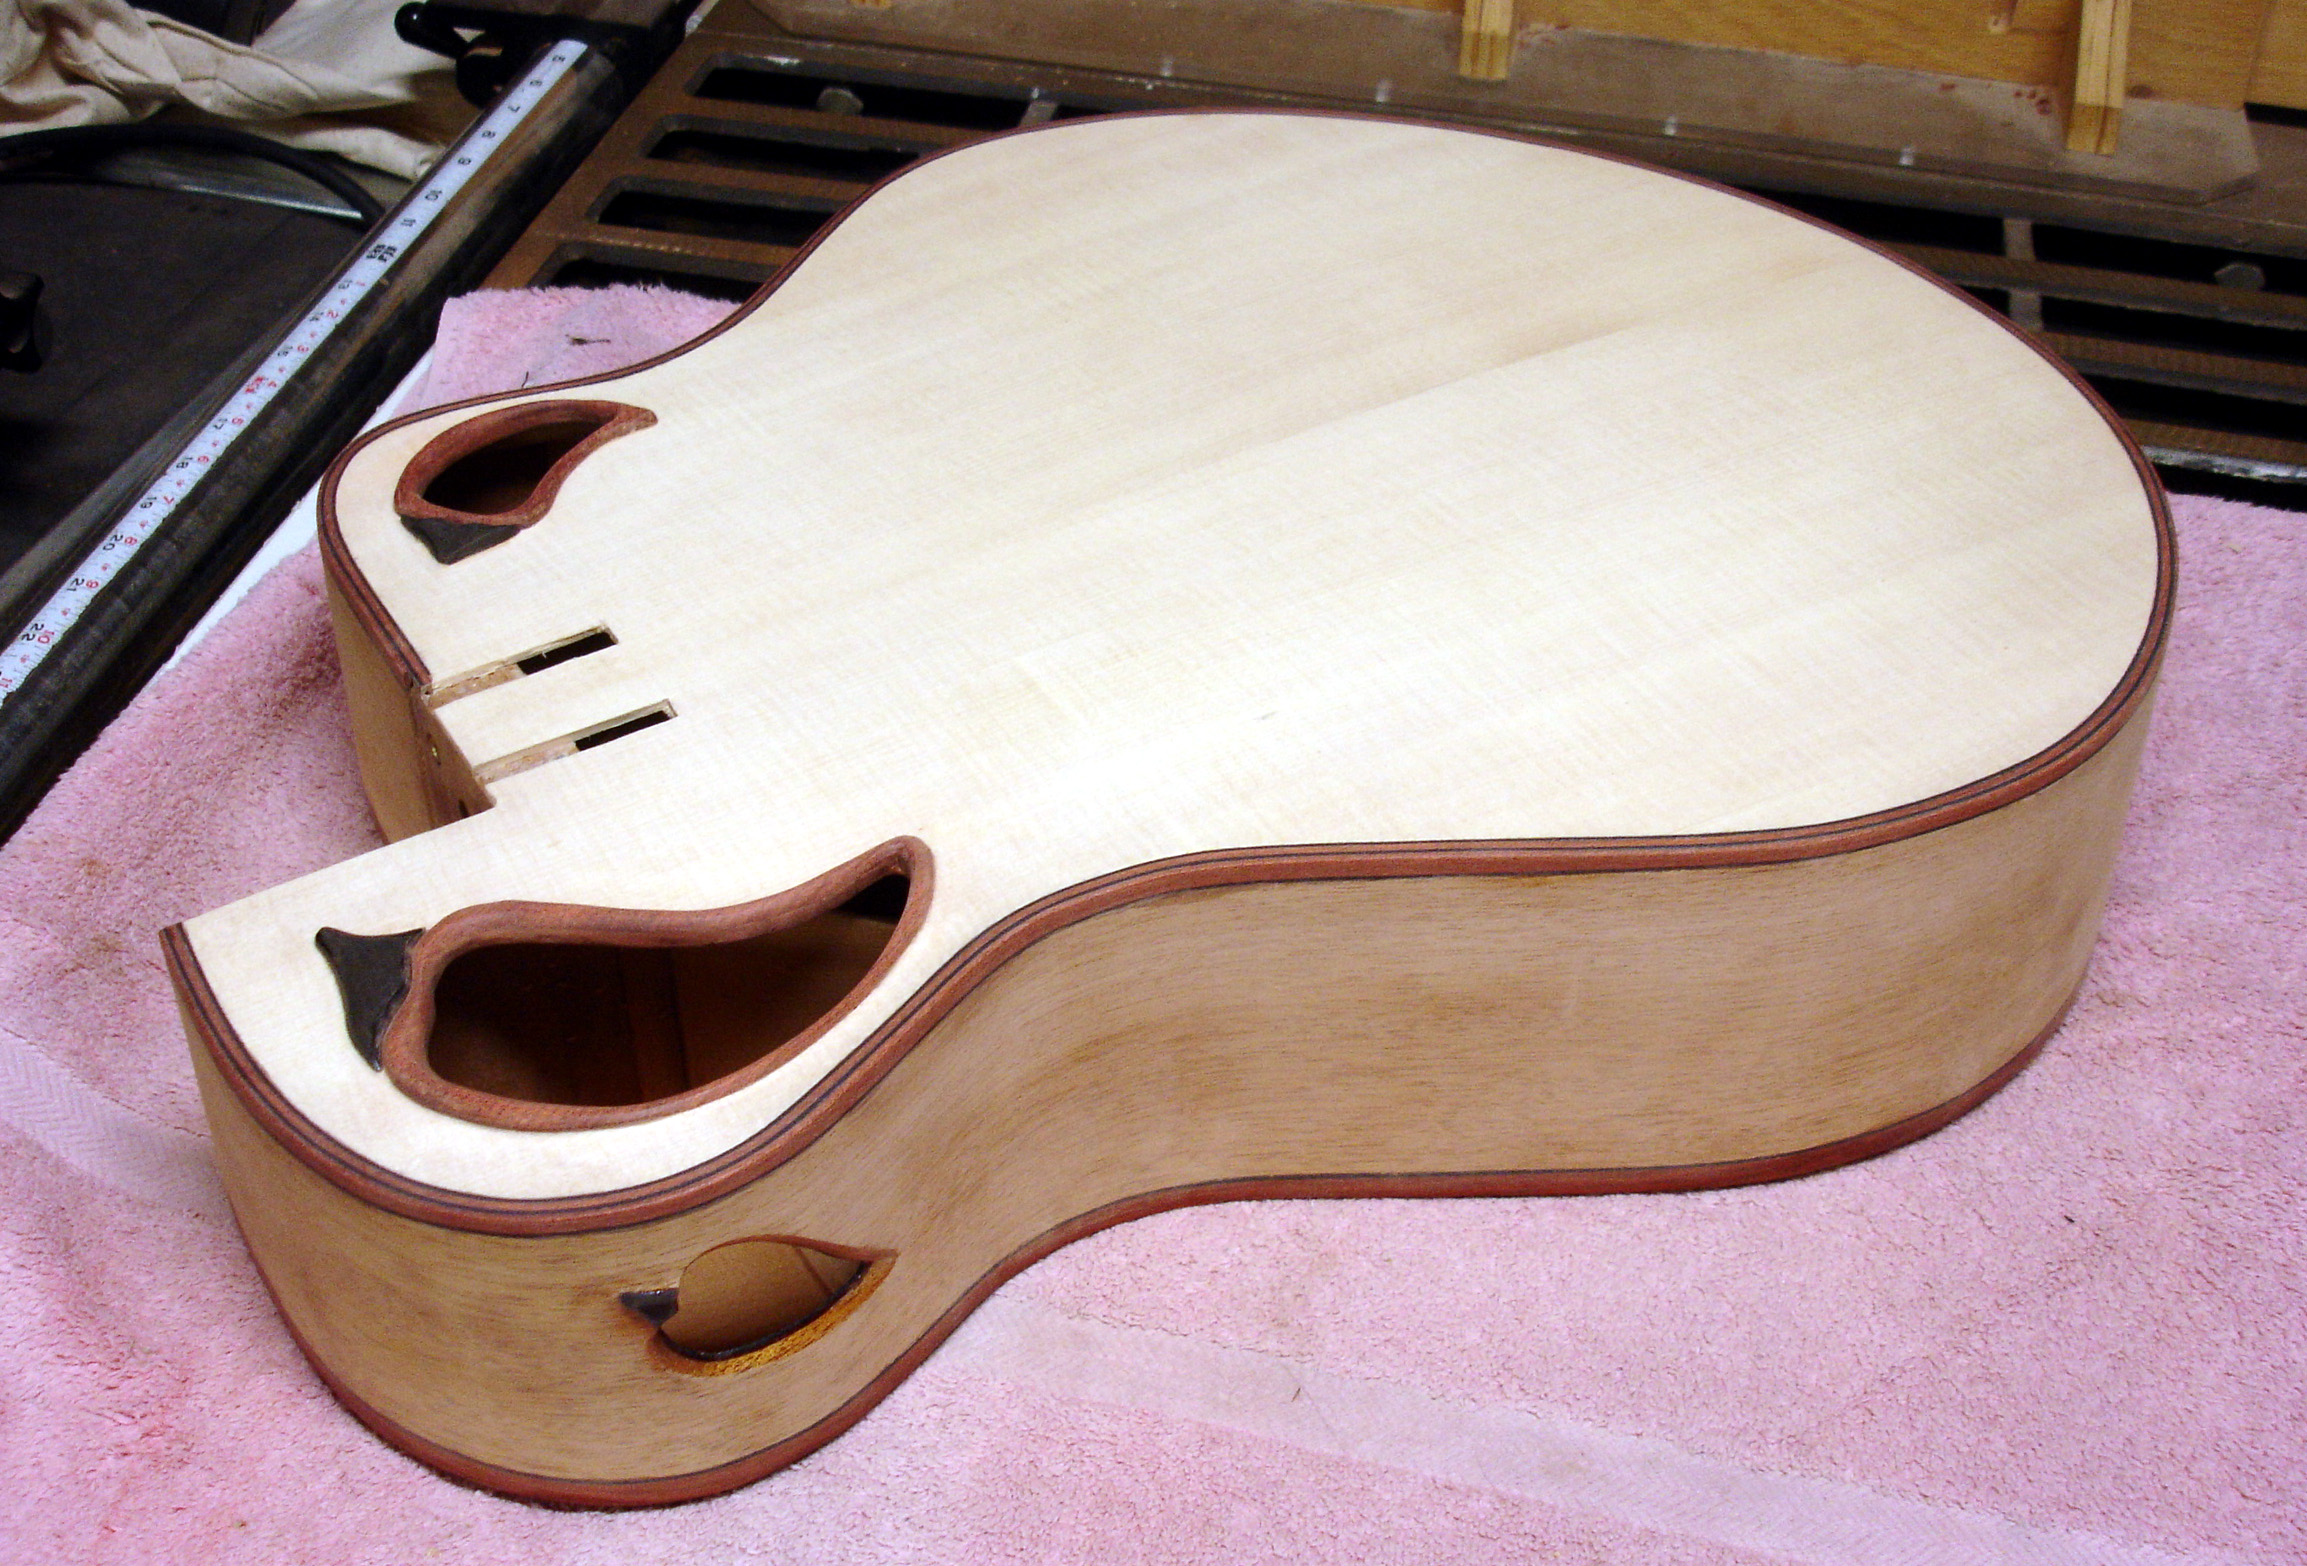
At right you see the top glued to the rims and roughly trimmed. After the box is fully assembled (back installed) a ledge will be cut around the back and top edges for binding and purfling (decorative edge strips). I will use blood wood and maple for this to tie together what going on with the rest of the design. You can see the chile holes with the ebony stems. These will be fine tuned when I start the final sanding.
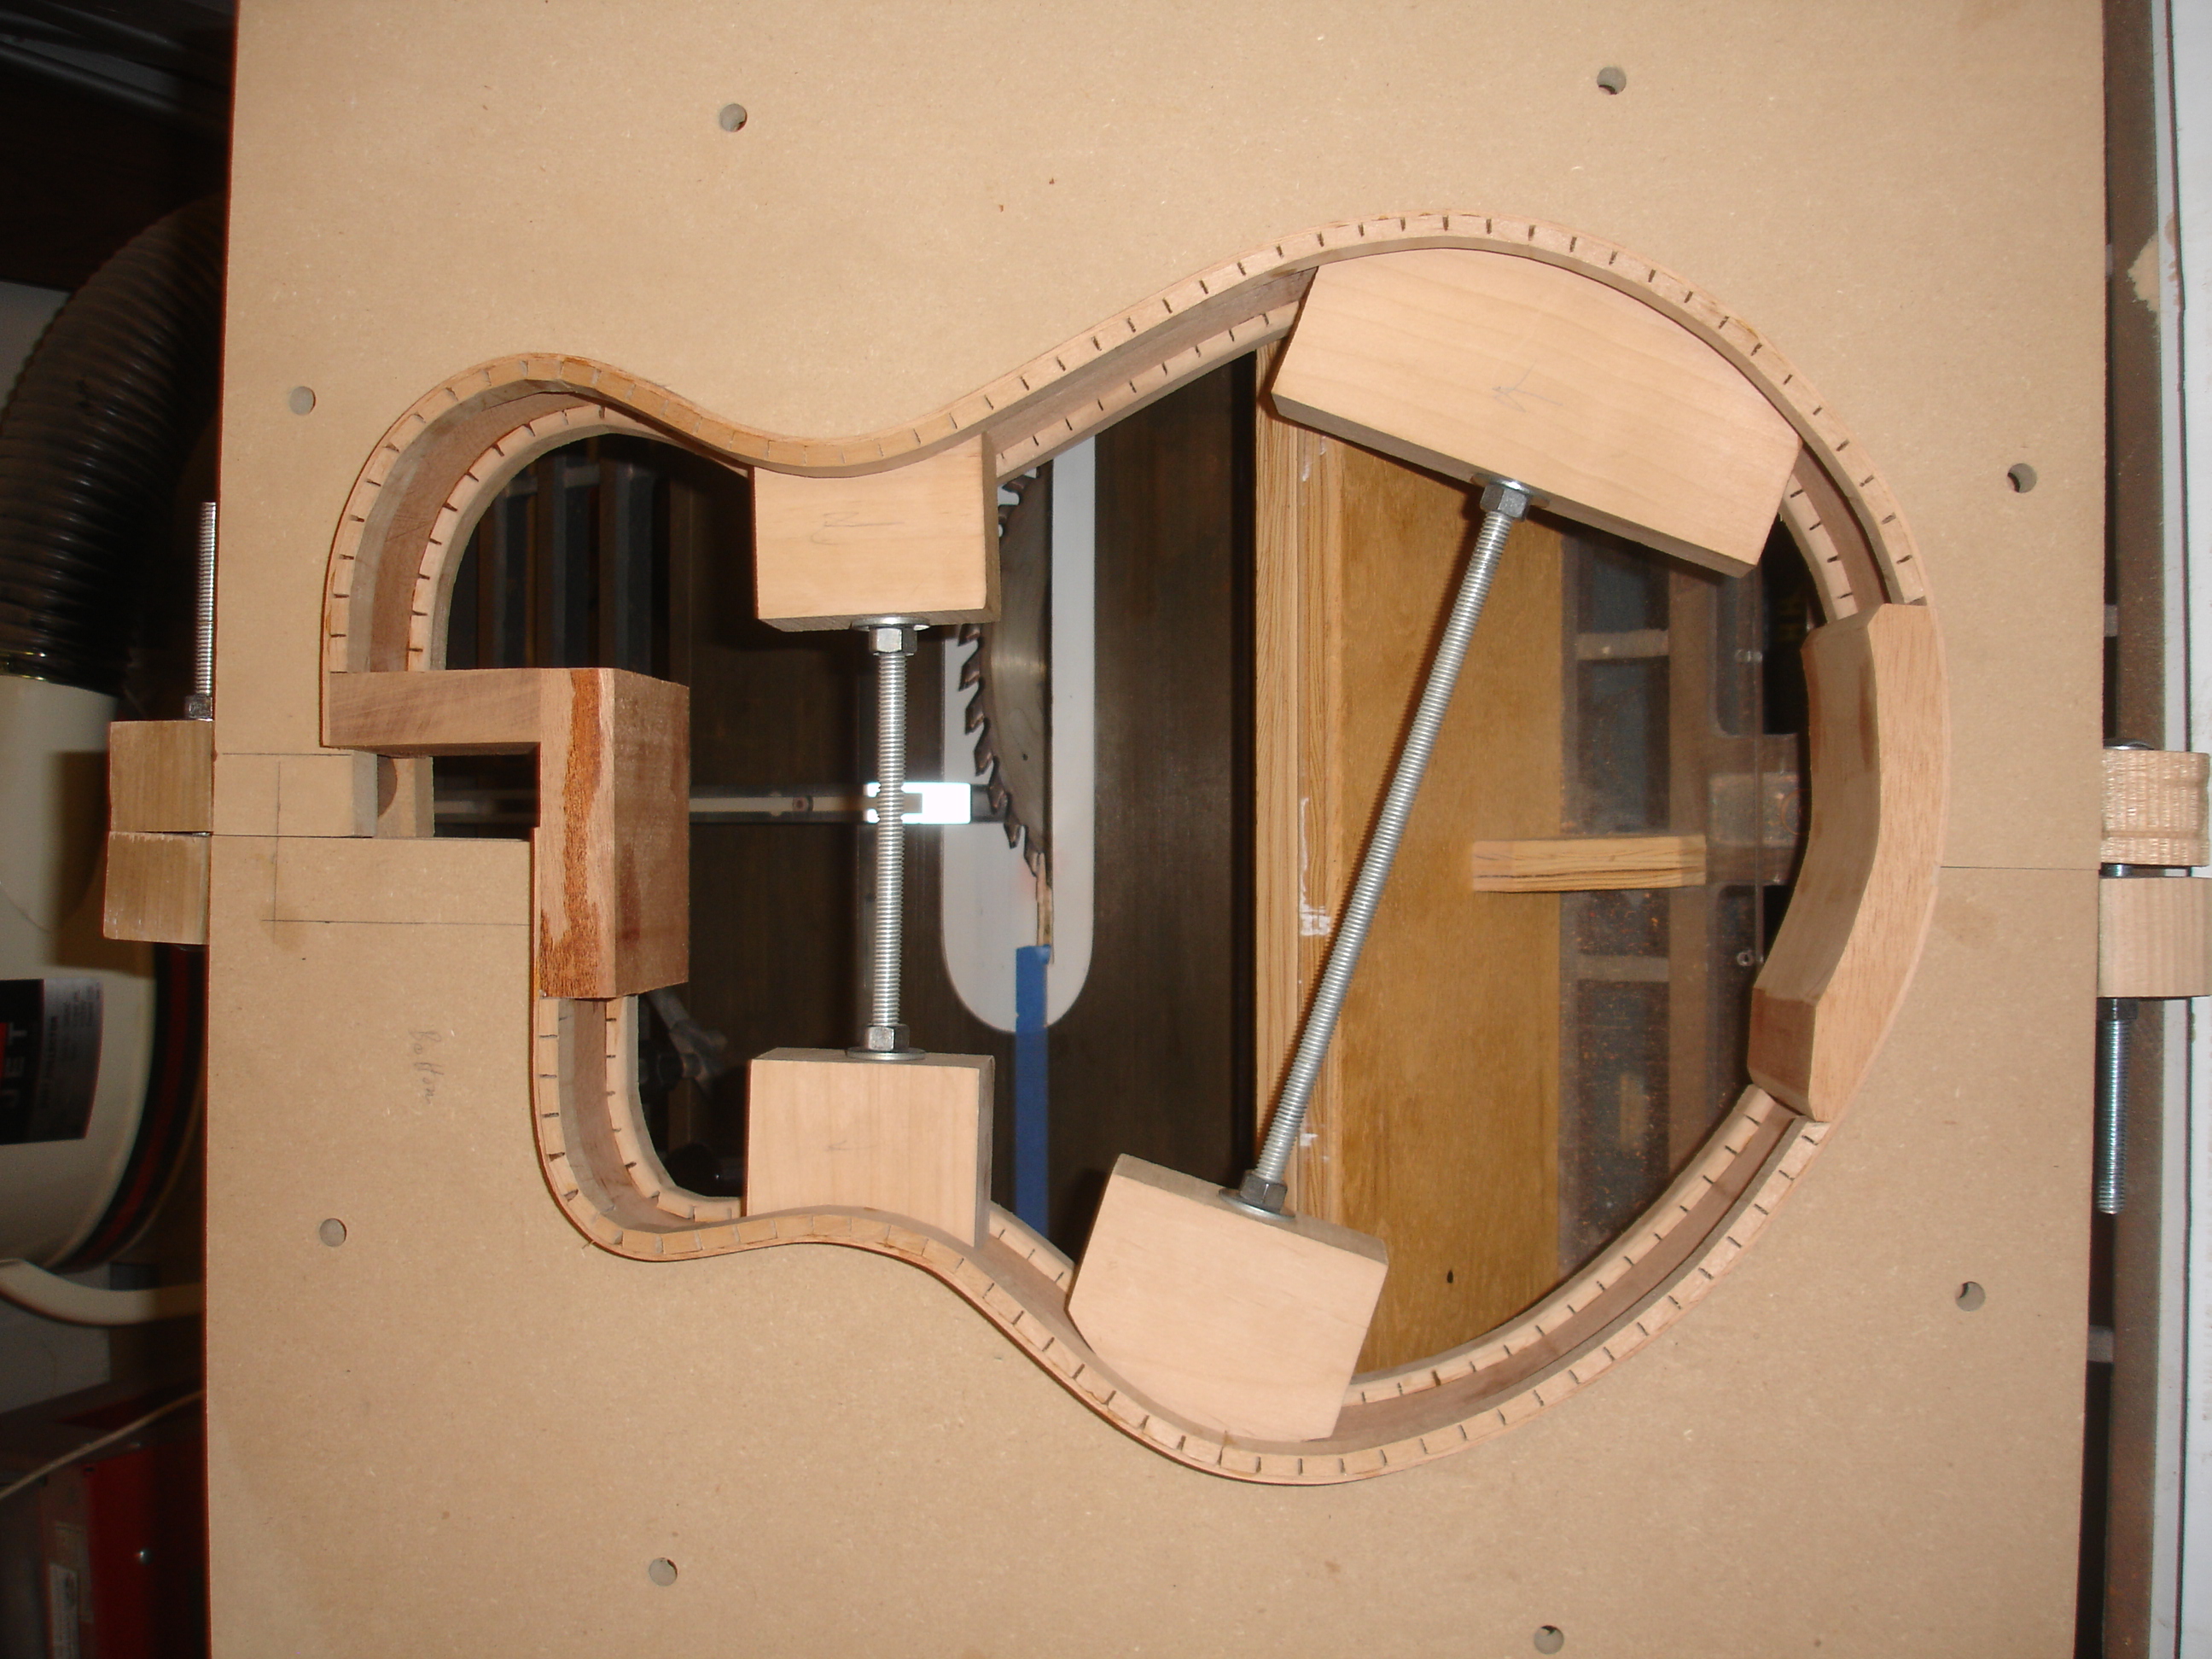
Here you see the inside of the box. You can see how the whole structure works together.
The braces have been contoured and a maple bridge plate has been installed. It is
hard to see because there is not much contrast between the maple and the spruce,
but it is thin strip glued between the two A braces and the cross connecting braces.
Maple is much stiffer and harder than spruce. This provides a tough anchor for the
strings. The bridge plate ties into the braces to resist the torque the strings apply
to the top. The primary braces forming the A-
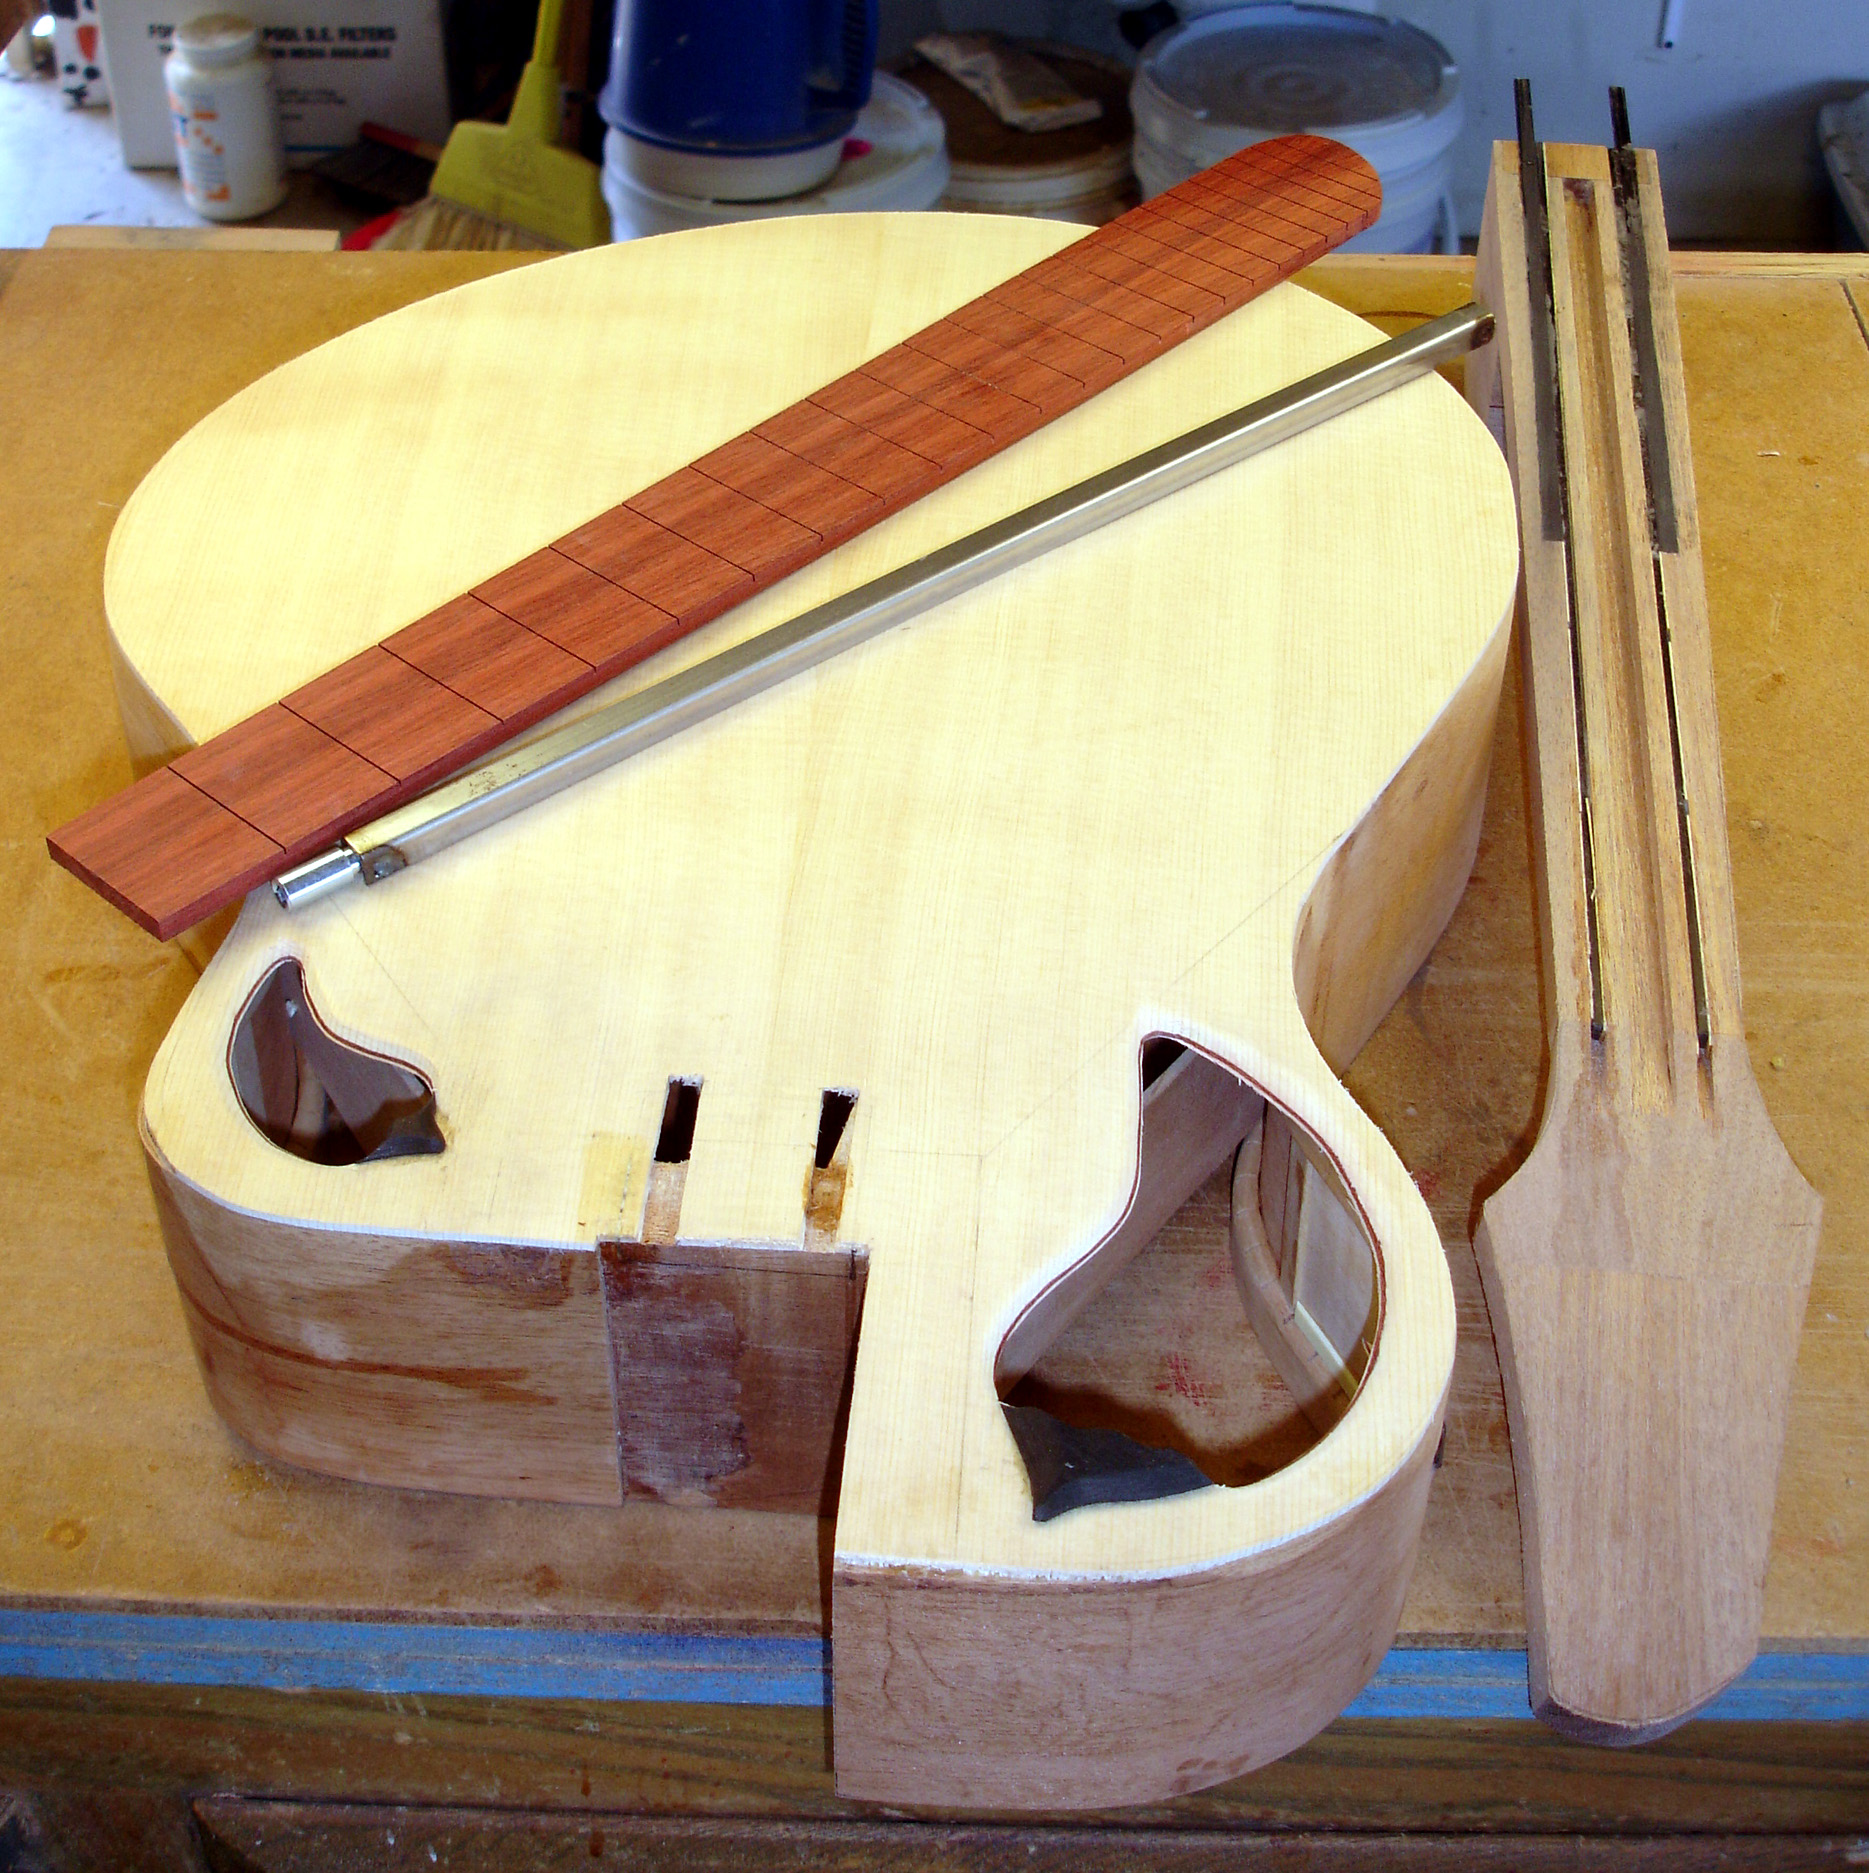
The next job is to rough out the neck to check for fit and drill and fit hard ware for neck attachment and adjustment. To the right you see all completed parts including the fingerboard slotted for frets, and the roughed out neck (back not yet shaped). The neck has been slotted for the truss rod (shown next to the fingerboard). It also has carbon fiber reinforcement to increase neck stiffness and to support the fingerboard past the neck/body junction. Notice that slots have been cut in the top for clearance for the carbon fiber supports.
The Back
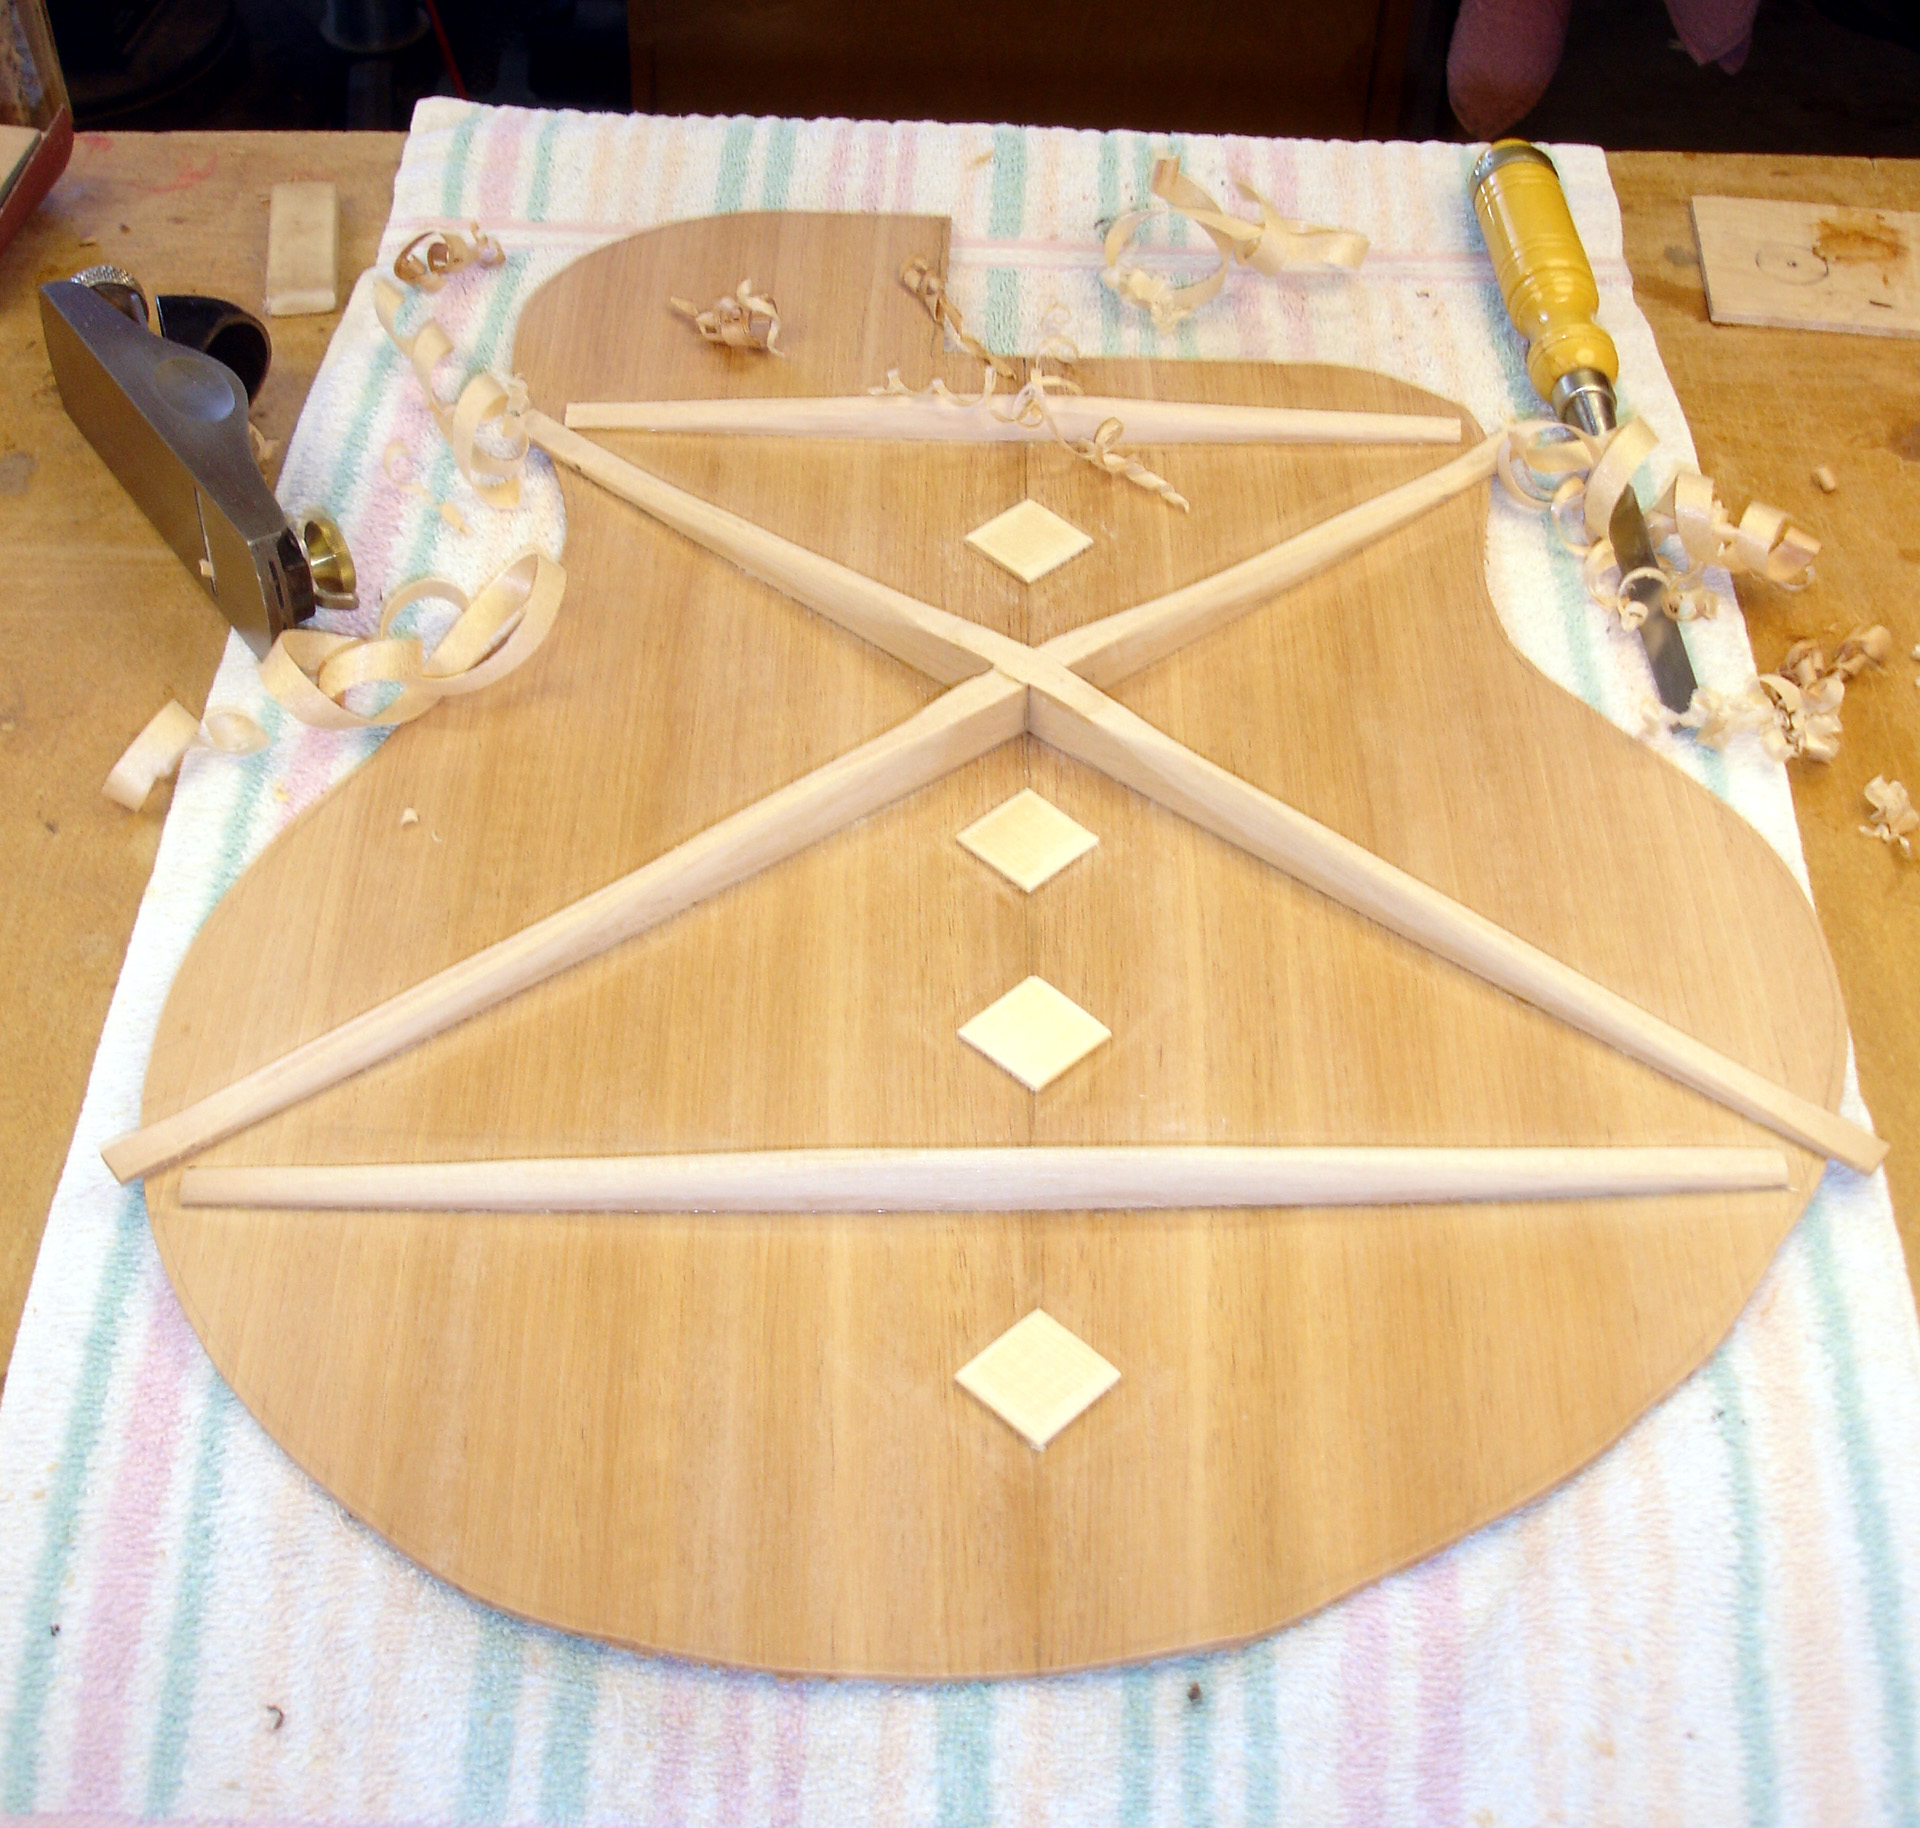
The back has been joined, roughly shaped and braced, as shown here. The back is formed as a dome on a 15’ radius, using a dish like that for the top. The brace material is sitka spruce, the same material used for the top and top braces. It is very light and stiff. I use an X brace pattern for the back, rather than the traditional ladder pattern. The X holds the dome shape well and provides an easily tuned structure.
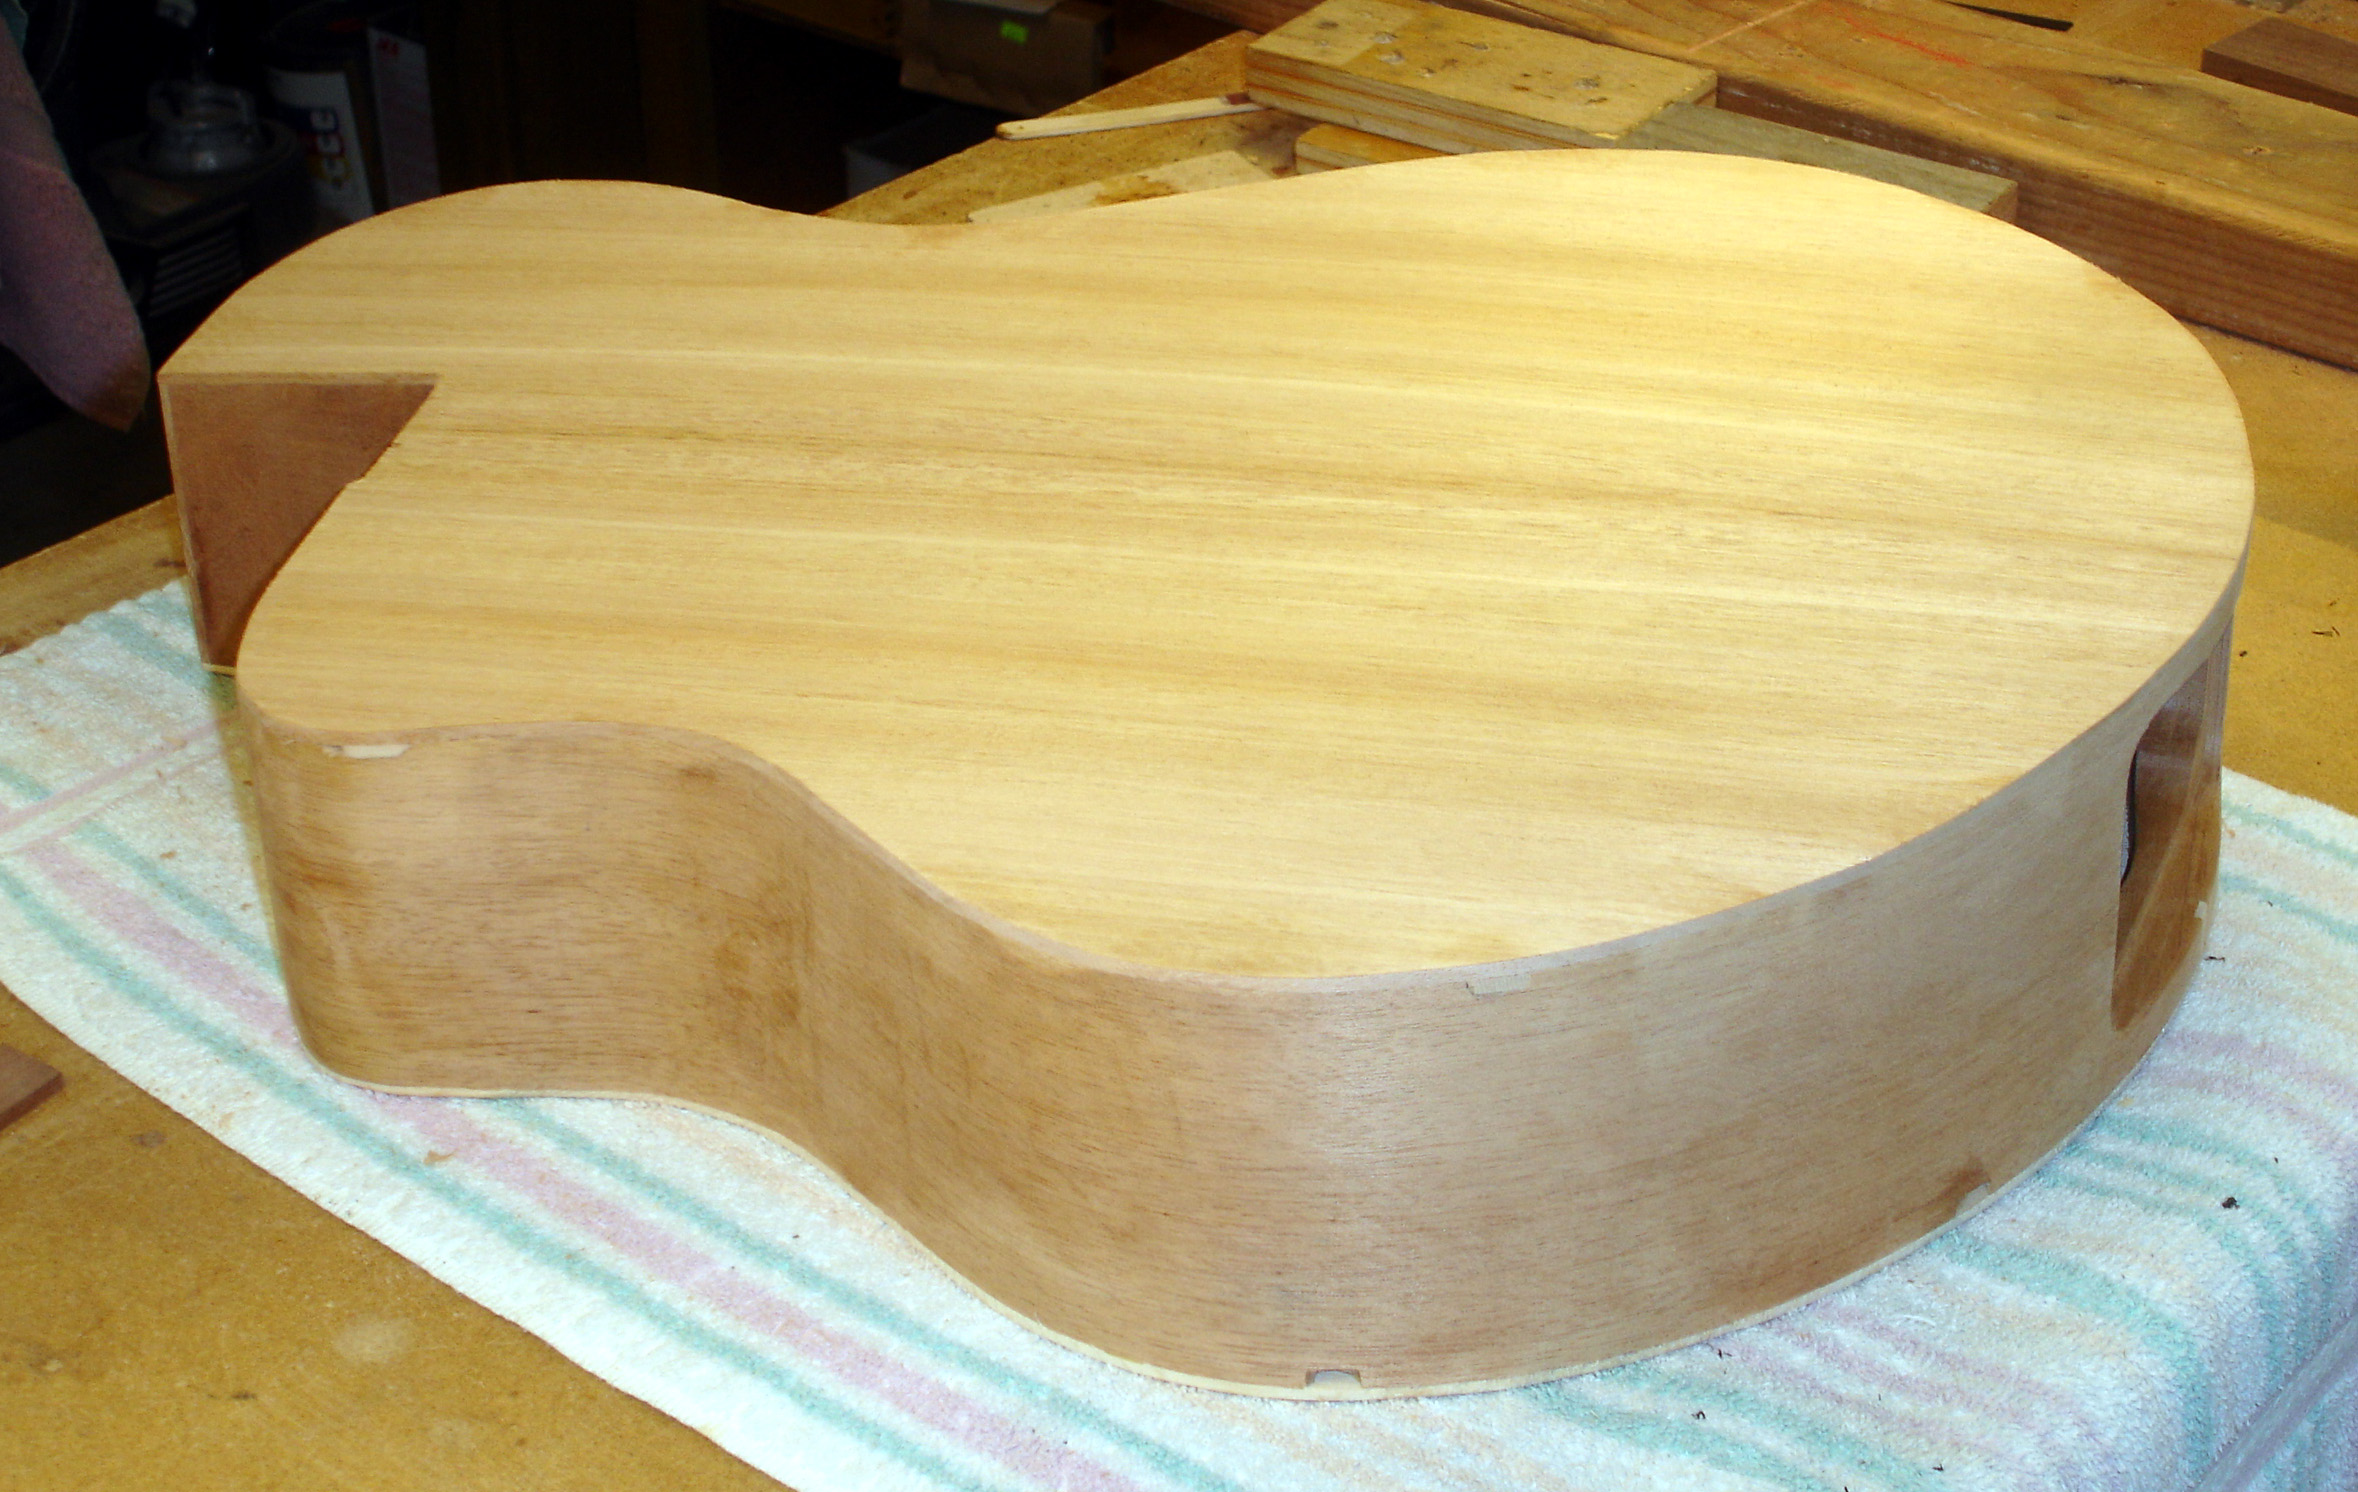
The back has been glued on and the box is now complete, except for cutting and installing binding and purfling. The back and side wood is fairly light in color for mahogany, but it has a nice striped figure. It will darken with finish.
The Neck
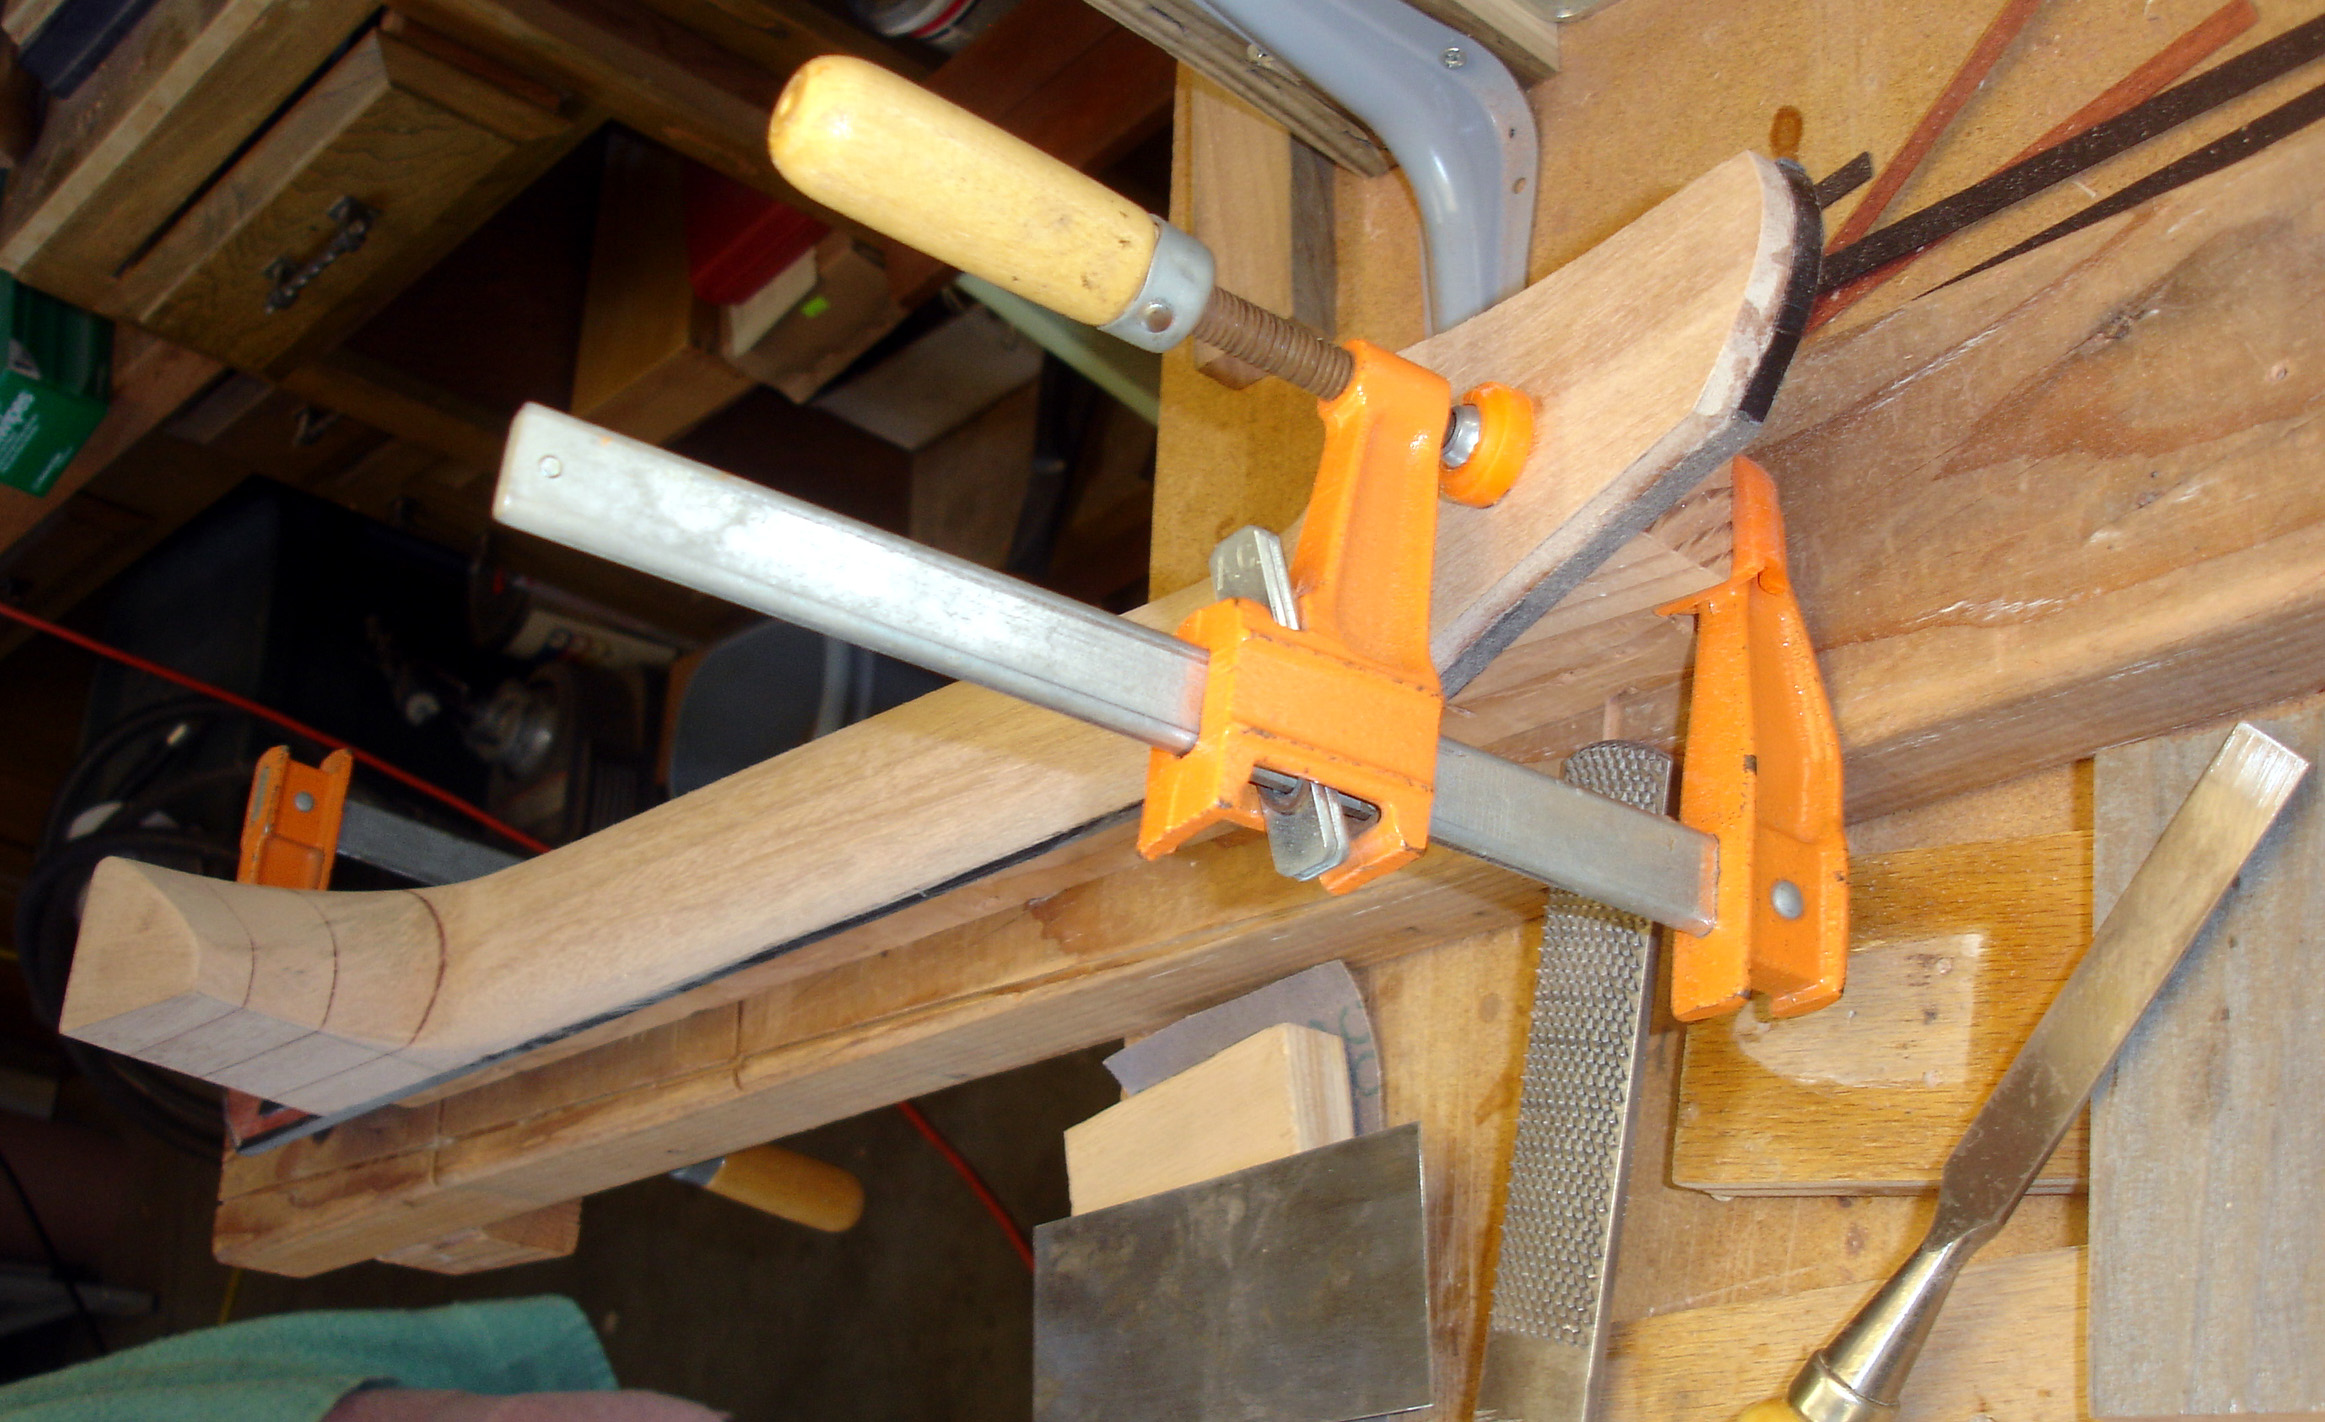
The fingerboard has been attached to the neck. A peghead veneer has been glued on, and binding and purfling has been added to the fingerboard and peghead. Now it is time to shape the neck. The neck is clamped down at right. You can see the neck attachement hardware in the heal.
The neck forming process is one of my favorite steps. I use sharp chisels, rasps, scrapers, etc. to sculpt the neck. The process is completely low tech; I work the wood until it feels right. I literally pick the neck up at intervals and wrap my hand around it, run it up and down. When it feels like a guitar neck, I am done.
The pictures are probably too small to appreciate the detail. The first picture shows a flat, unsculpted neck after the first few cuts from a chisel (the heal has been roughly shaped). In the second picture, it has been smoothed into its final form, awaiting finish sanding and then finish. Notice the blood wood veneer lines added to accent the stacked heal.
Let’s Try That Again
It has been a while since I have posted an update. Things have been going slow due
to excessive business travel of late. More seriously, I had a bit of a set back (just
in case you thought this always goes smoothly). The angles in the neck heal and neck
block were not set correctly. The result would be an off-
You can see the new top on the right. I decided to modify the sound-
The second picture shows the new neck heal being glued on. I also changed the design – more bloodwood and black veneer. To be honest, I didn’t have enough mahogany (I have more mahogany, but not from the same piece of wood – the color wouldn’t match) to repeat the same design, but I think it will look better. This guitar has some bling going on.
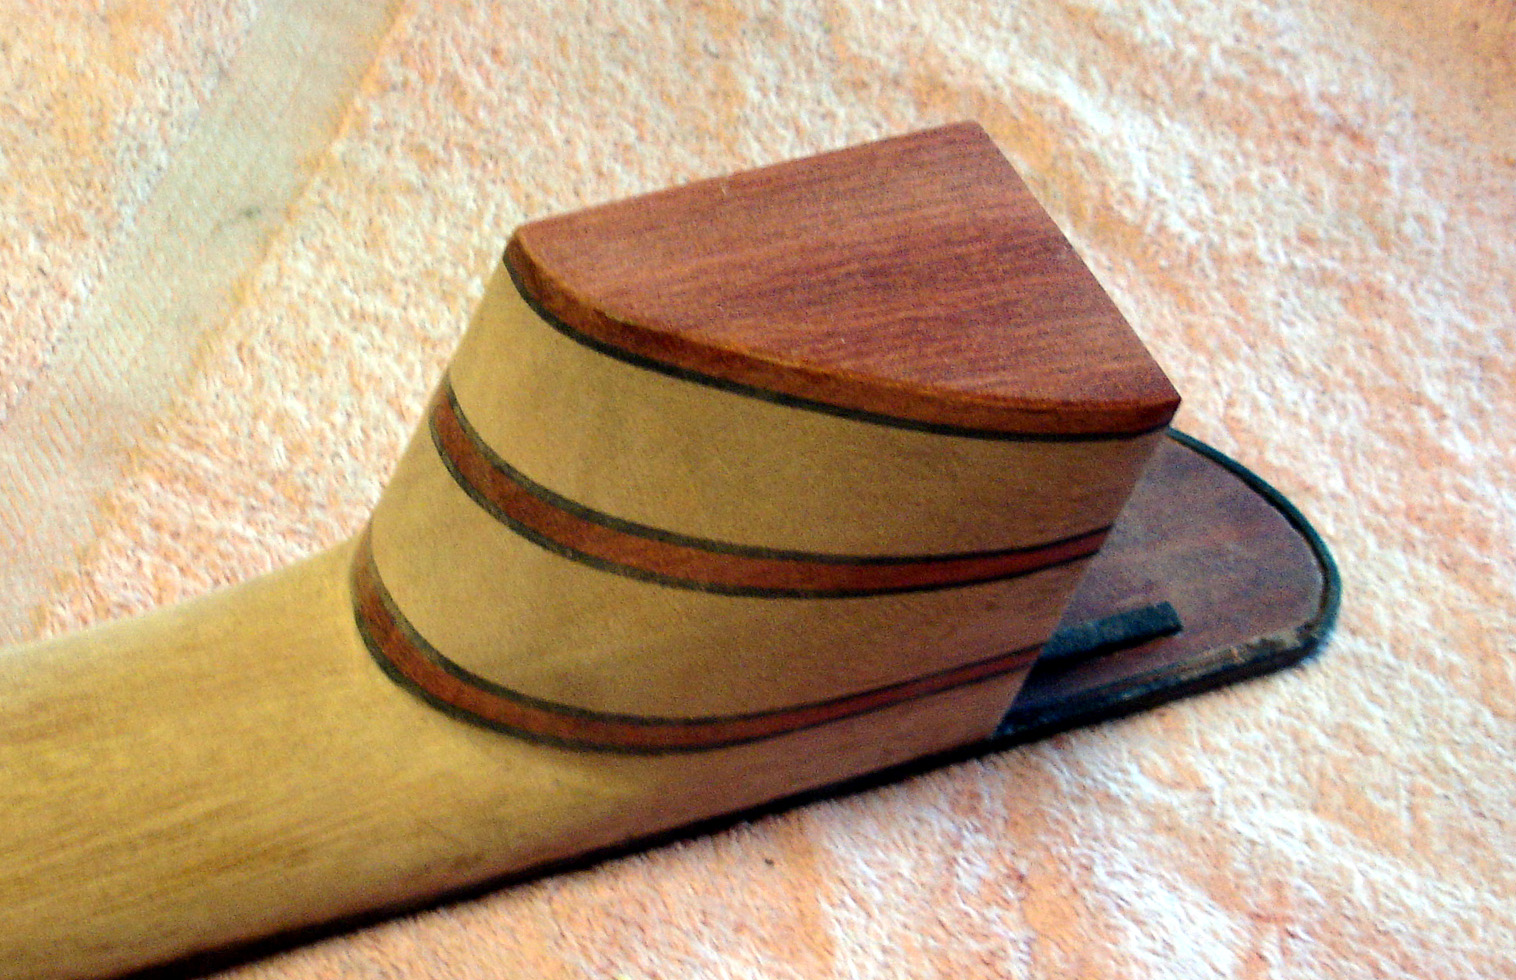
Here you can see the reshaped the neck heal. The mahogany/bloodwood/black veneer sandwich is going to look great with the other accents on the guitar.
Is it a Guitar Yet?
I finally fished the guitar and got it strung up. I am still working on the basic setup. Over the next few weeks it will settle in under string tension. The action is good, but I should be able to lower it a bit. It speaks with a loud voice and already sounds good, but will mellow out some as it settles in.
Generally speaking, I think the design was a success. However, I am already learning from the first version and deciding what to change for version 2.
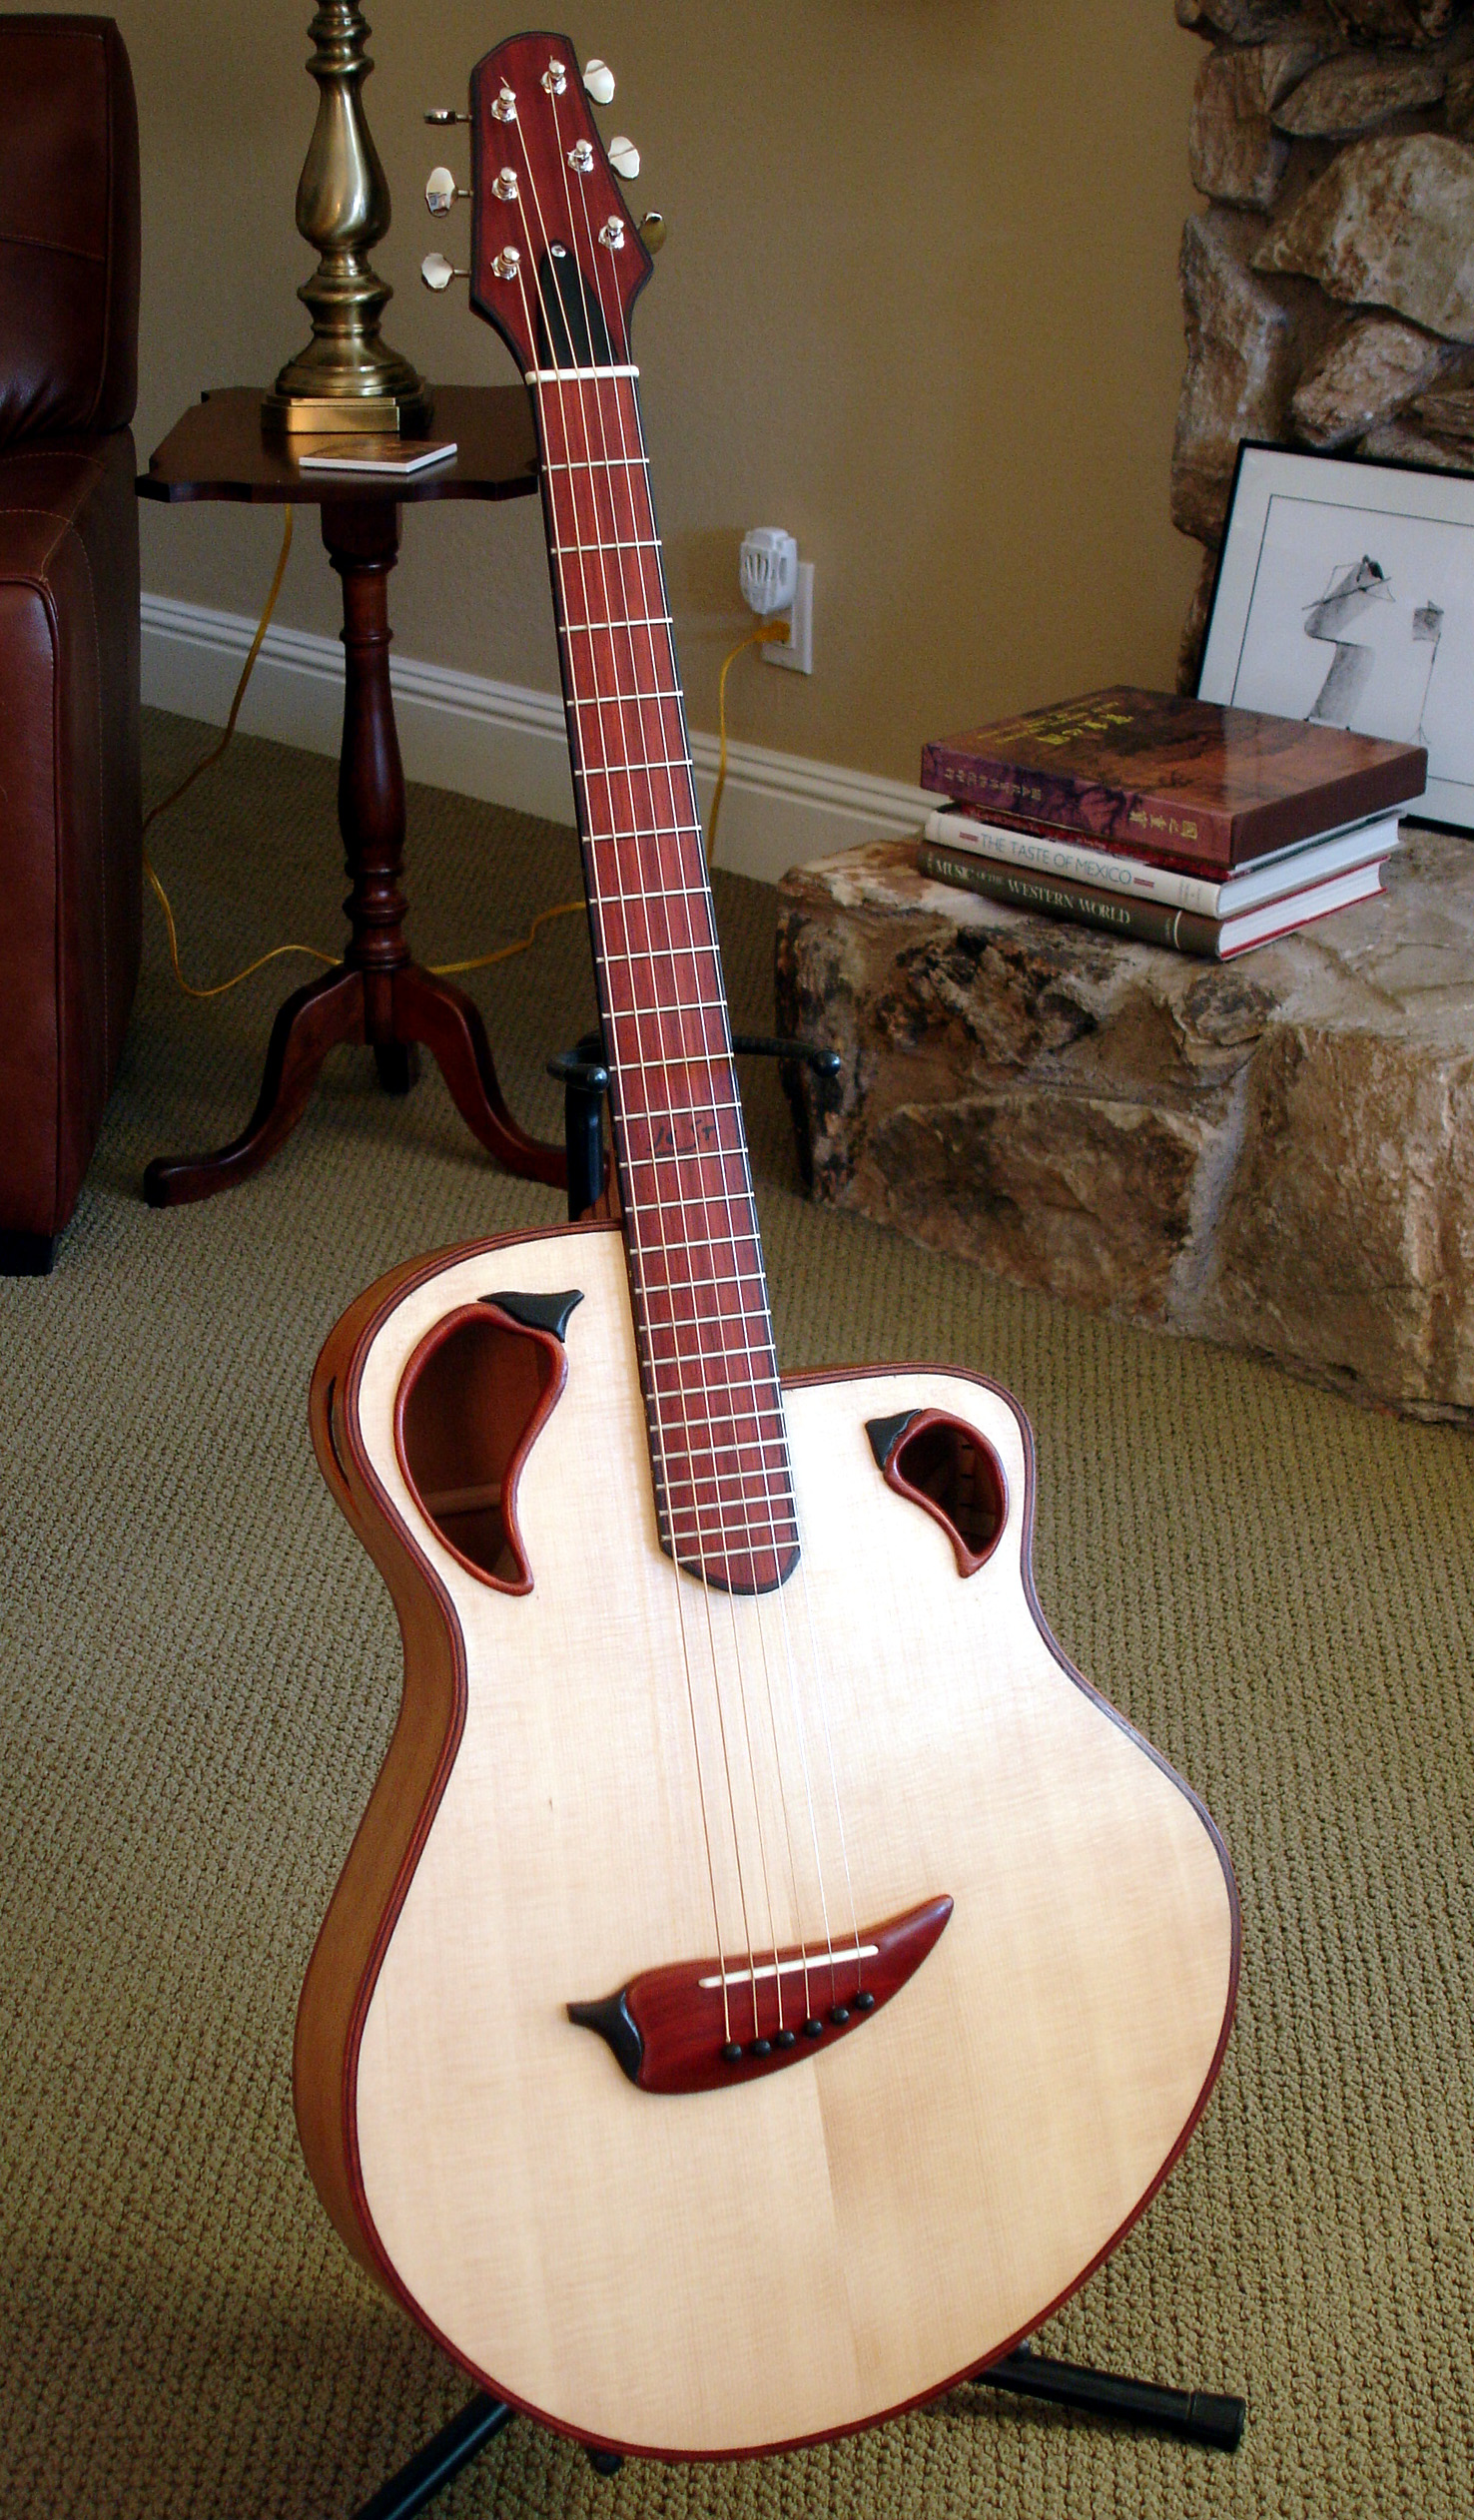
Got to love that chile shaped bridge. It really brings the theme home, and it makes the guitar look like it’s smiling at you.
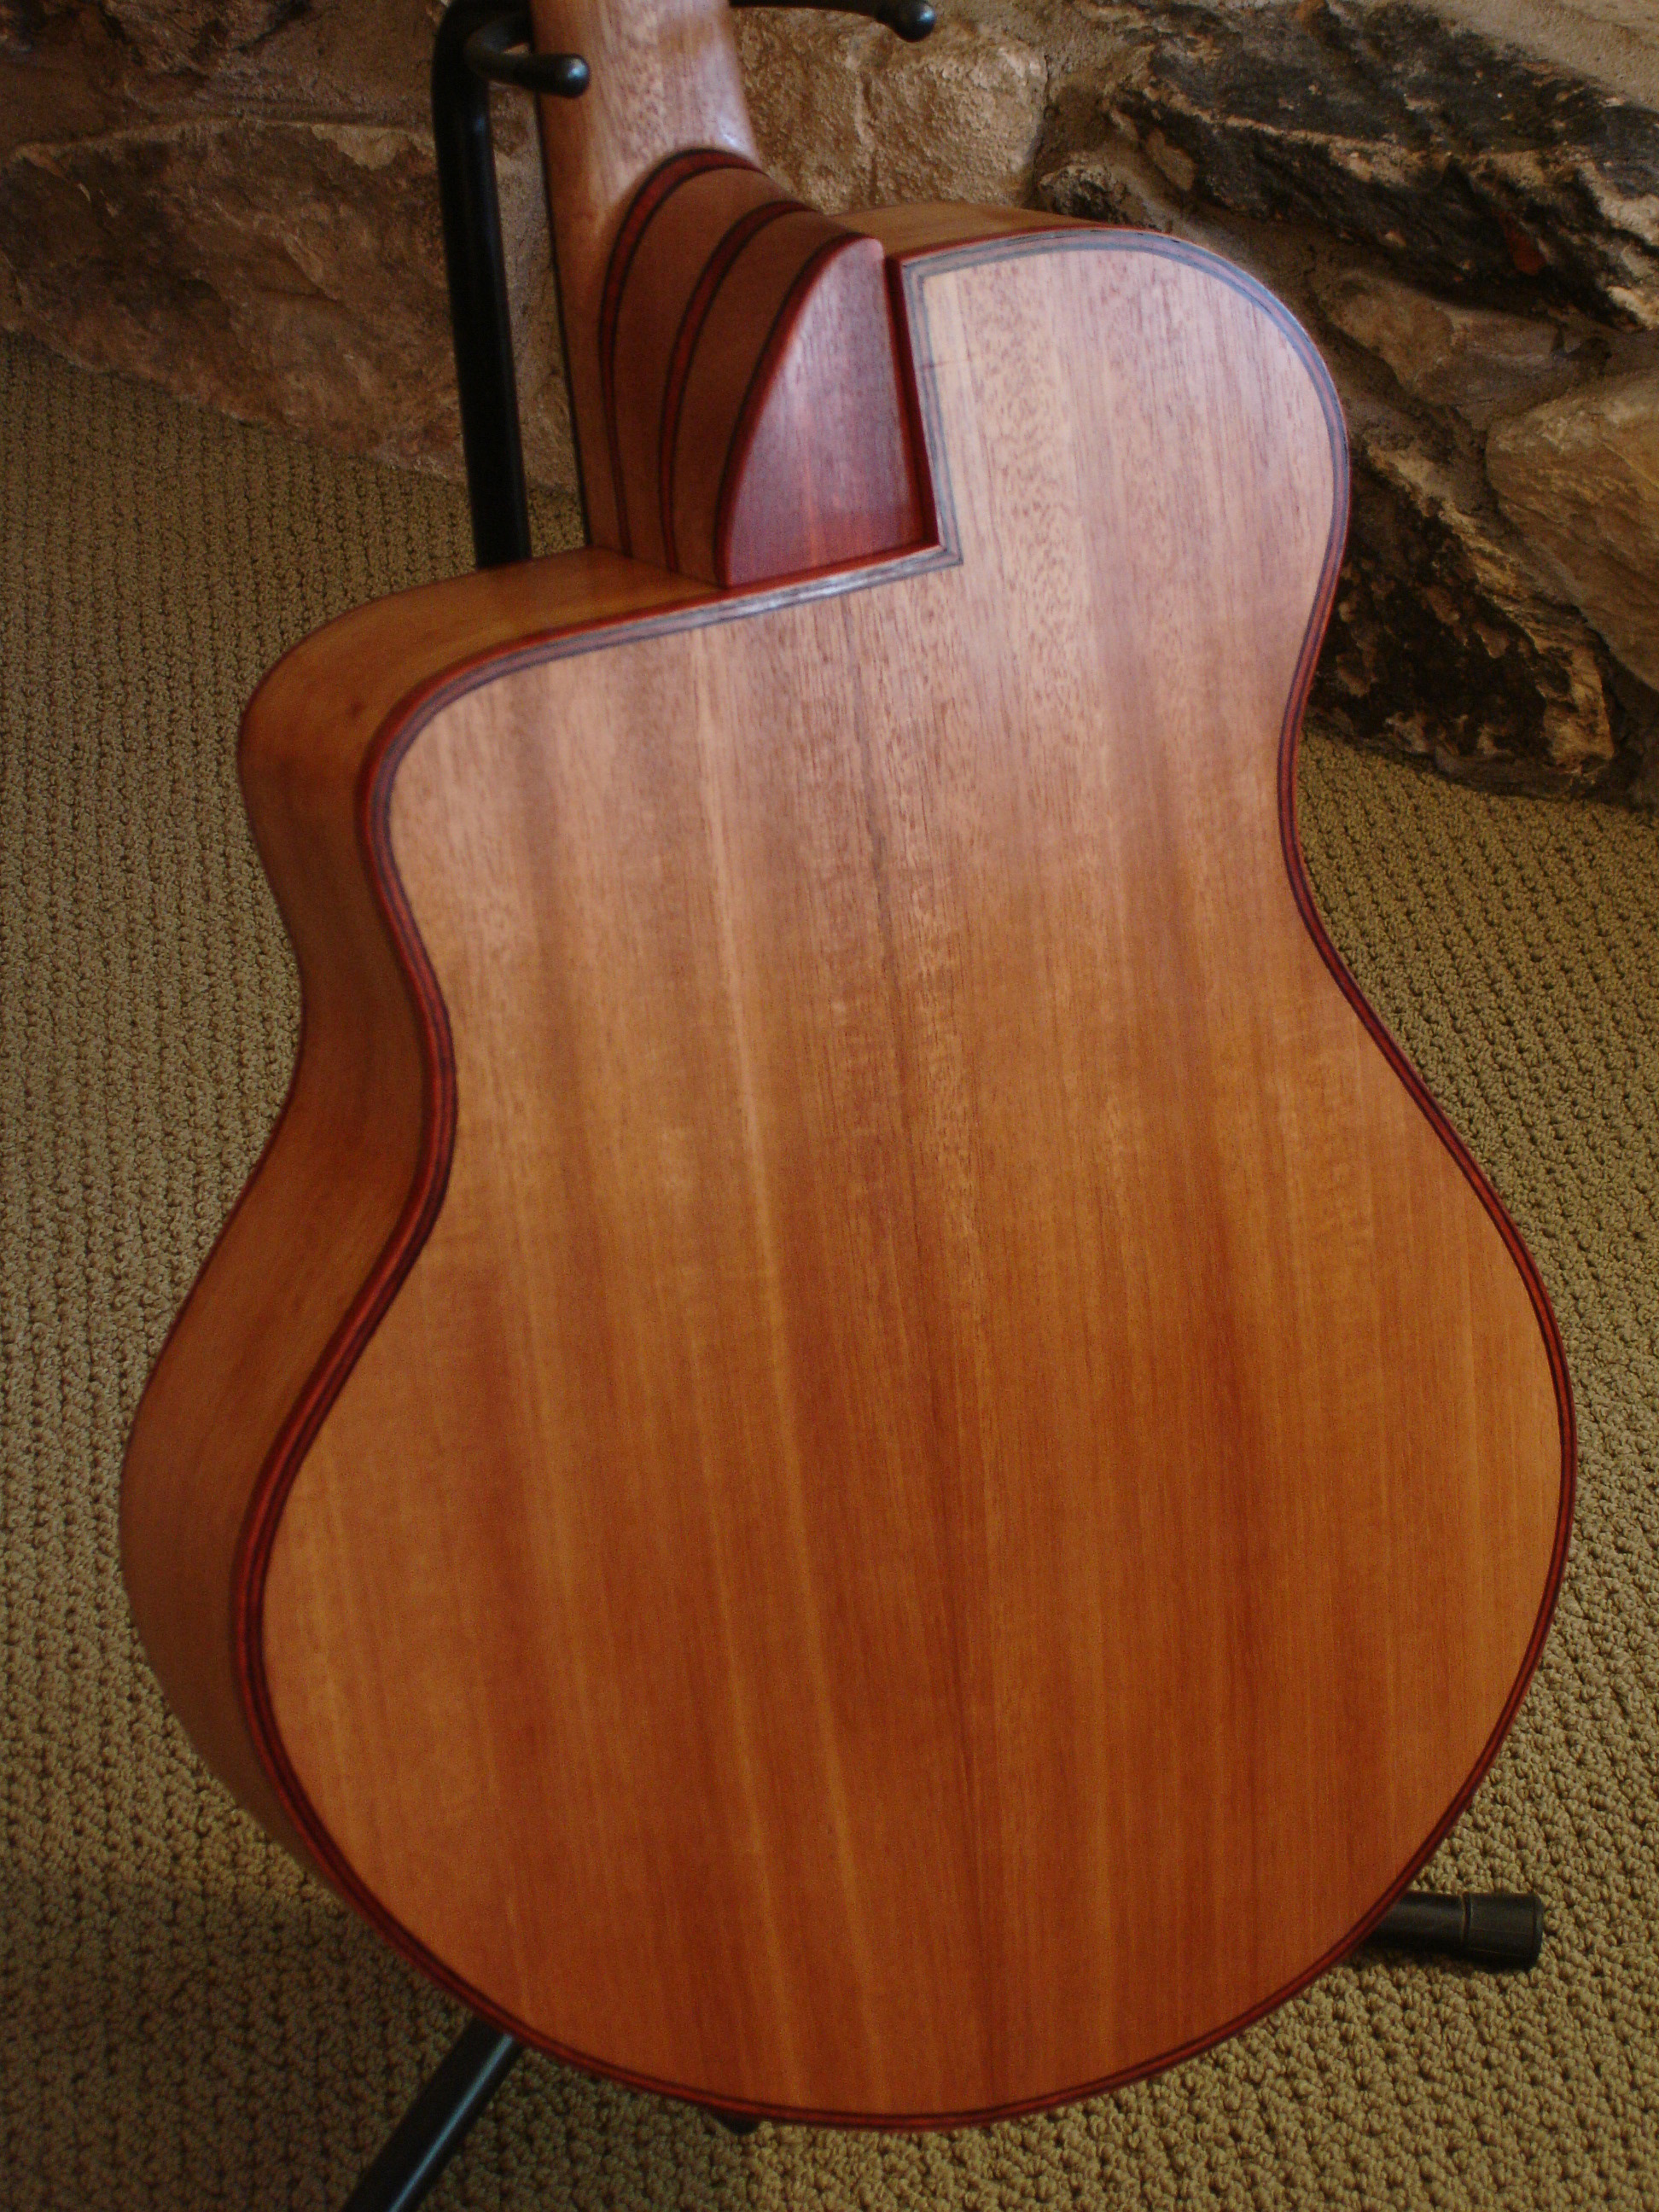
At right is a picture of the back. The right angle neck joint is quite unconventional, and exactly what I had in mind. However, I think I will use an angled smooth transition here on version 2. I think it will look better and make the neck angle easier to set correctly.
That neck heal also looks a bit big. I think I may even try to reduce it a bit on this one.
I like the mahogany body. It has a nice elegant tan color, and a mahogany body always sounds great. The casket walnut I have planned for the next version should also work very well. The color will be a darker brown with some more color and grain variation. There is a subtle streak of red that should be picked up by the bloodwood accents.
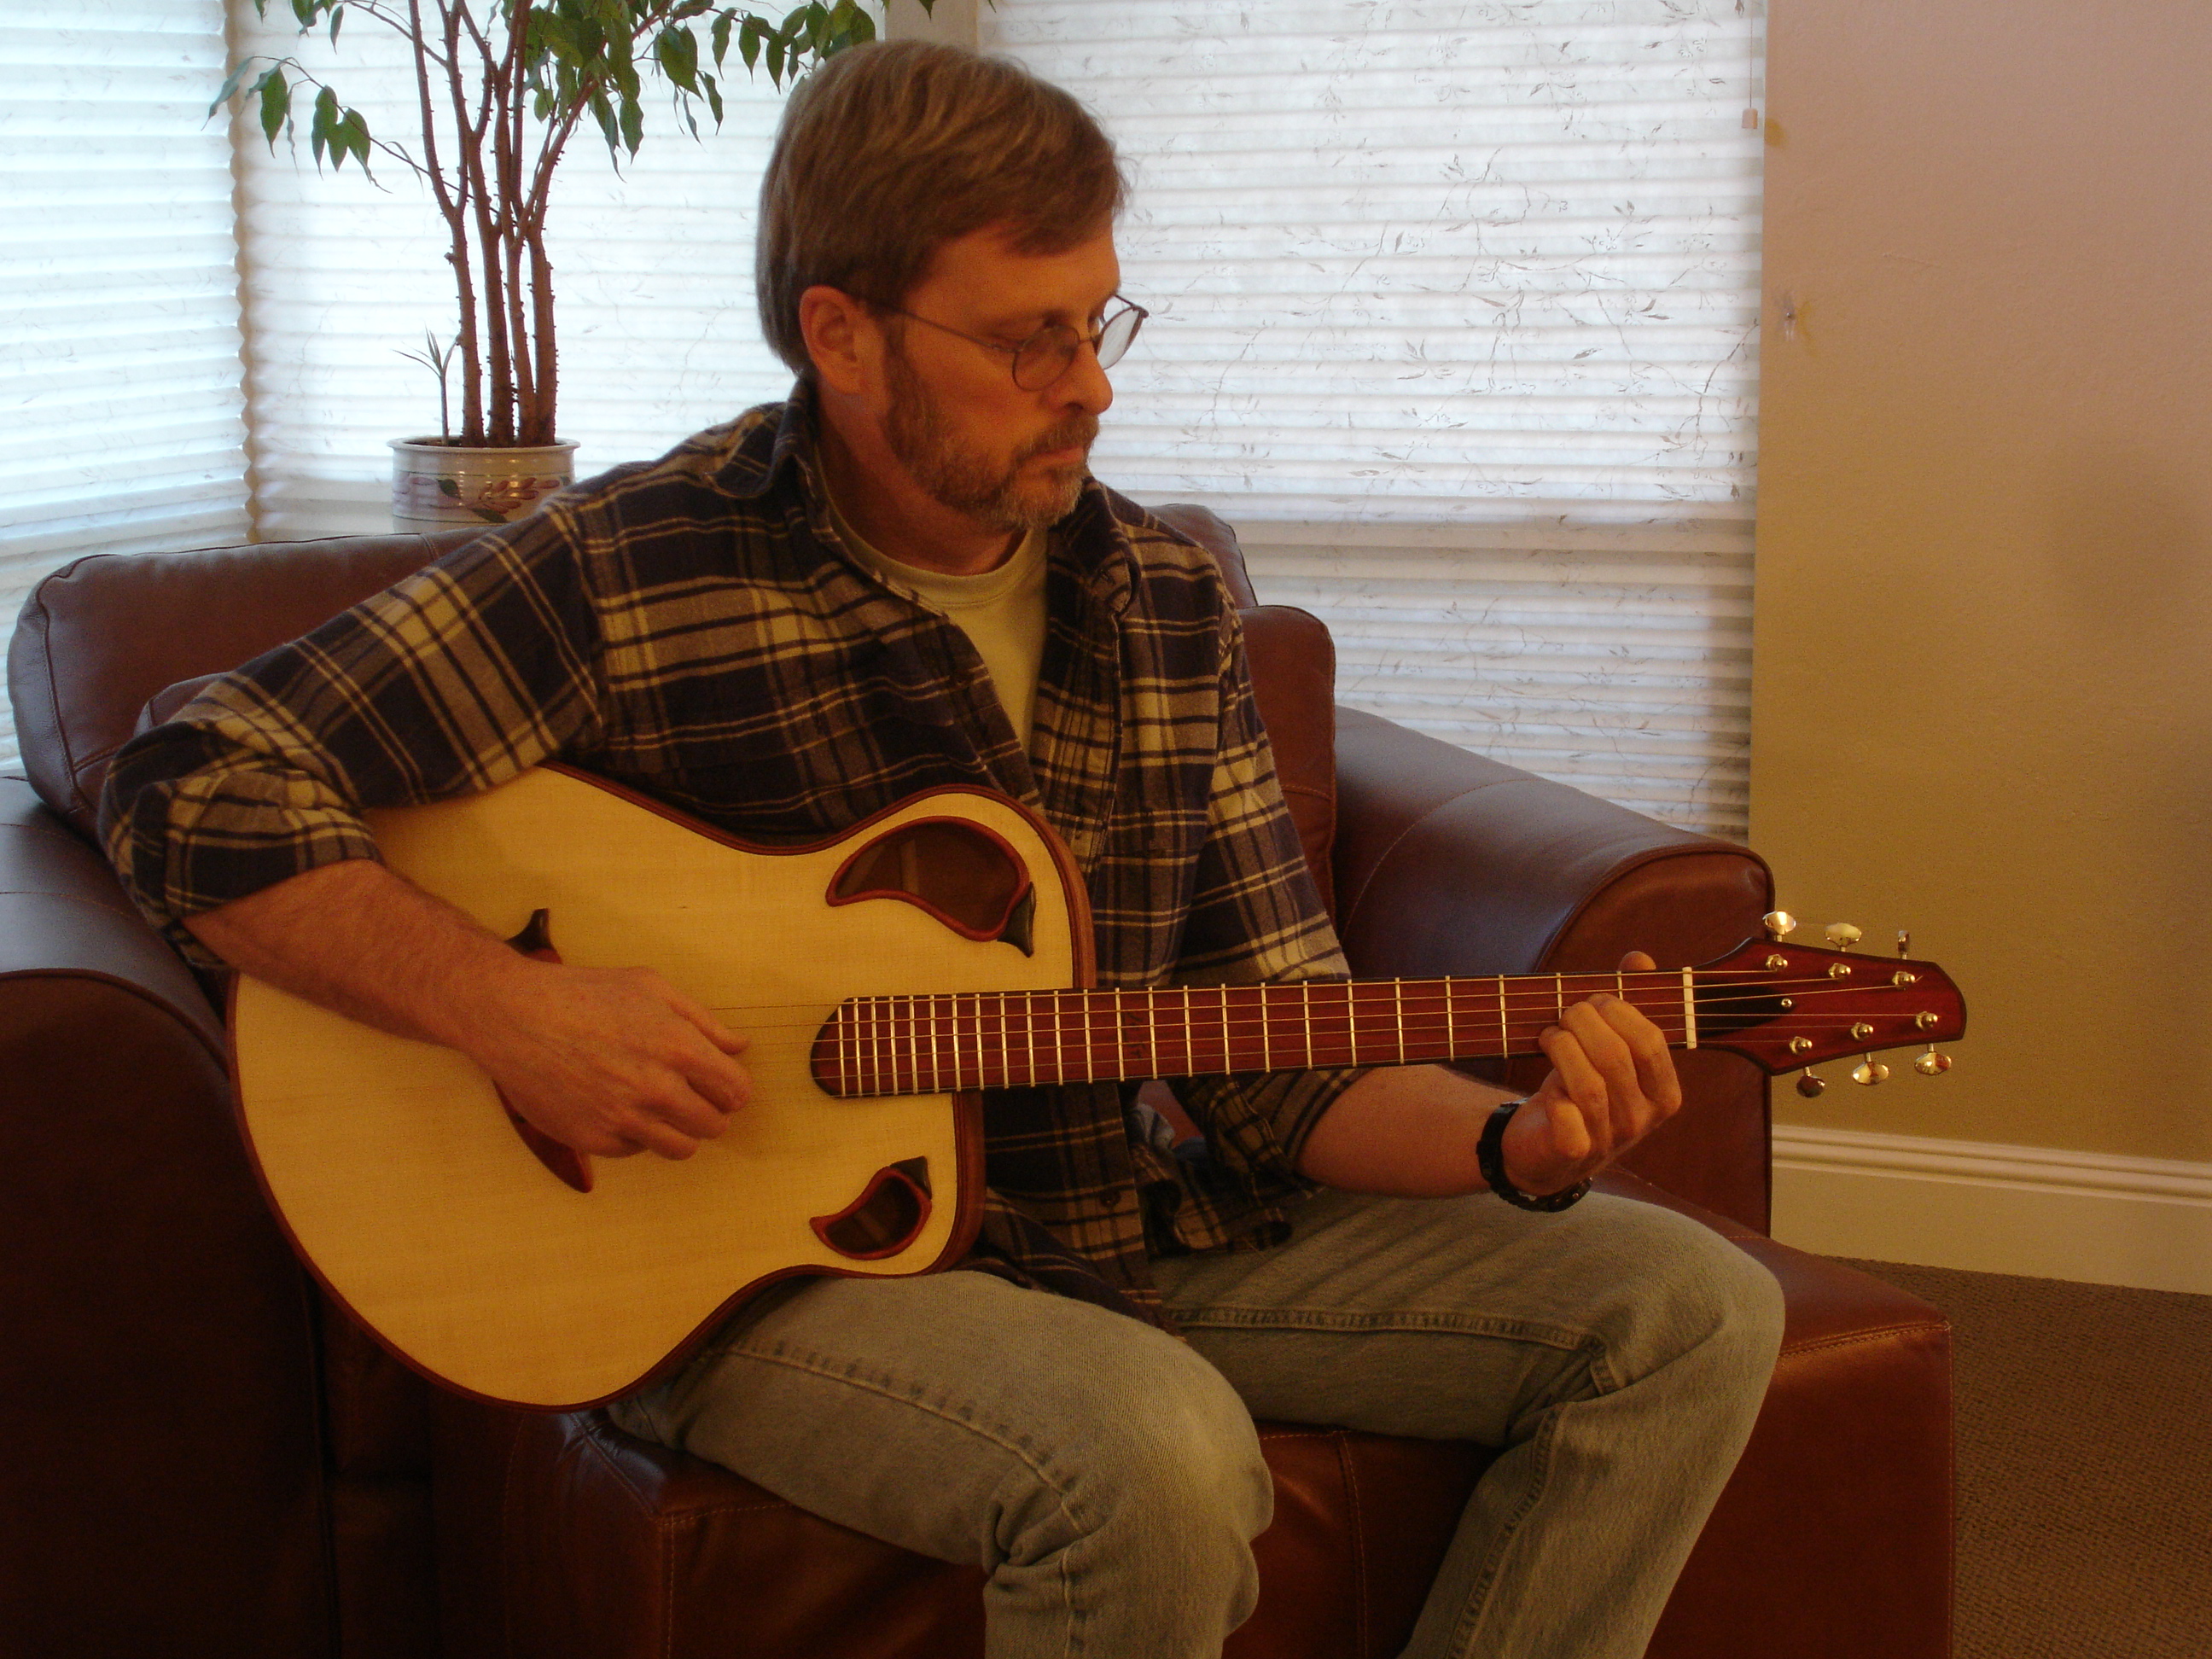
Finally, at right you see a picture of me giving the new guitar a spin. It sounds good. I am sure it would sound great in the hands of a real player.
Chili 1 -