I have started a new semi-
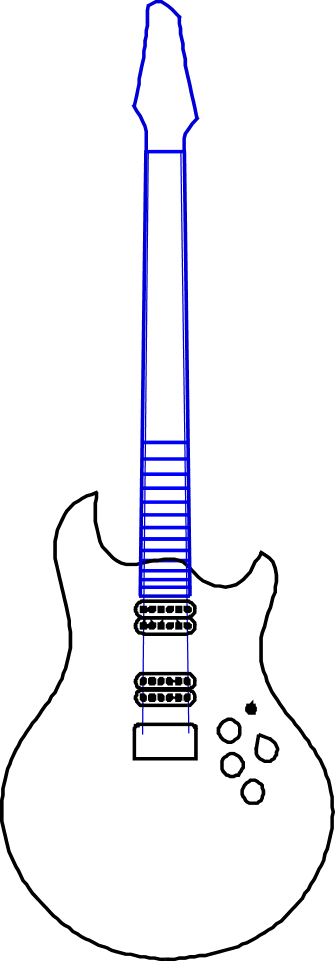
After exploring wood options, Mark felt that he wanted an all mahogany guitar. I am using plain mahogany back and sides (bent like an acoustic), matched to a figured mahogany top. The neck will also be mahogany. Fingerboard, binding and accents will be bloodwood, with thin black accents.
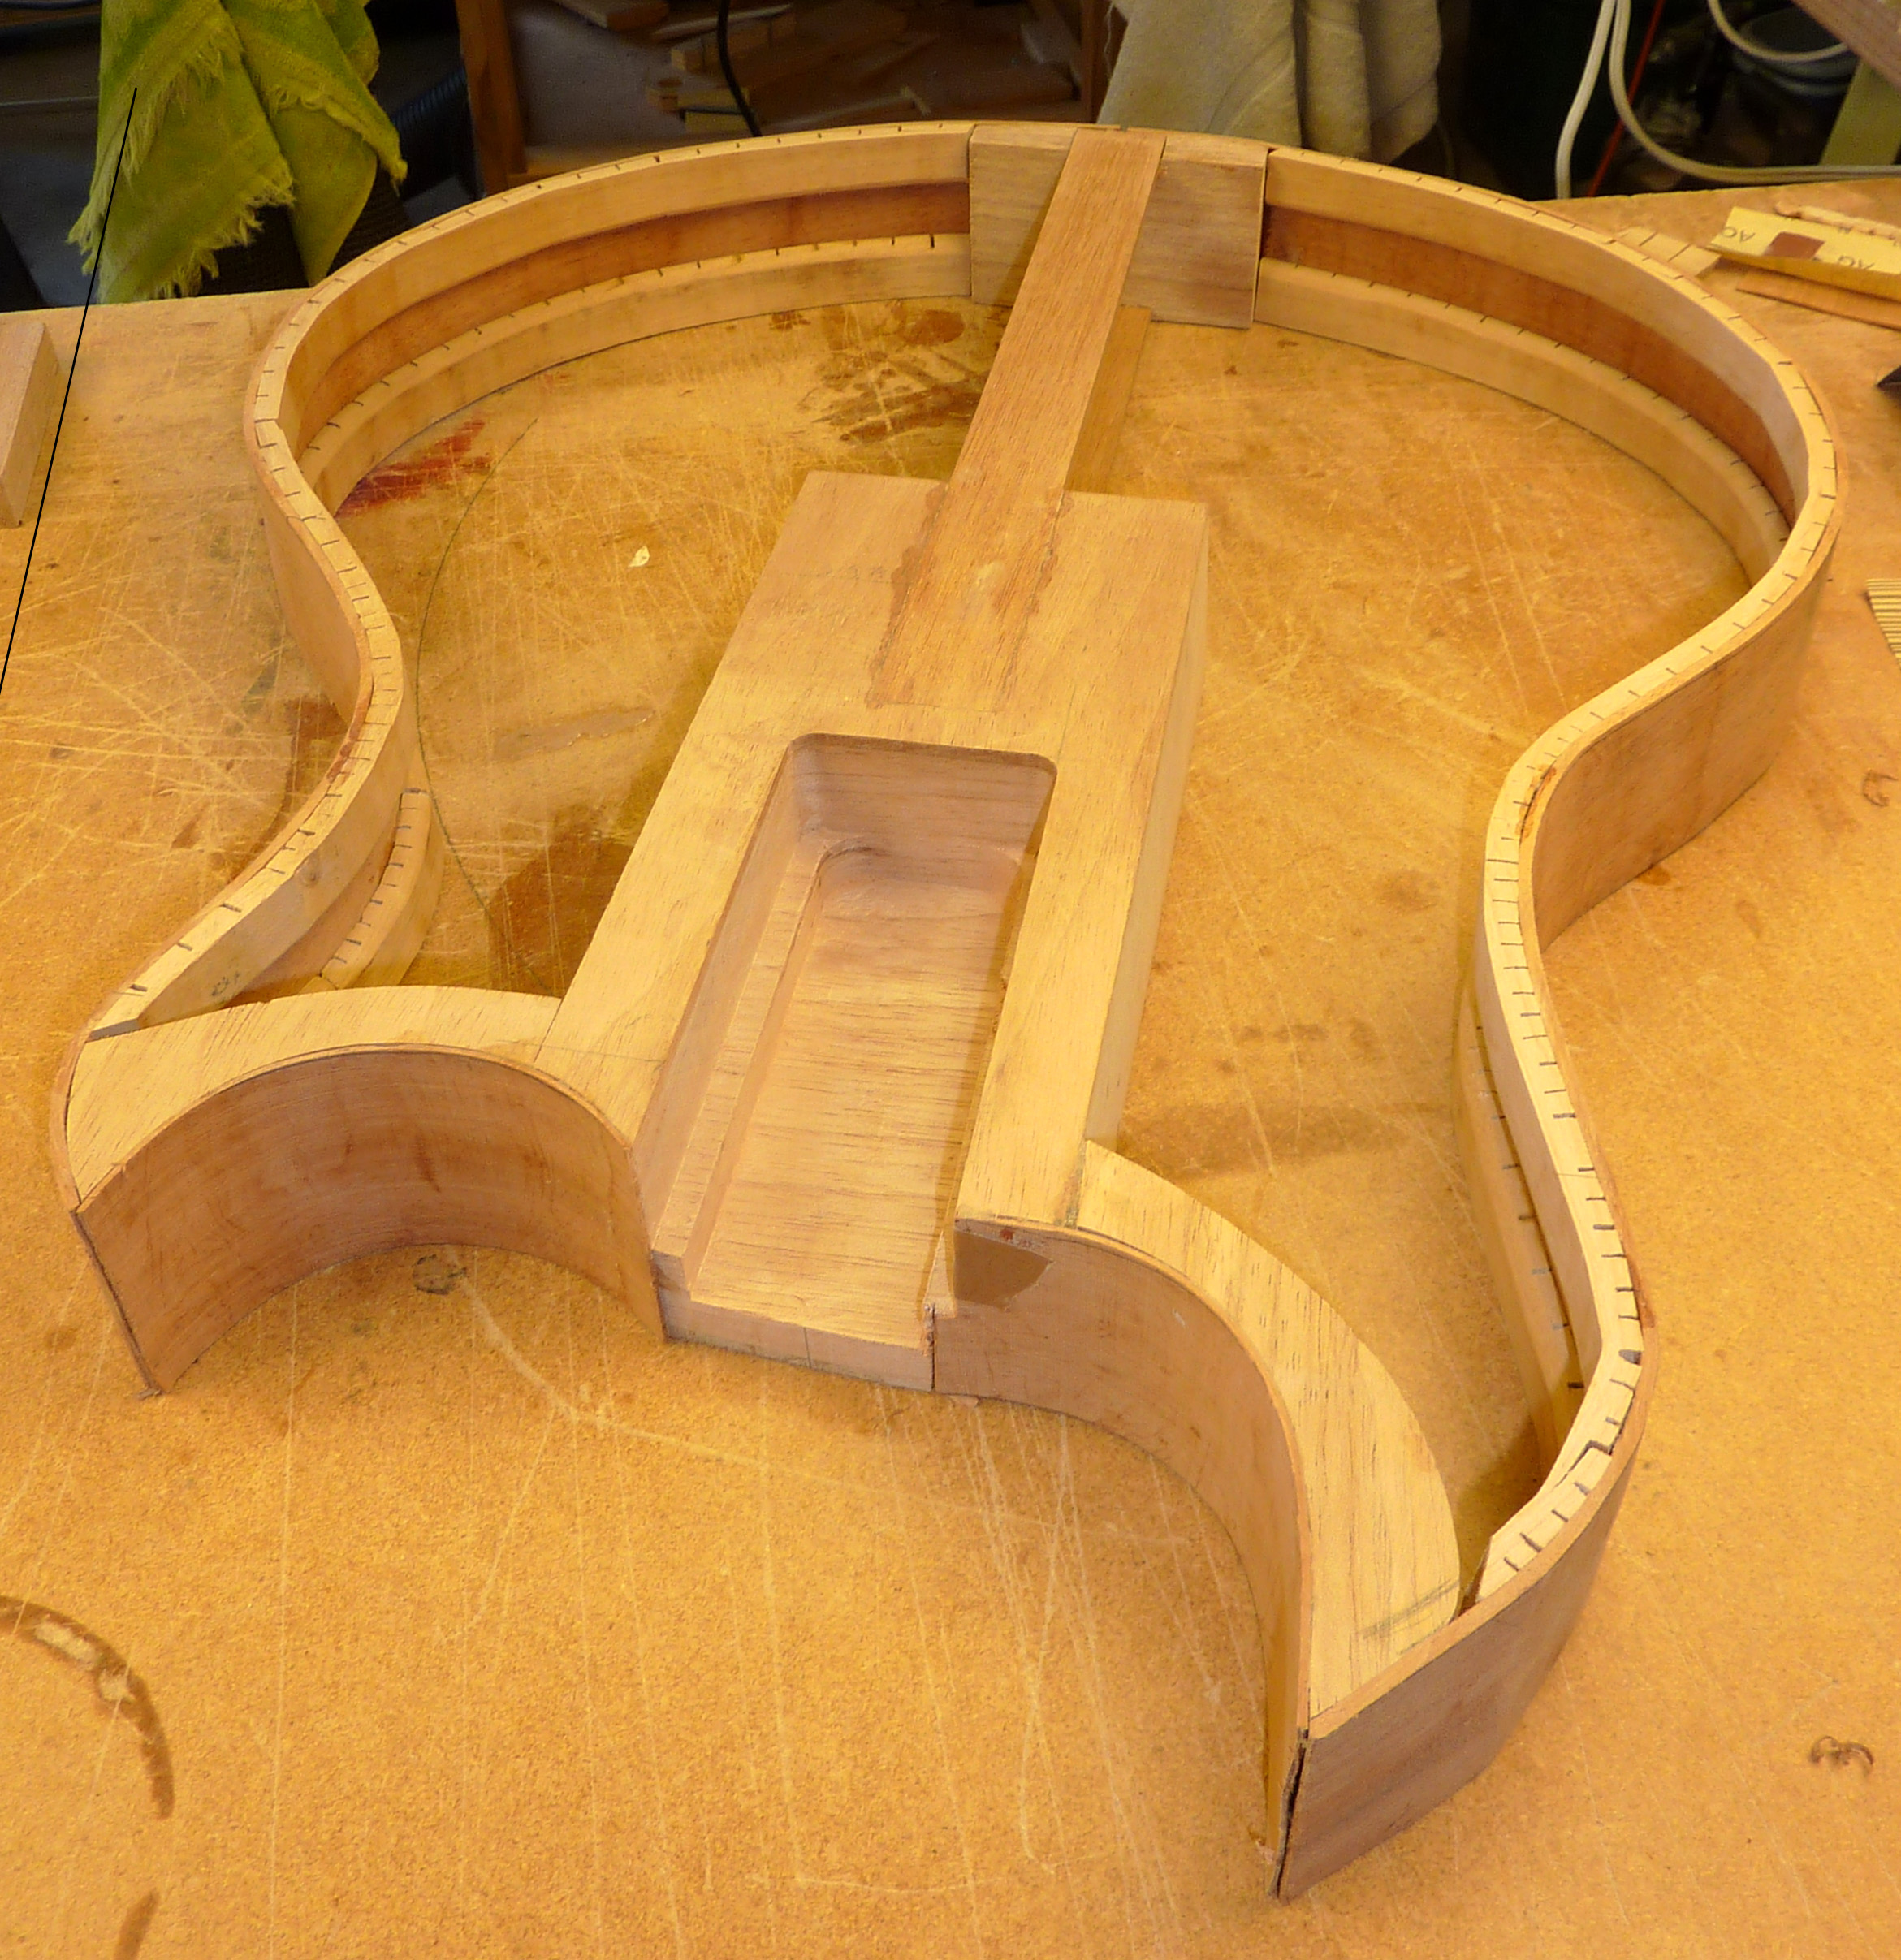
The construction is more similar to an acoustic than a traditional solid body electric guitar. The sides are bent with heat from thin plates. At right you see the bent sides with liners joined to the center block and solid pieces to reinforce the horns. Thin strips, top and back, join the center and end blocks to maintain body length and alignment prior to gluing on the top and back. Notice the deep neck tenon pocket. This will extend into the bridge pickup cutout.
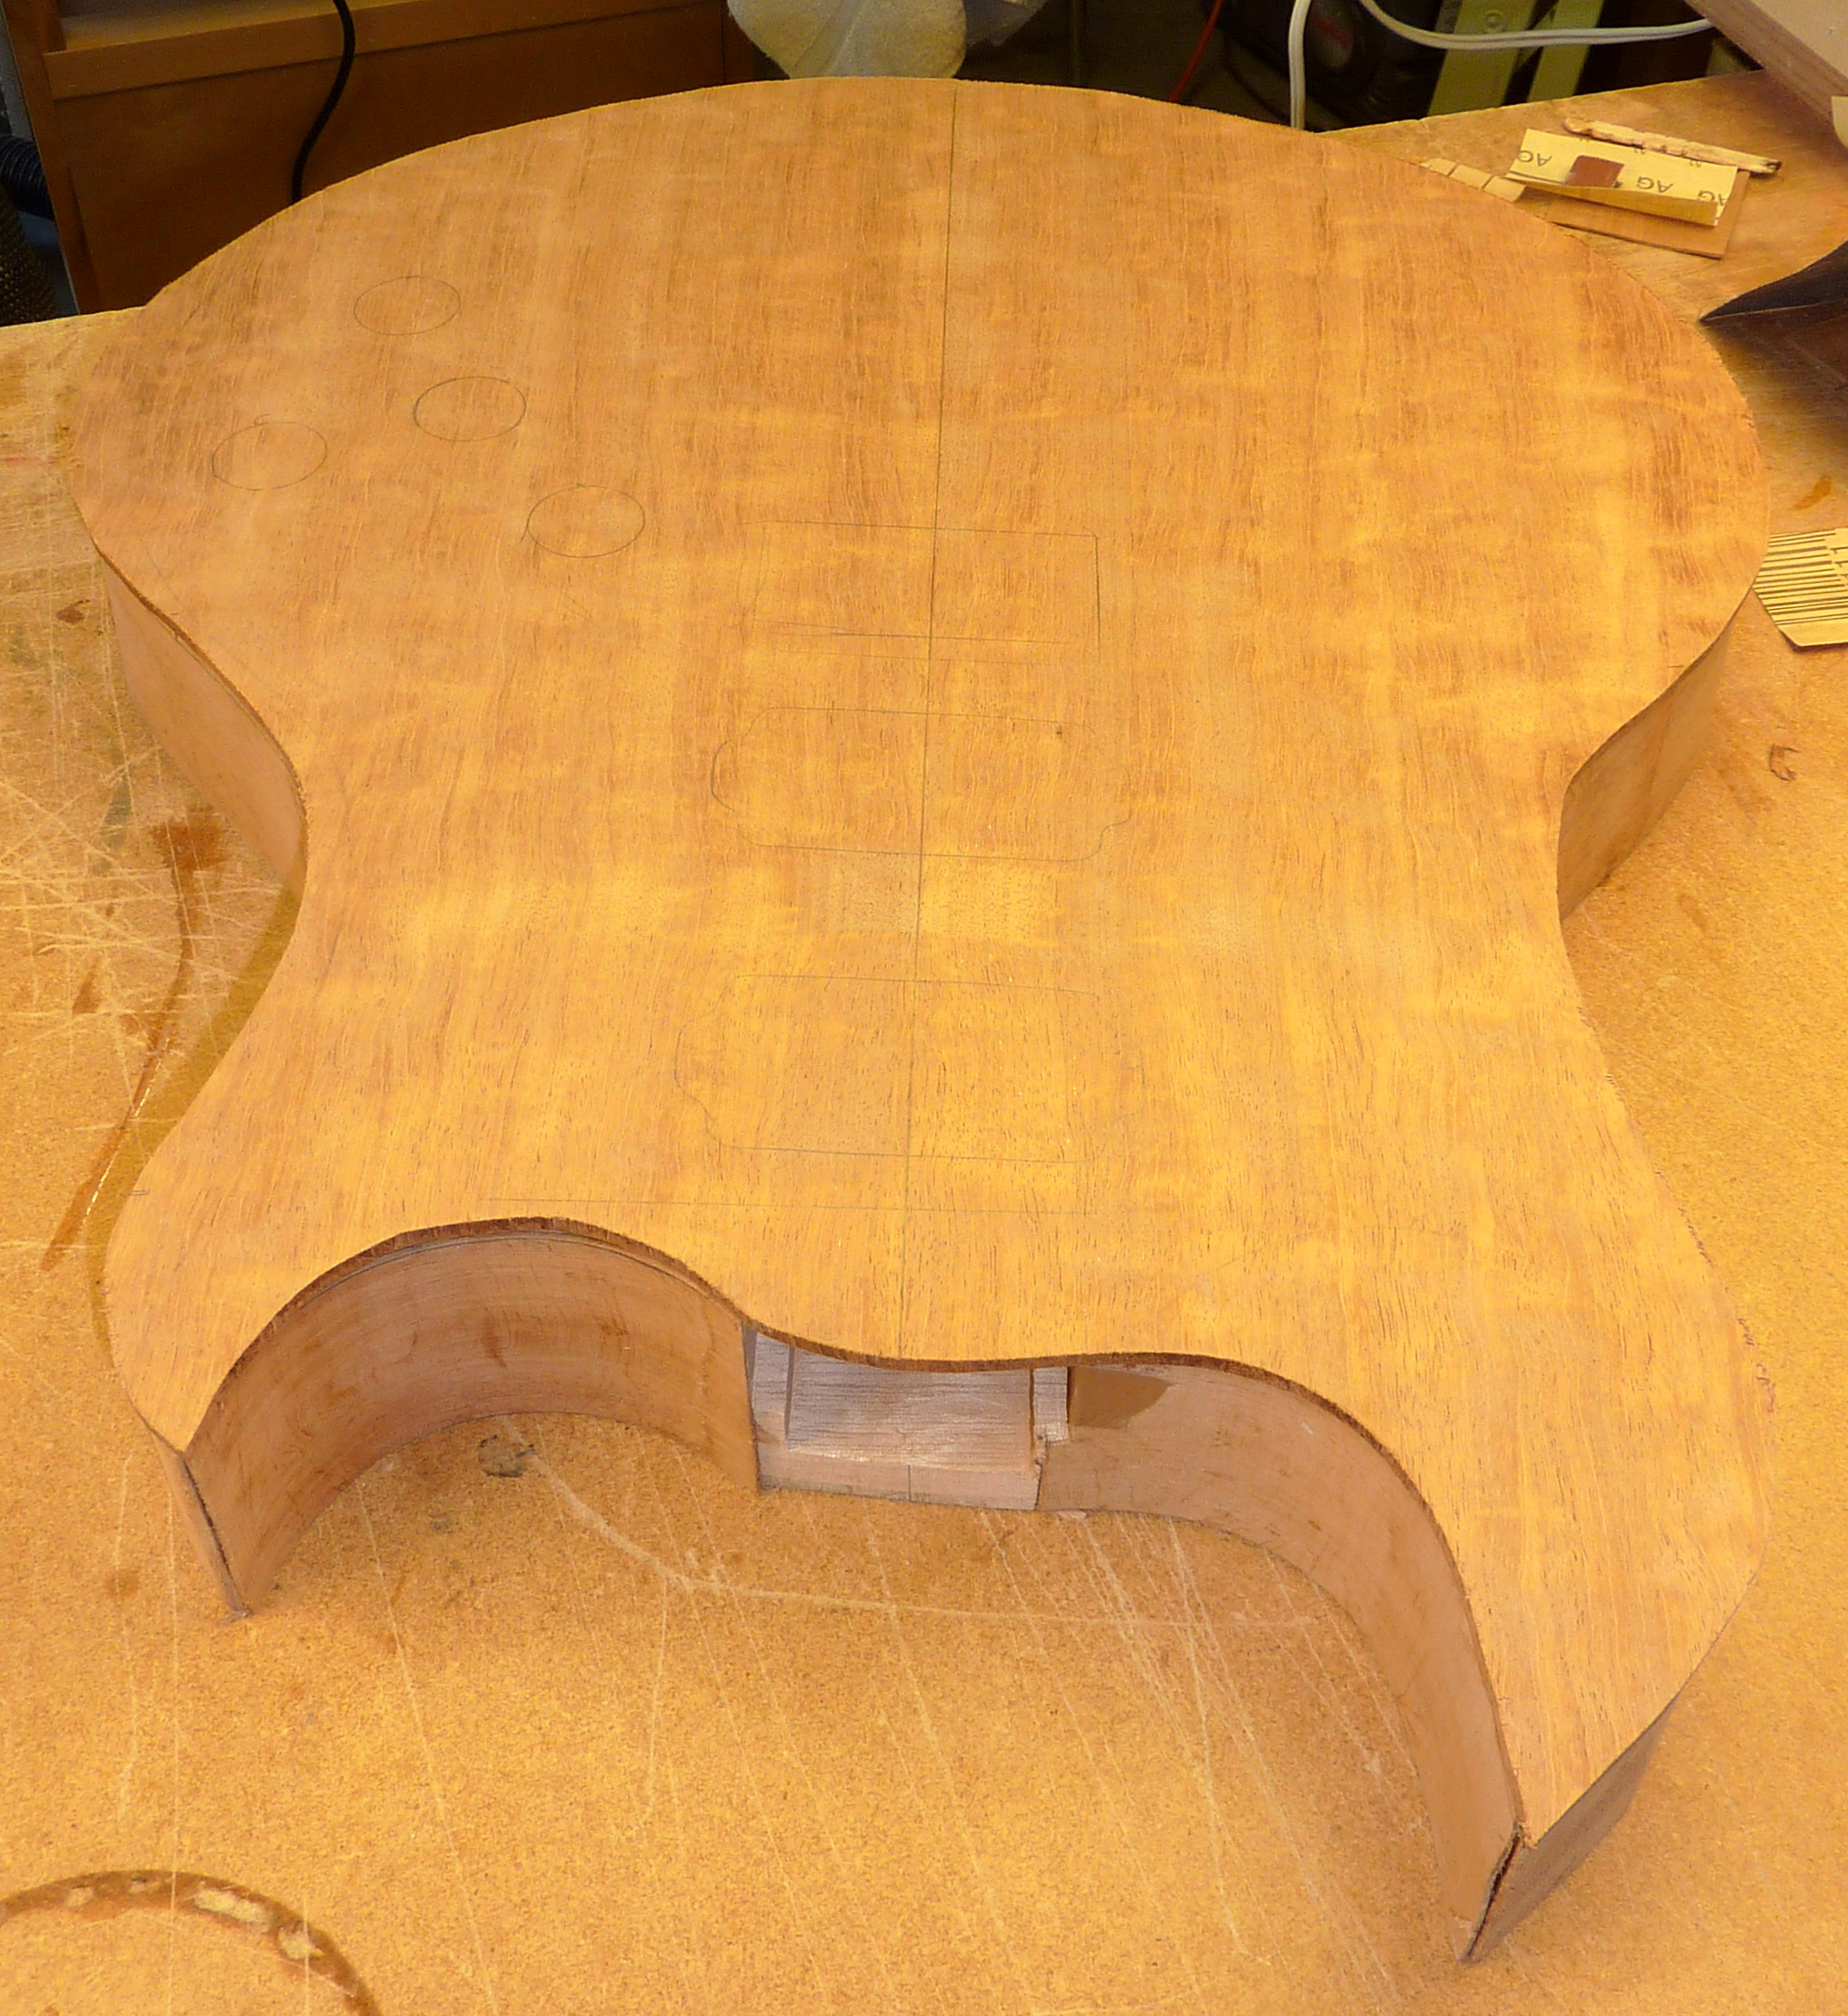
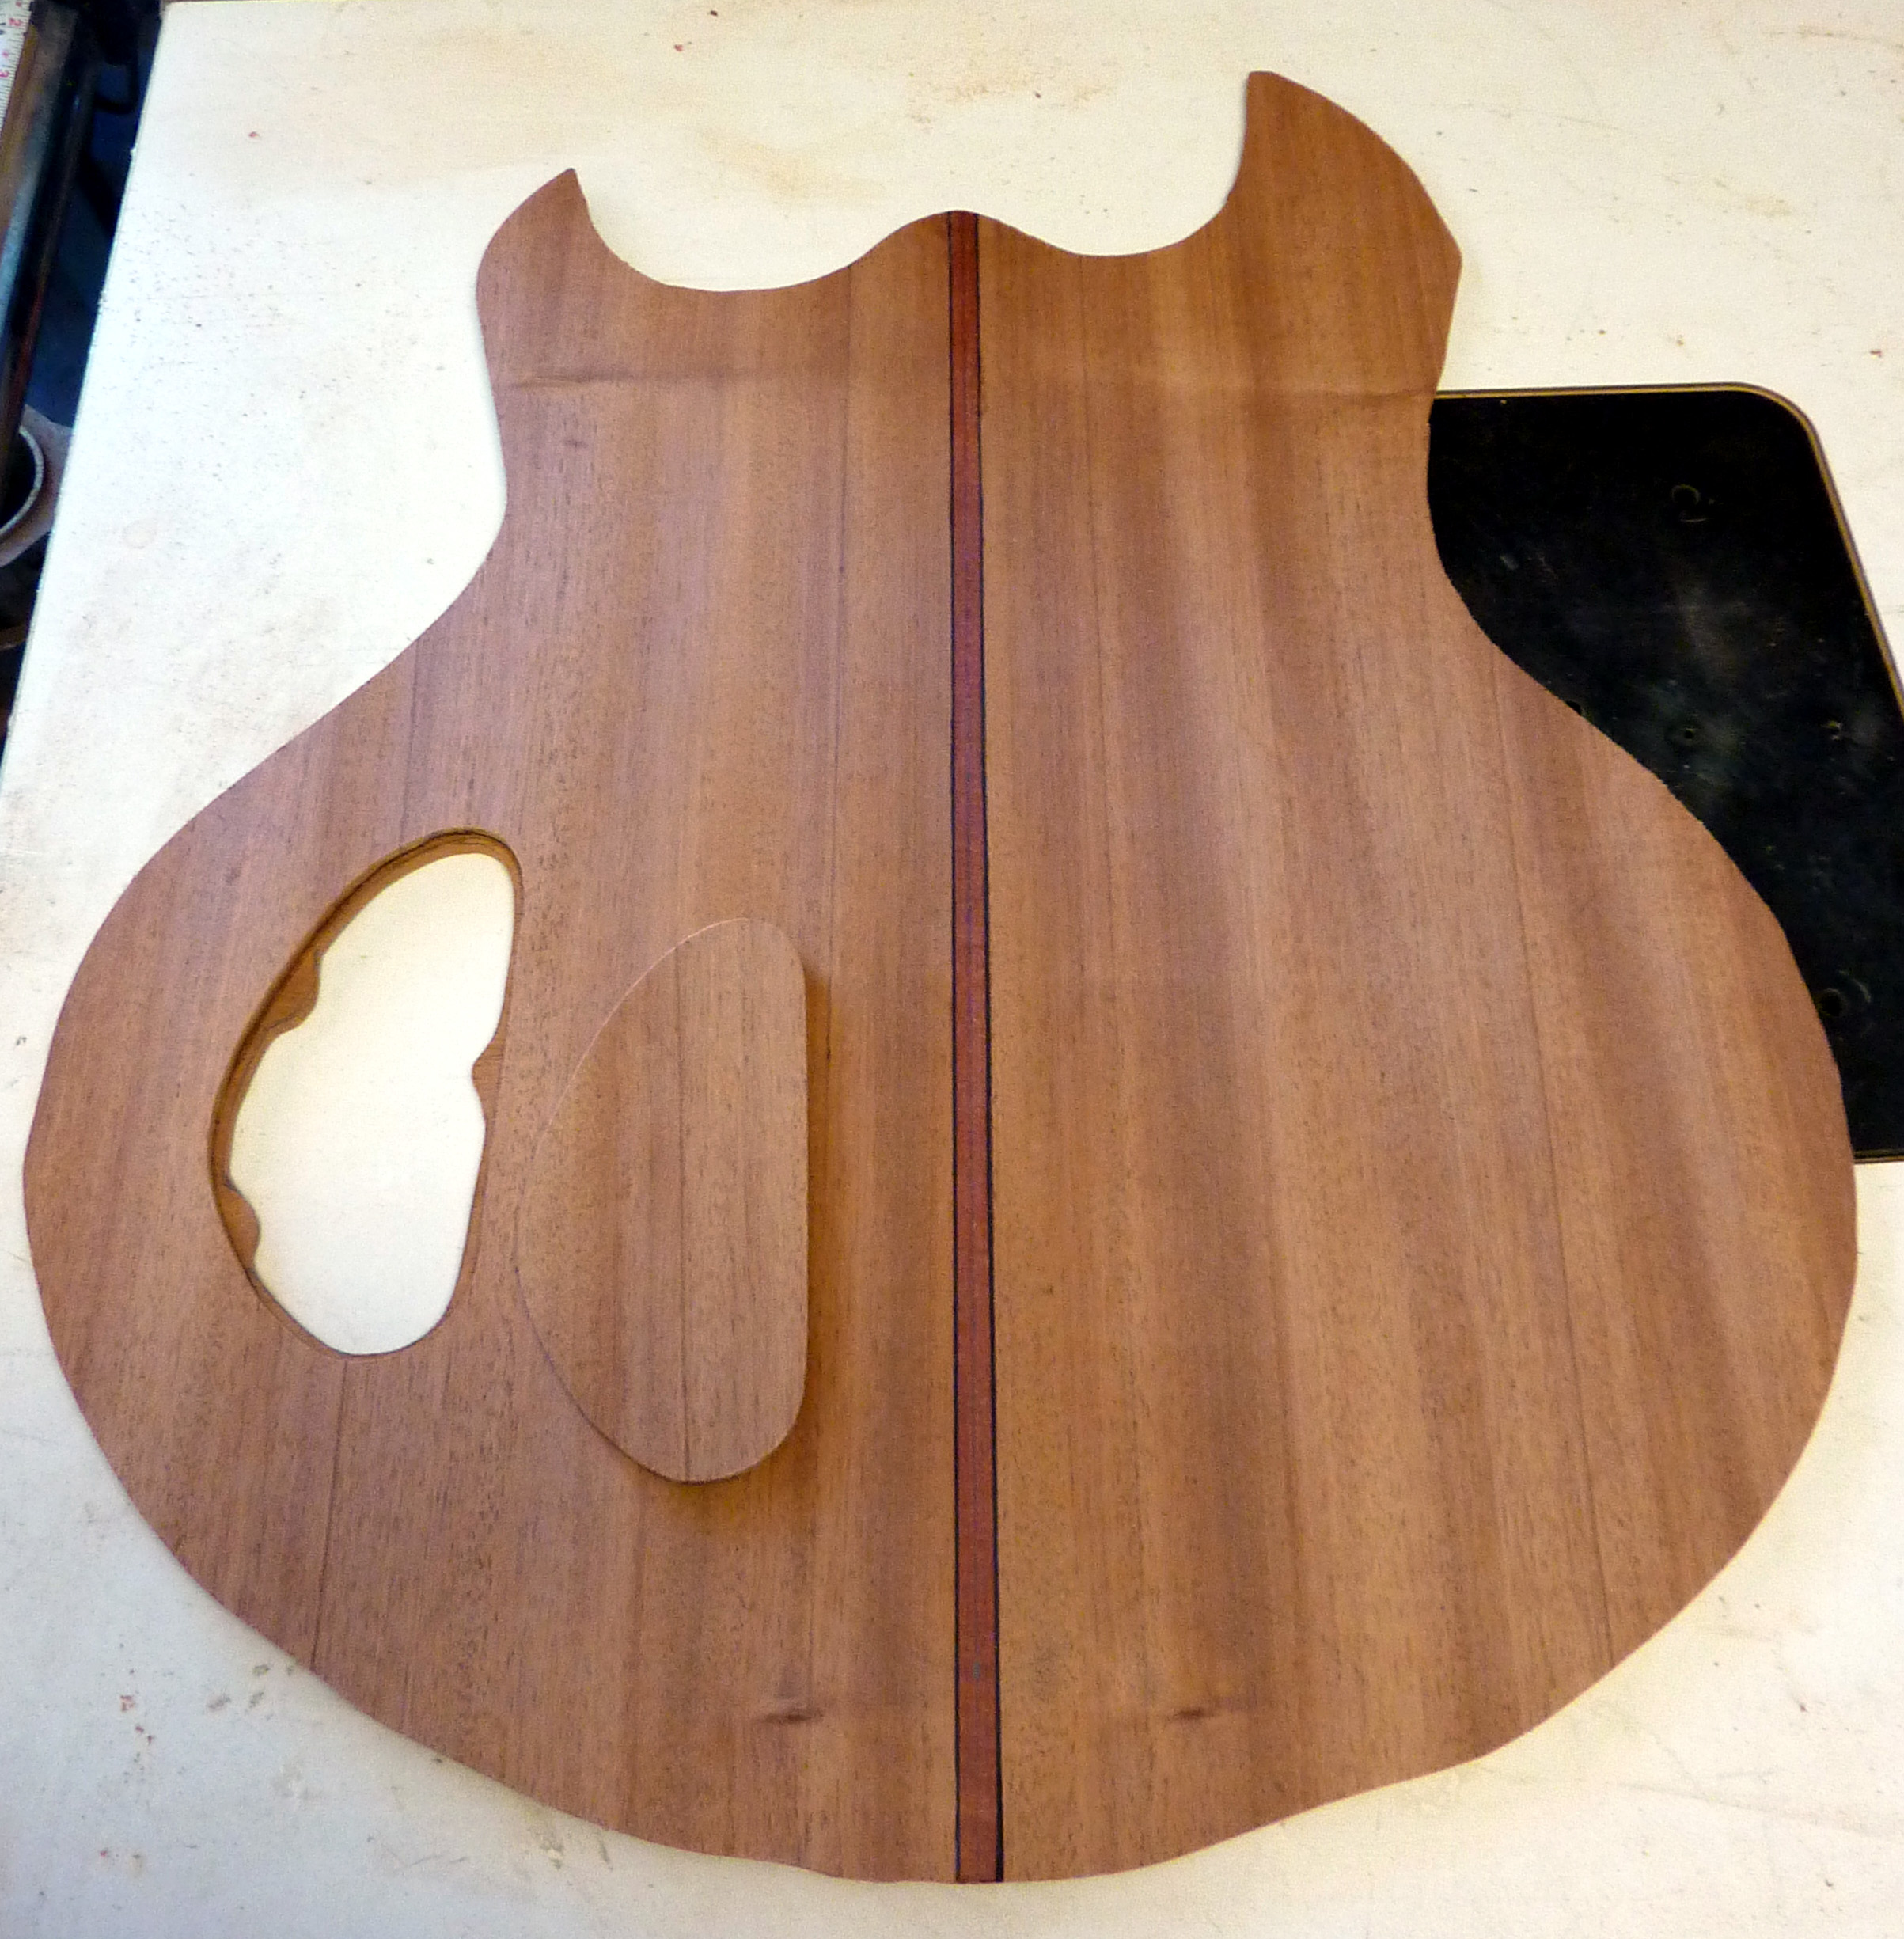
At the right you can see the top plate resting on the body form. It hasn't been glued
yet -
You can just barely see the figure in the piece of wood, but it will be spectacular once finish is applied.
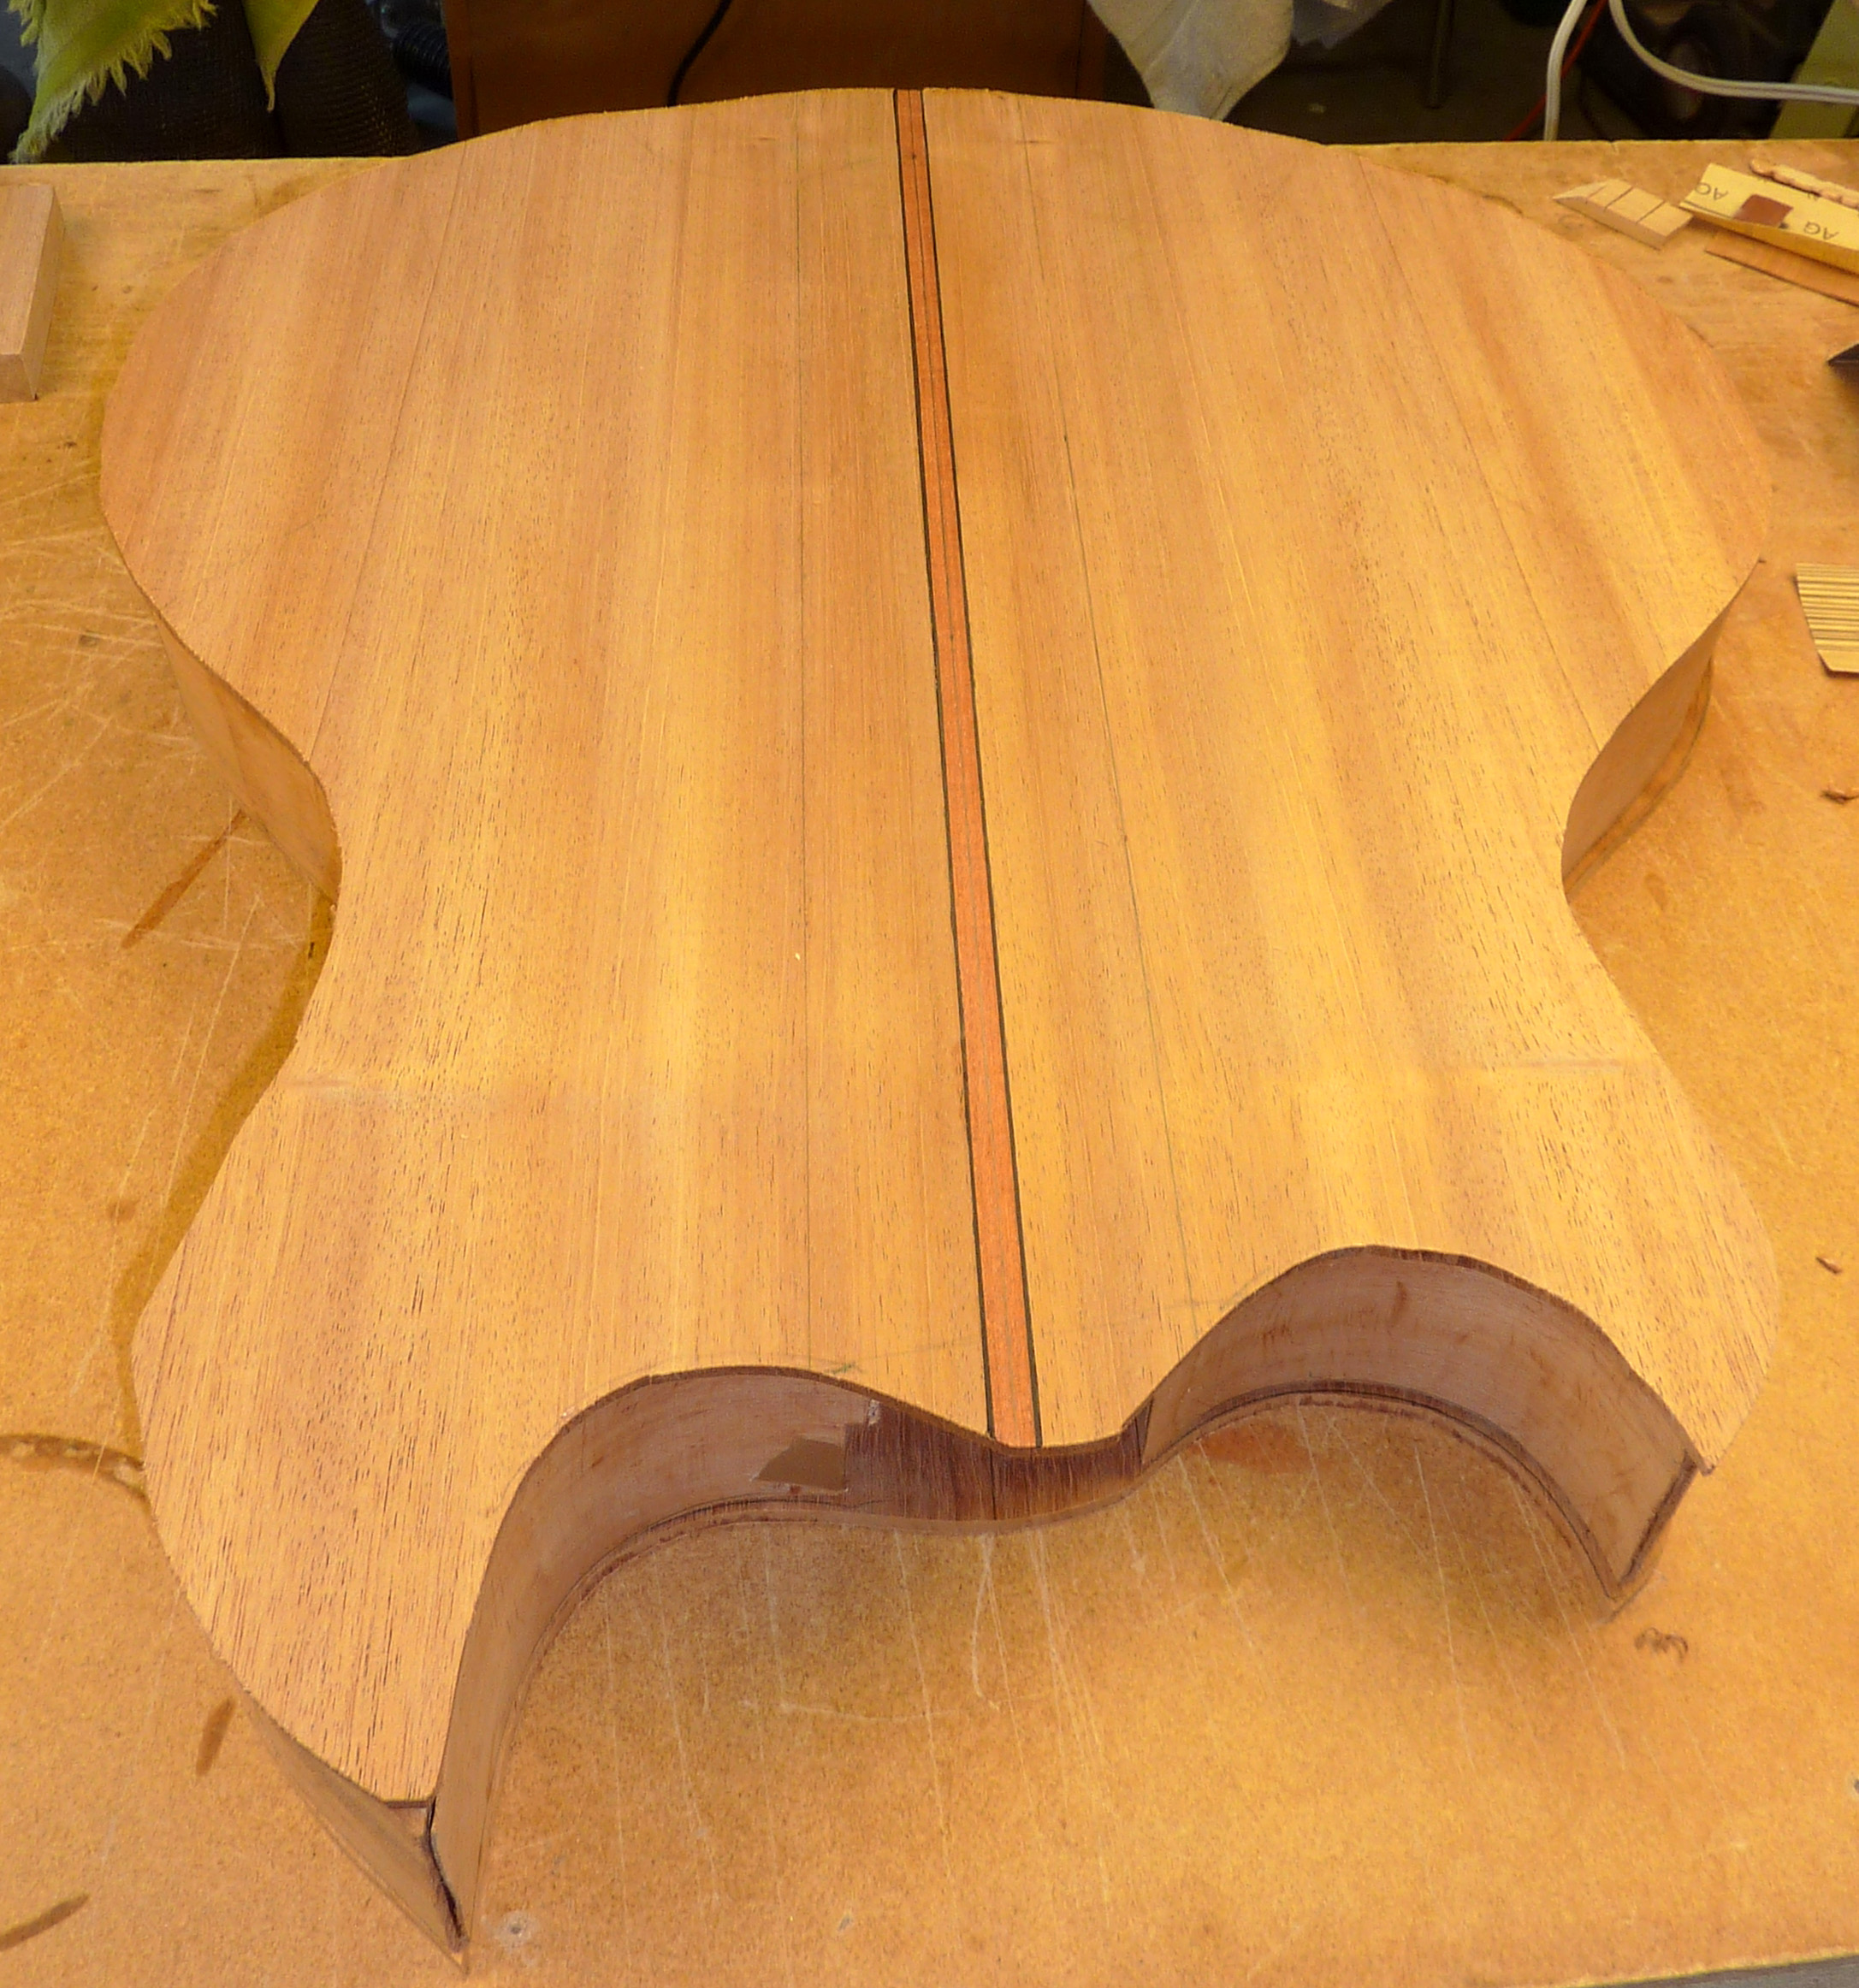
At the right is the back plate, also not yet glued. The center bloodwood and black veneer stripe will match and tie into the neck.
The next step is to radius and taper the sides and center block top and back. I will
use a 15' radius. This will provide a somewhat curved top and back -
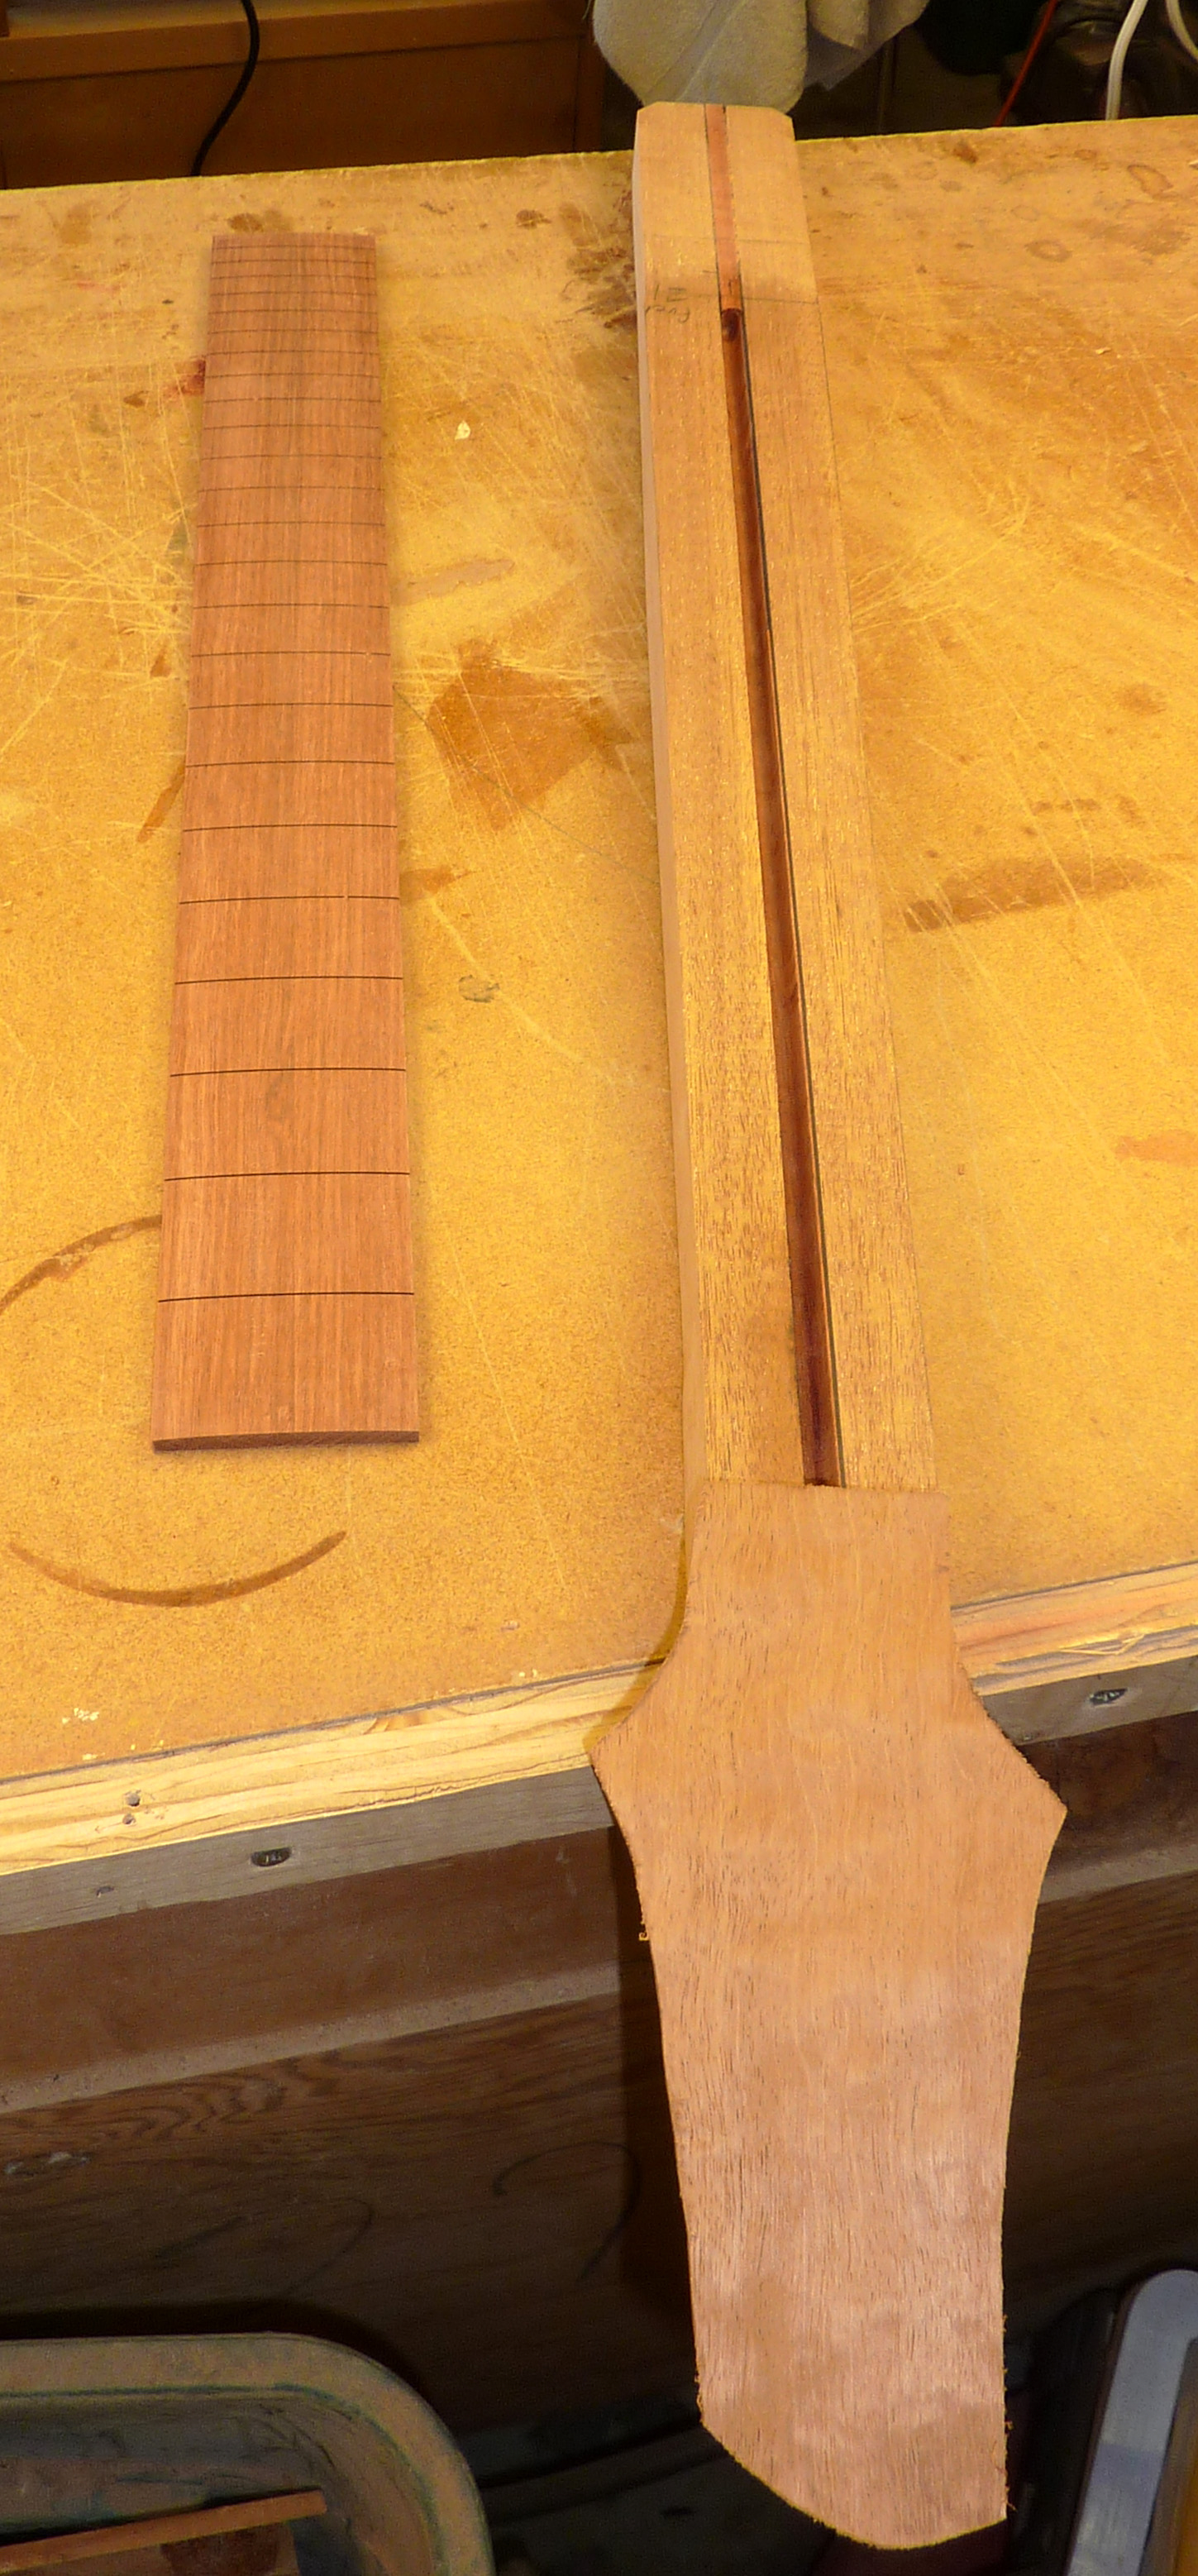
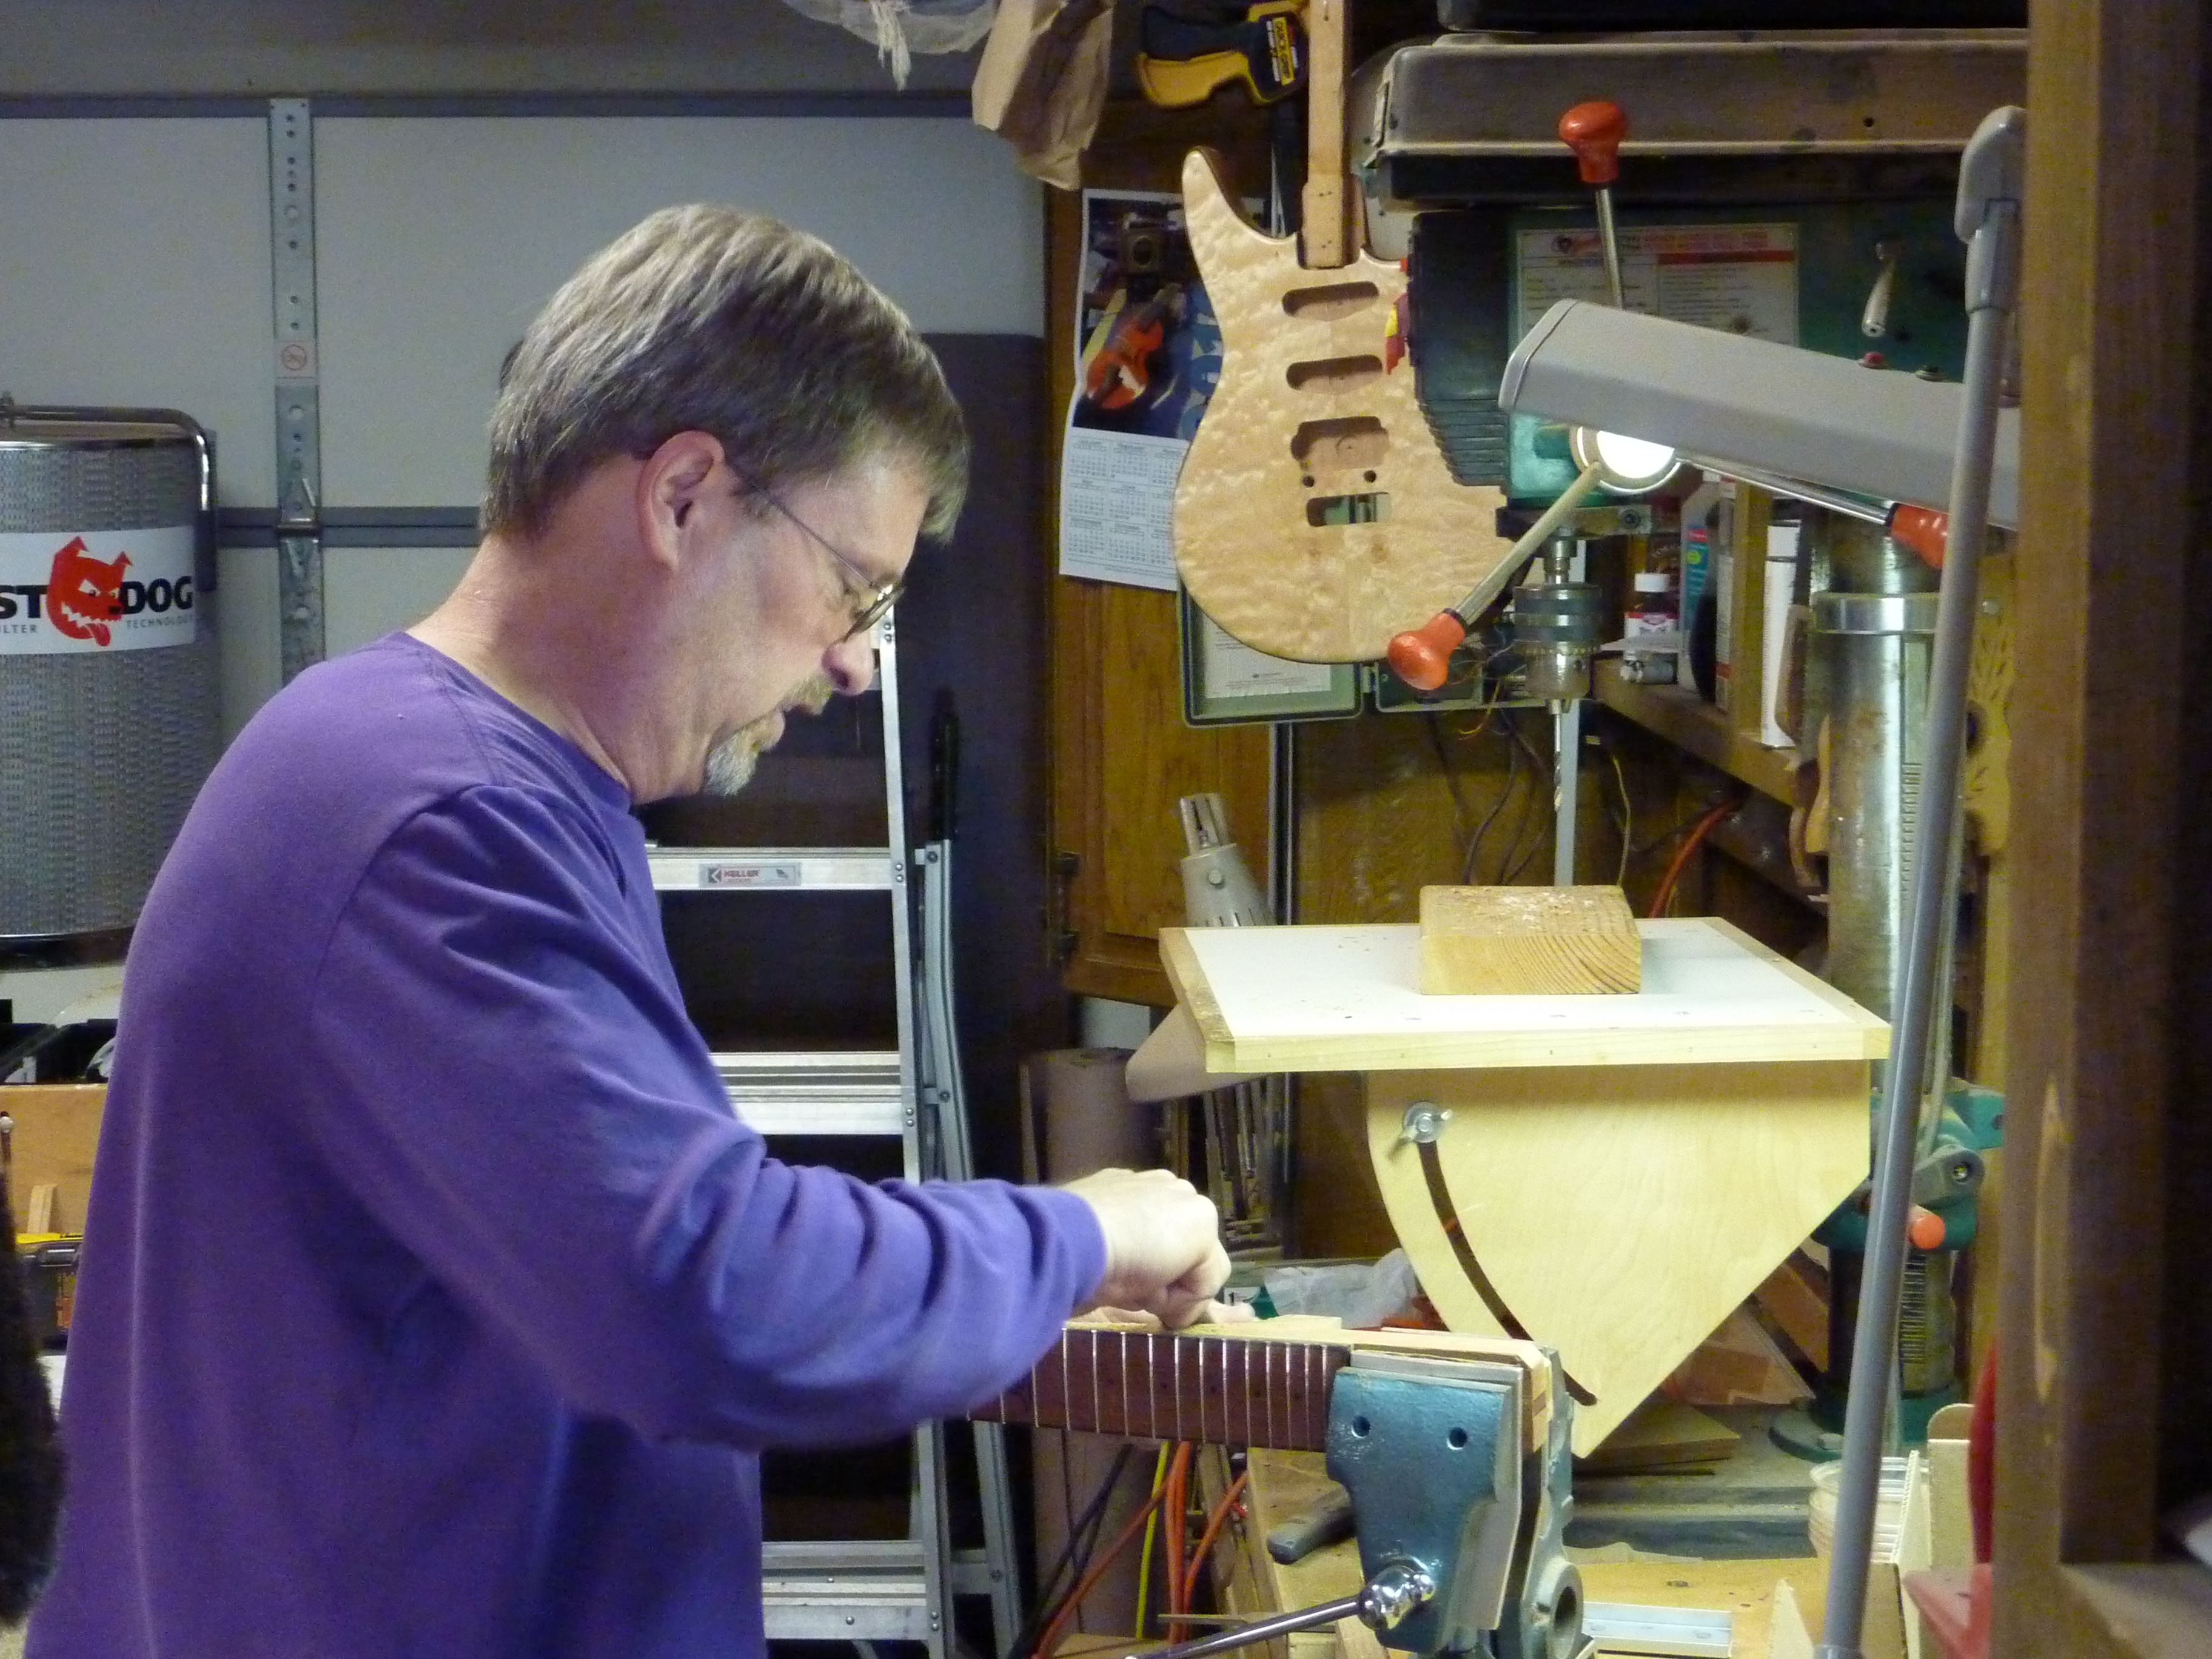
The neck has been cut and tapered to the correct width. The truss rod slot has been cut. The fingerboard has been cut, radiused, and fret slots have been cut.
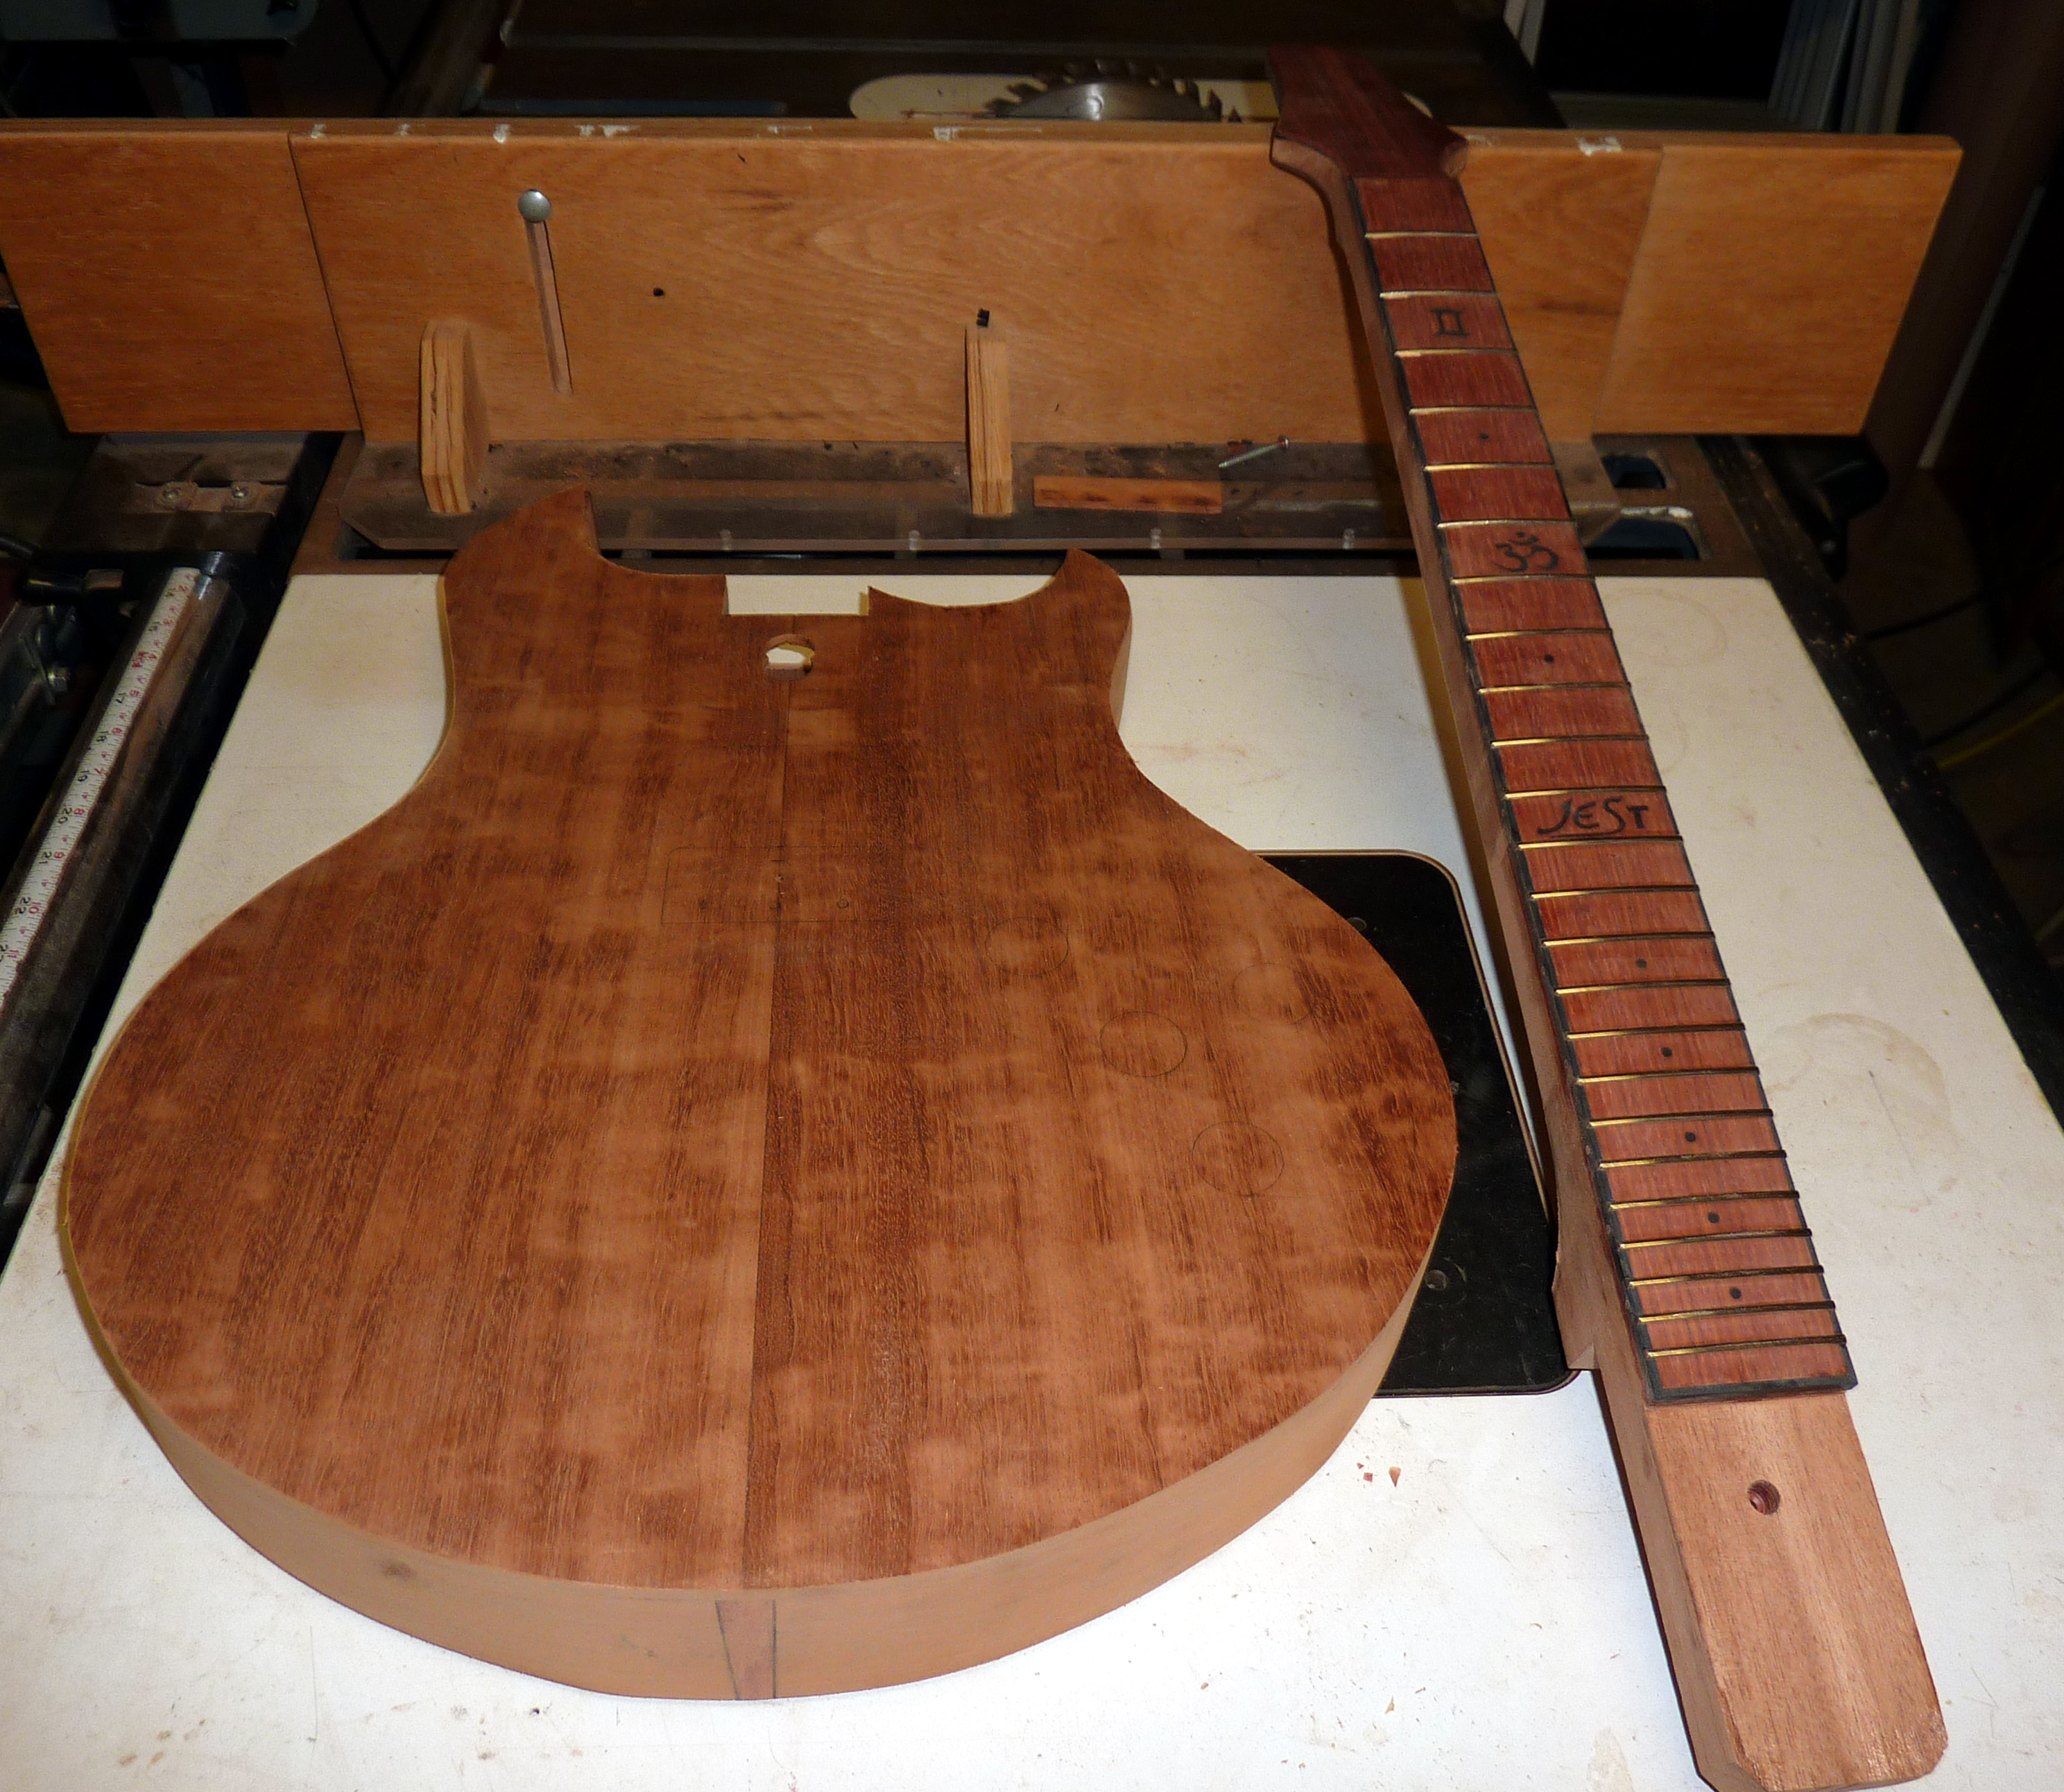
I have made progress on both the body and neck. The neck pocket angle and depth have been adjusted so that the neck can be inserted and glued in after the top is glued to the sides and center block. This will allow for an easier and cleaner binding job on the top. The top has now been glued to the sides. The fingerboard inlays are complete, frets and binding have been installed.
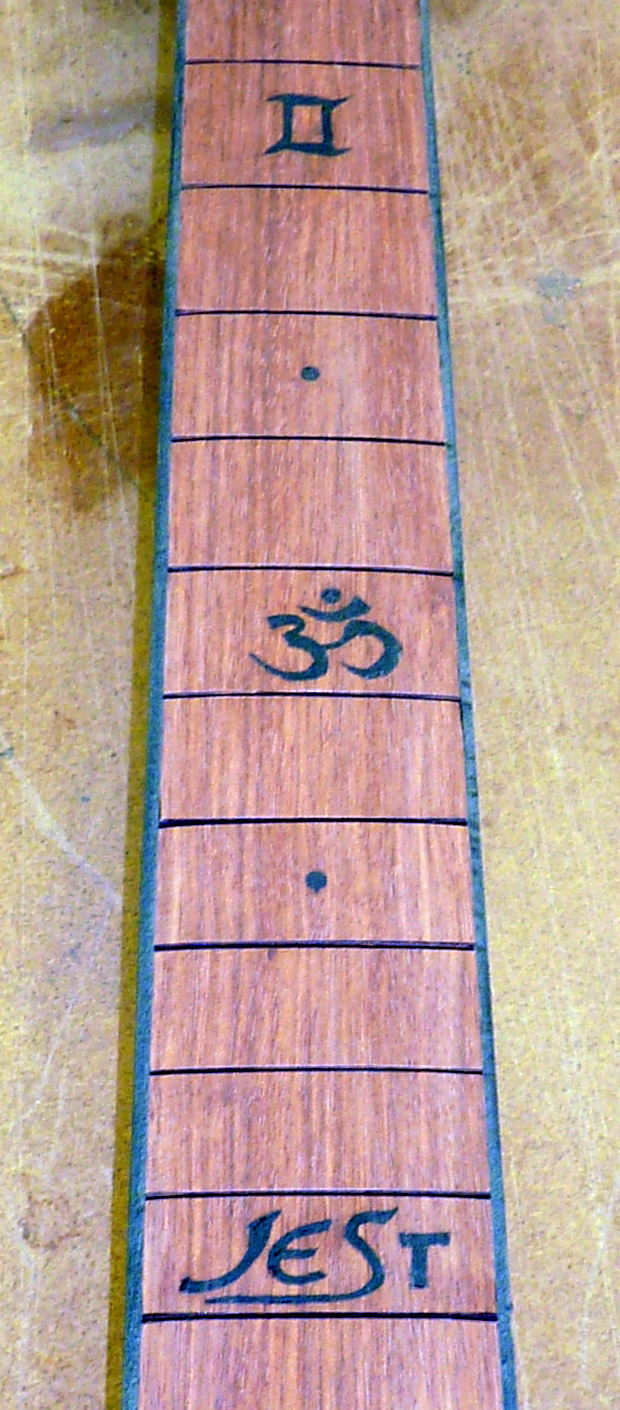
Here is a close up of the inlays. I am pleased with how they turned out. The symbols at the 3rd and 7th frets are according to Mark's design. The third fret inlay is the symbol for Gemini, the third zodiac element (obviously Mark is a Gemini). The 7th fret inlay is the 7th or Crown Chakra. This has special significance in Yoga (Mark is an active practitioner).
In the interest of honest disclosure, I feel compelled to admit that I made a mistake that I had to fix. In my first attempt, I somehow managed to put the Chakra inlay at the 9th fret. This had to be fixed because of the obvious numerical significance. I am sure I would have doomed Mark to a life of bad guitar karma if the inlay had been left at the 9th.
I have cut the access panel into the back. I used my scroll saw to carefully cut it from the back piece to get a perfect match between the panel and back, thus making it as unobtrusive as possible.
A statement from Mark:
“Steve, it looks great! Really happy with the fret board. The bloodwood with black binding and inlay looks terrific. It's neat to see the first fruits of this collaborative process: ideas that I had modified by your considerable wisdom, skill, and vision. Can't wait to hold, play, and appreciate the finished guitar! And definitely looking forward to being there for the neck carving this weekend. Thank you for including me so fully in this process.”
And speaking of the neck carving: The following are a set of action shots that Mark captured during his visit.
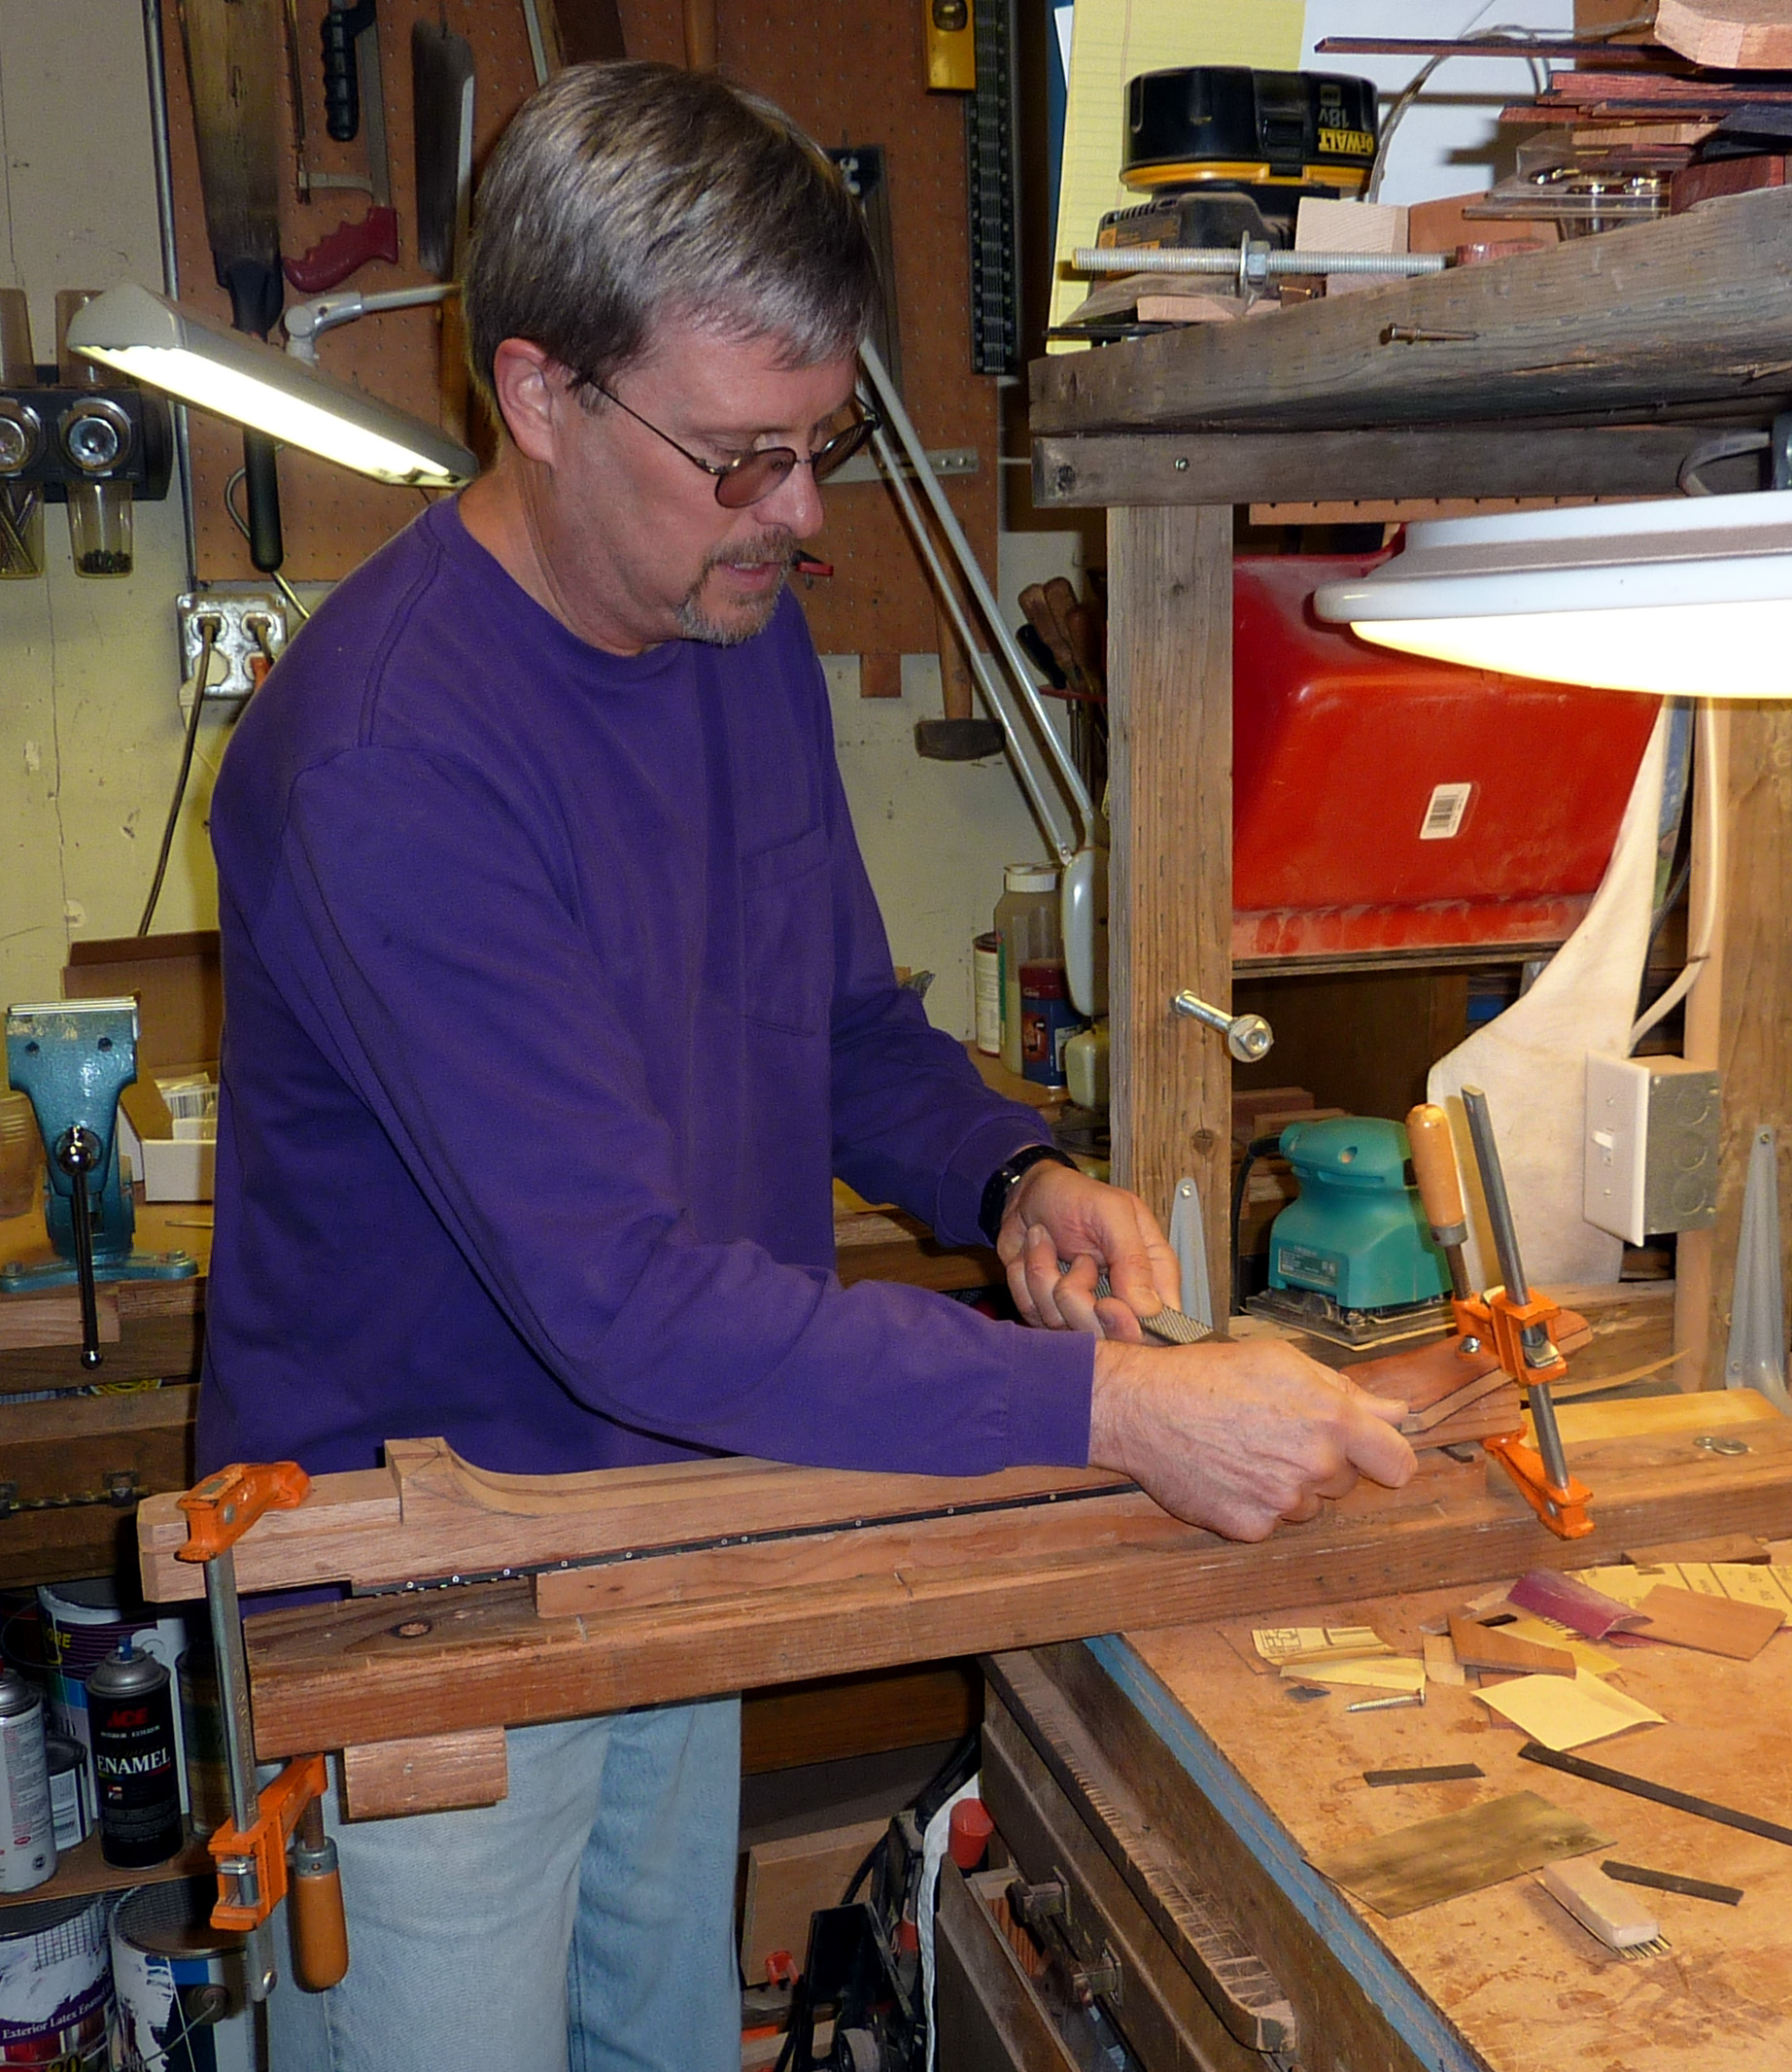
I am starting here with the neck roughly cut to thickness with the band saw. I will use a series of planes, files, rasps, and abrasives to round the neck into a final profile. The neck is clamped to a work arm secured to the bench. I am starting here by rounding out the volute at the neck/peghead joint.
As I work, I will frequently pull the neck off and feel it. In this case, Mark also has the chance to see and feel progress. I am also talking through the process for Mark’s benefit. I am mentioning this because some of the pictures show my mouth open. I can't promise that I wouldn't look goofy without the talking, but I can promise that I don't talk to myself as I work.
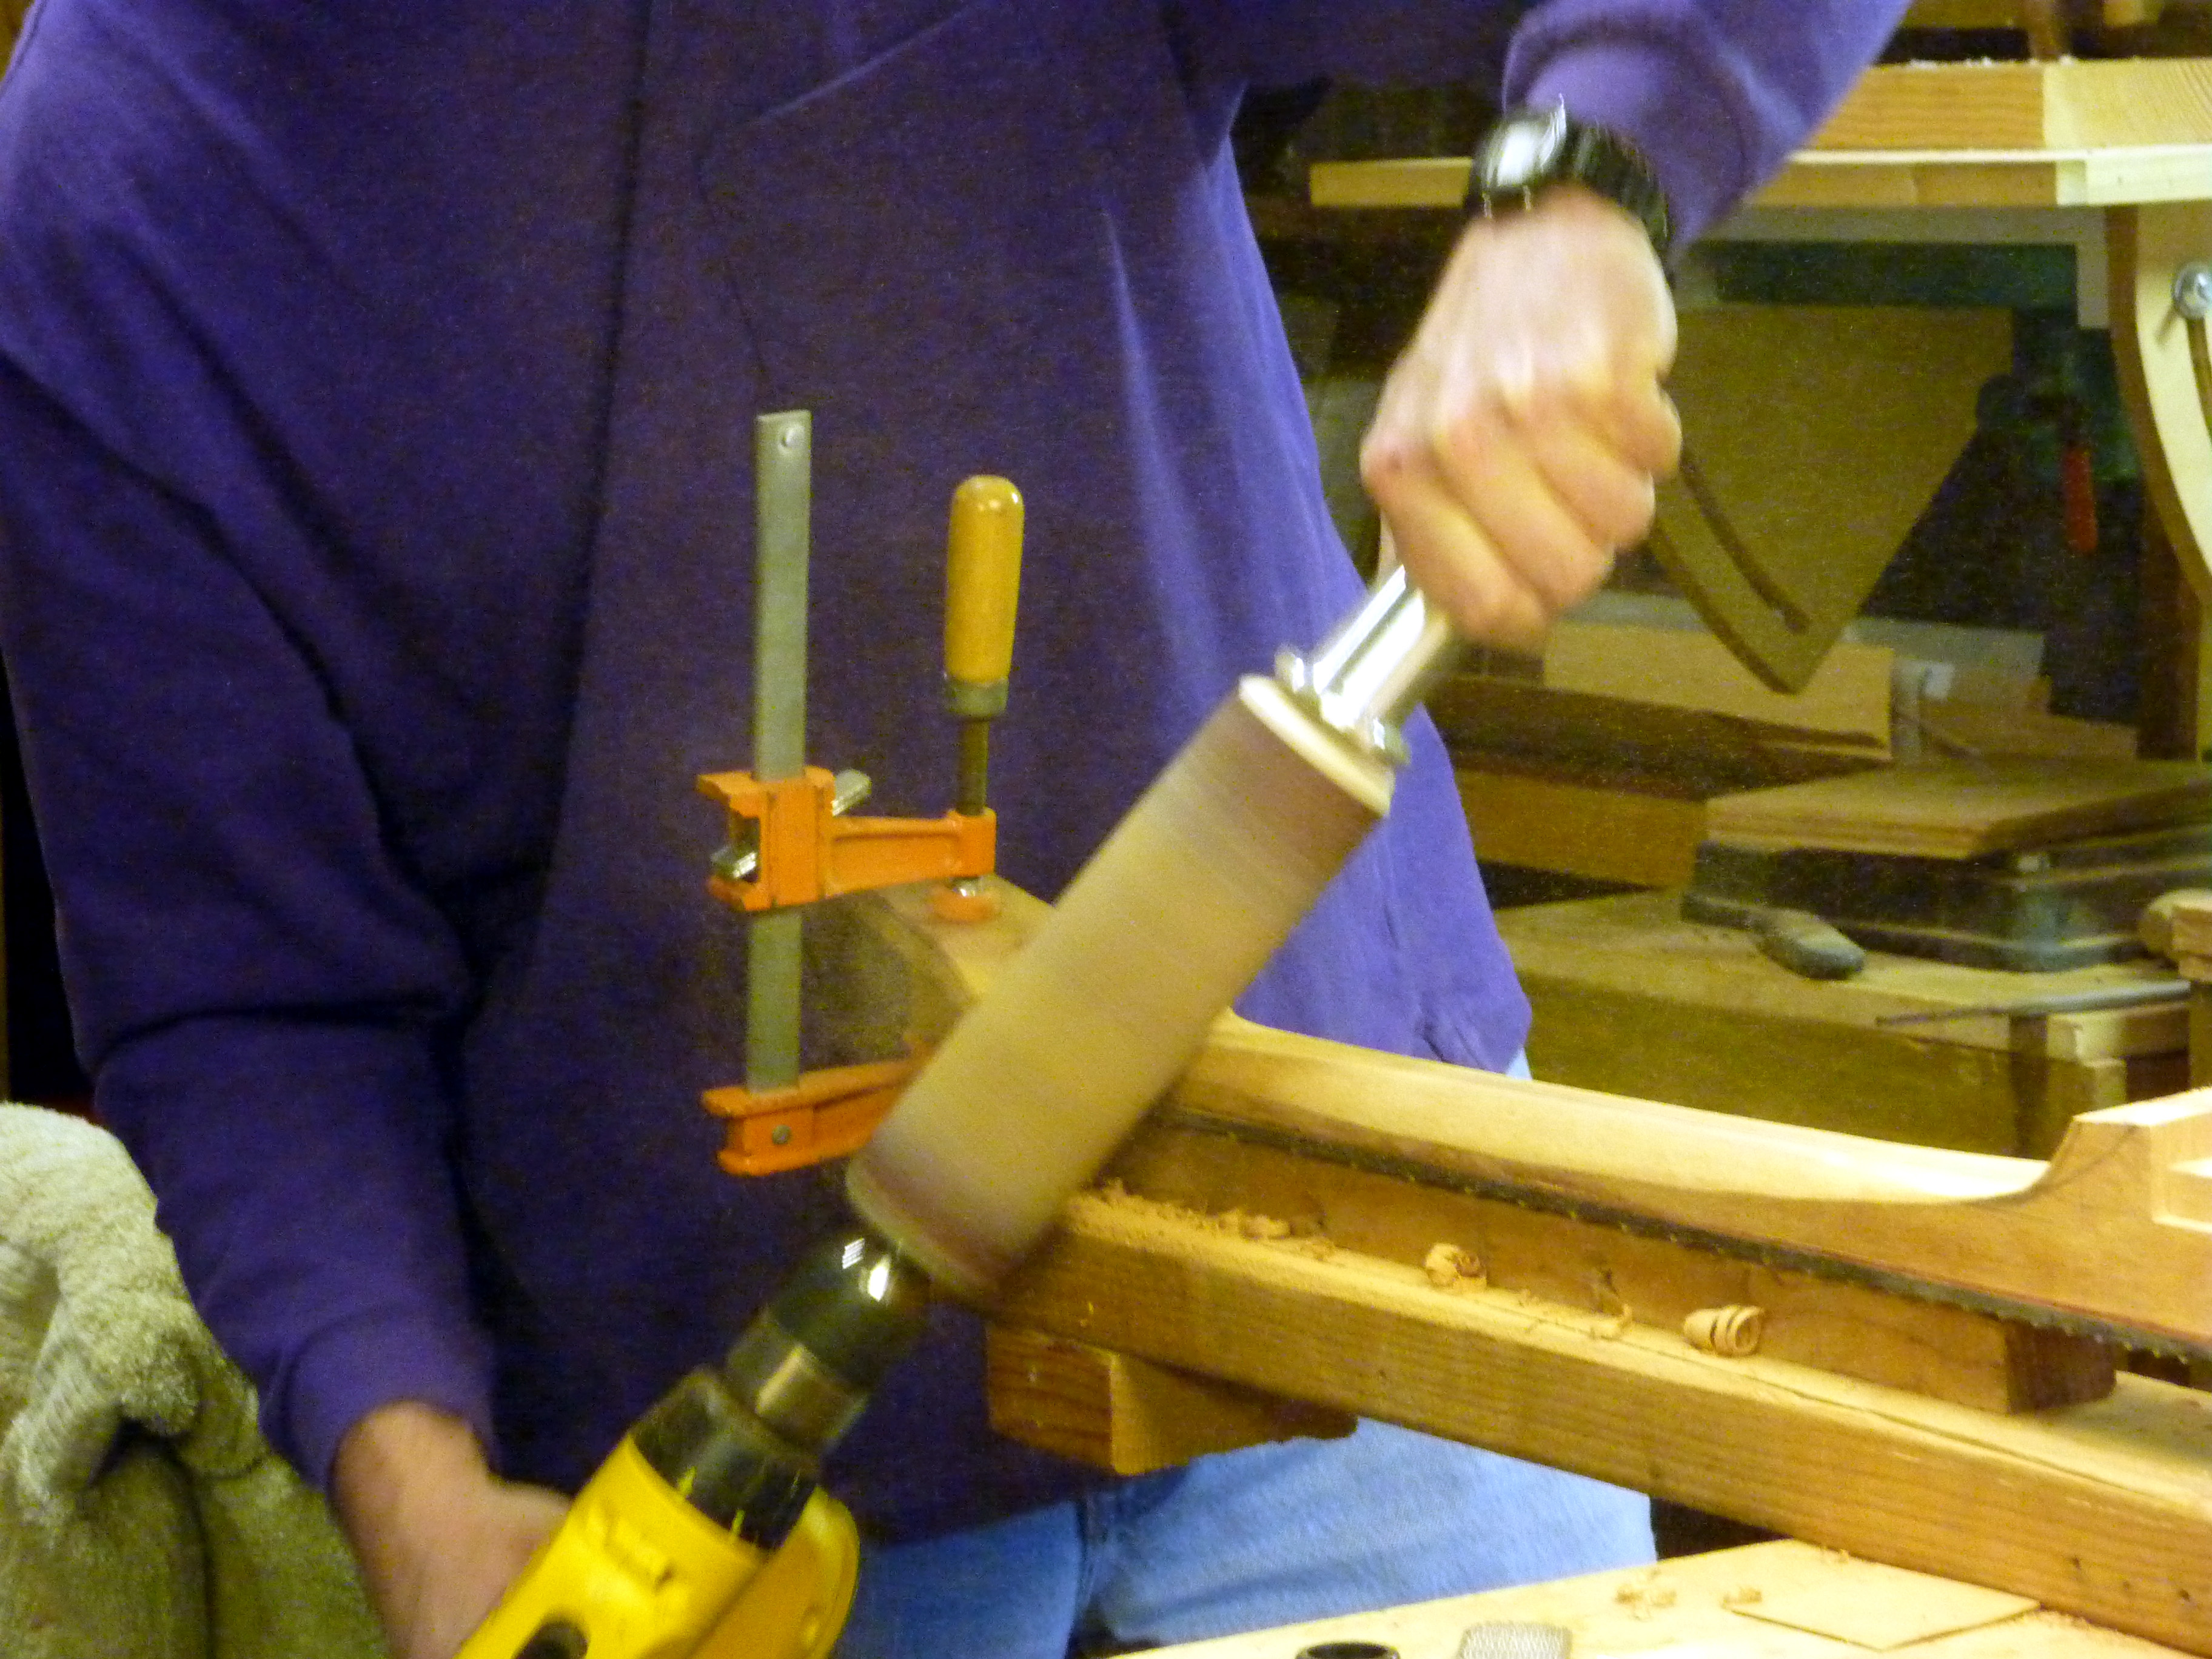
Here I am using an abrasive sleeve spindle that I attach to my portable drill. It is an effective tool, but removes wood agressively and must be used with care.
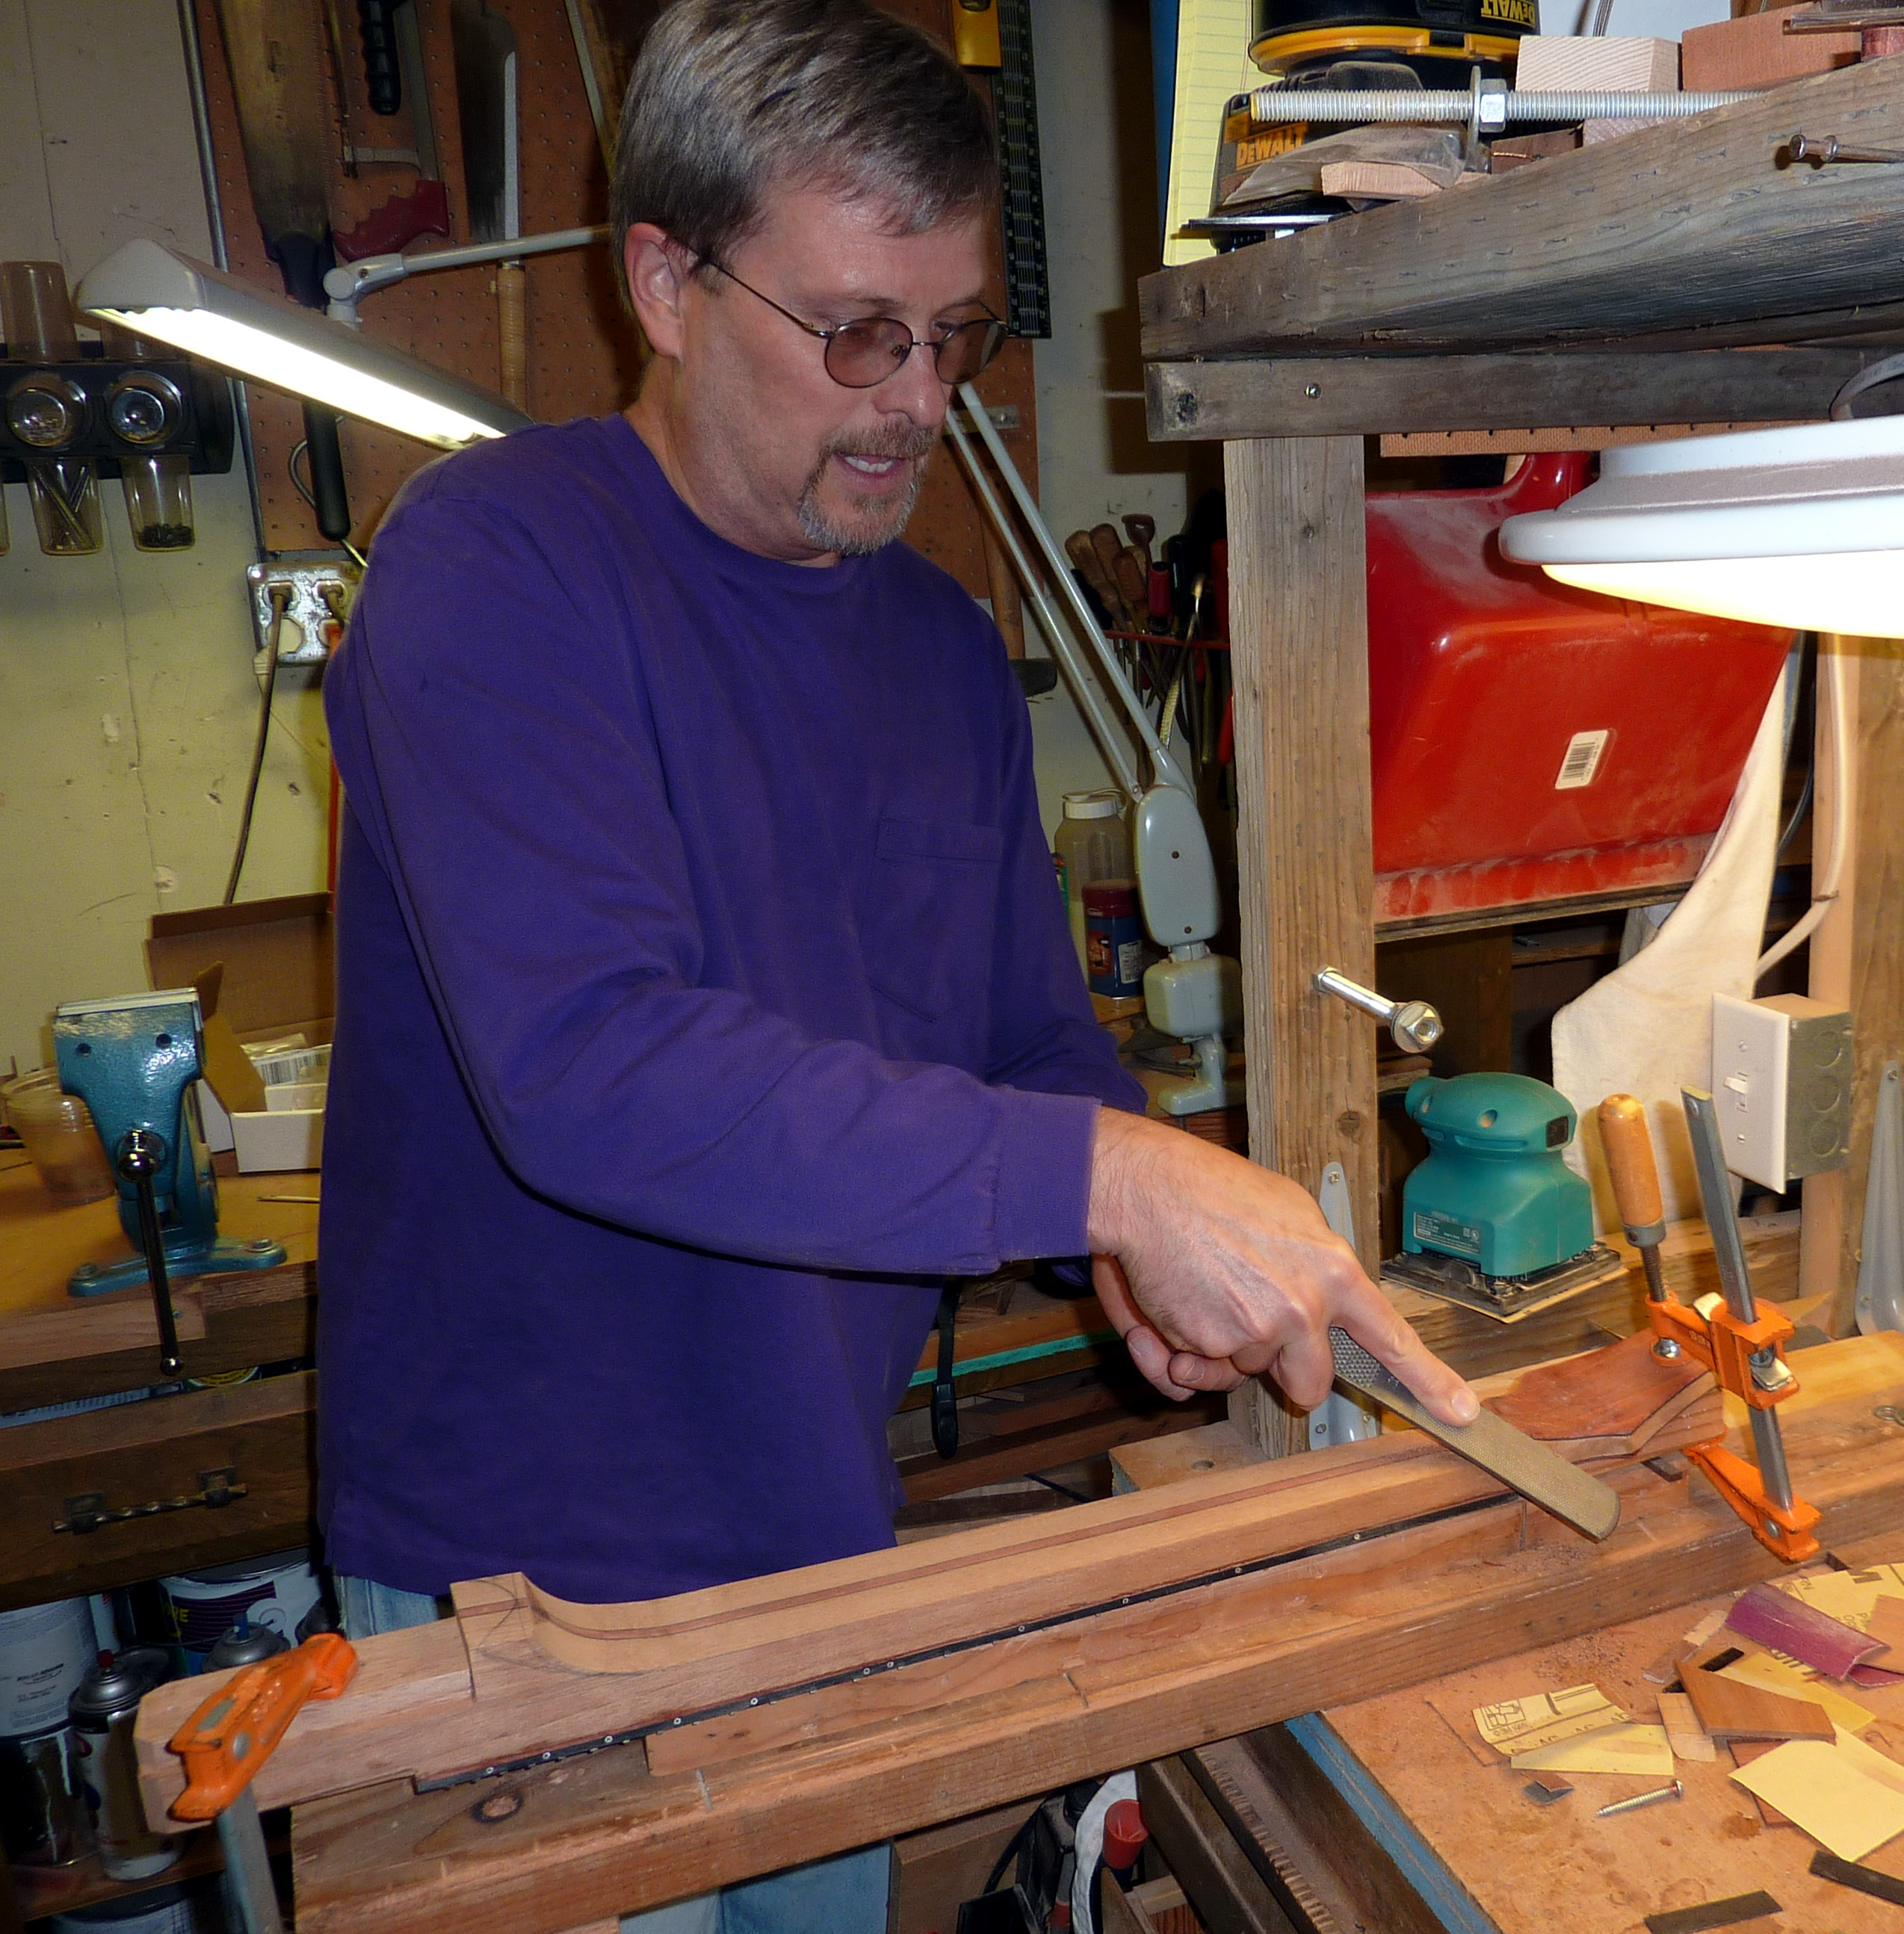
I am working more on the volute with a coarse rasp to round it out to final shape. You can see that I am also talking. If you look closely, you can see pencil lines at the heal indicating the rough final shape outline.
I have got it clamped in the vise here to get a different angle on the heel. I am
either talking or grimasing -
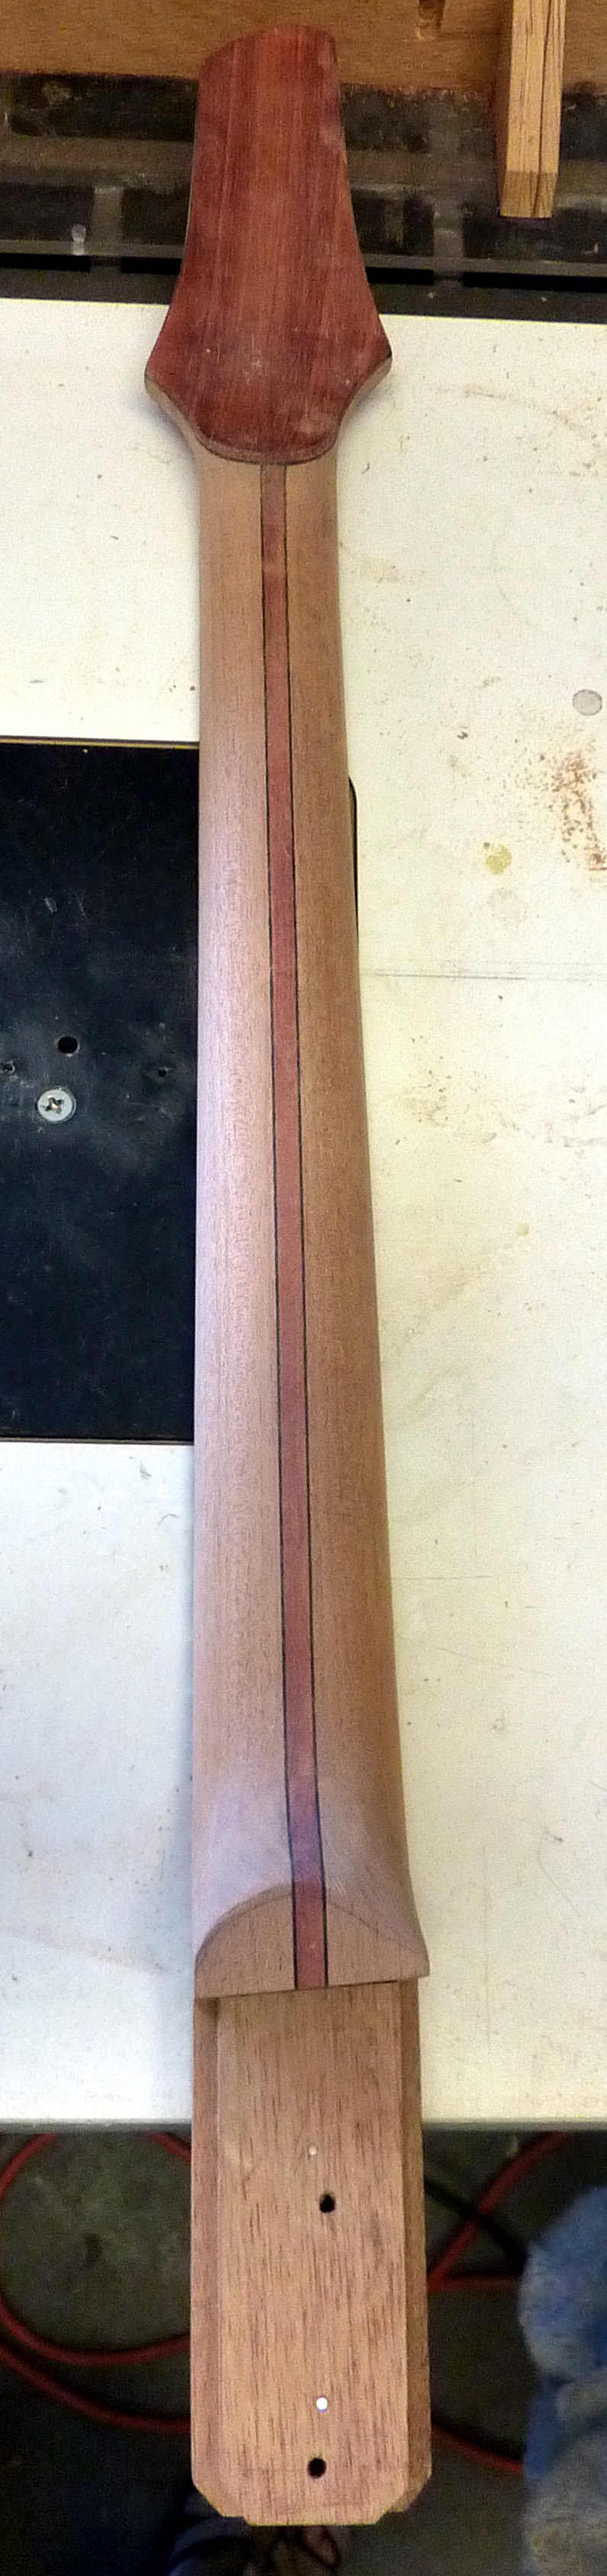
It is now carved to final shape and dimensions and is ready to be glued into the body. I will make some final adjustment to the heel, once the back has been glued to the body. I want to make sure that the lines match perfectly.
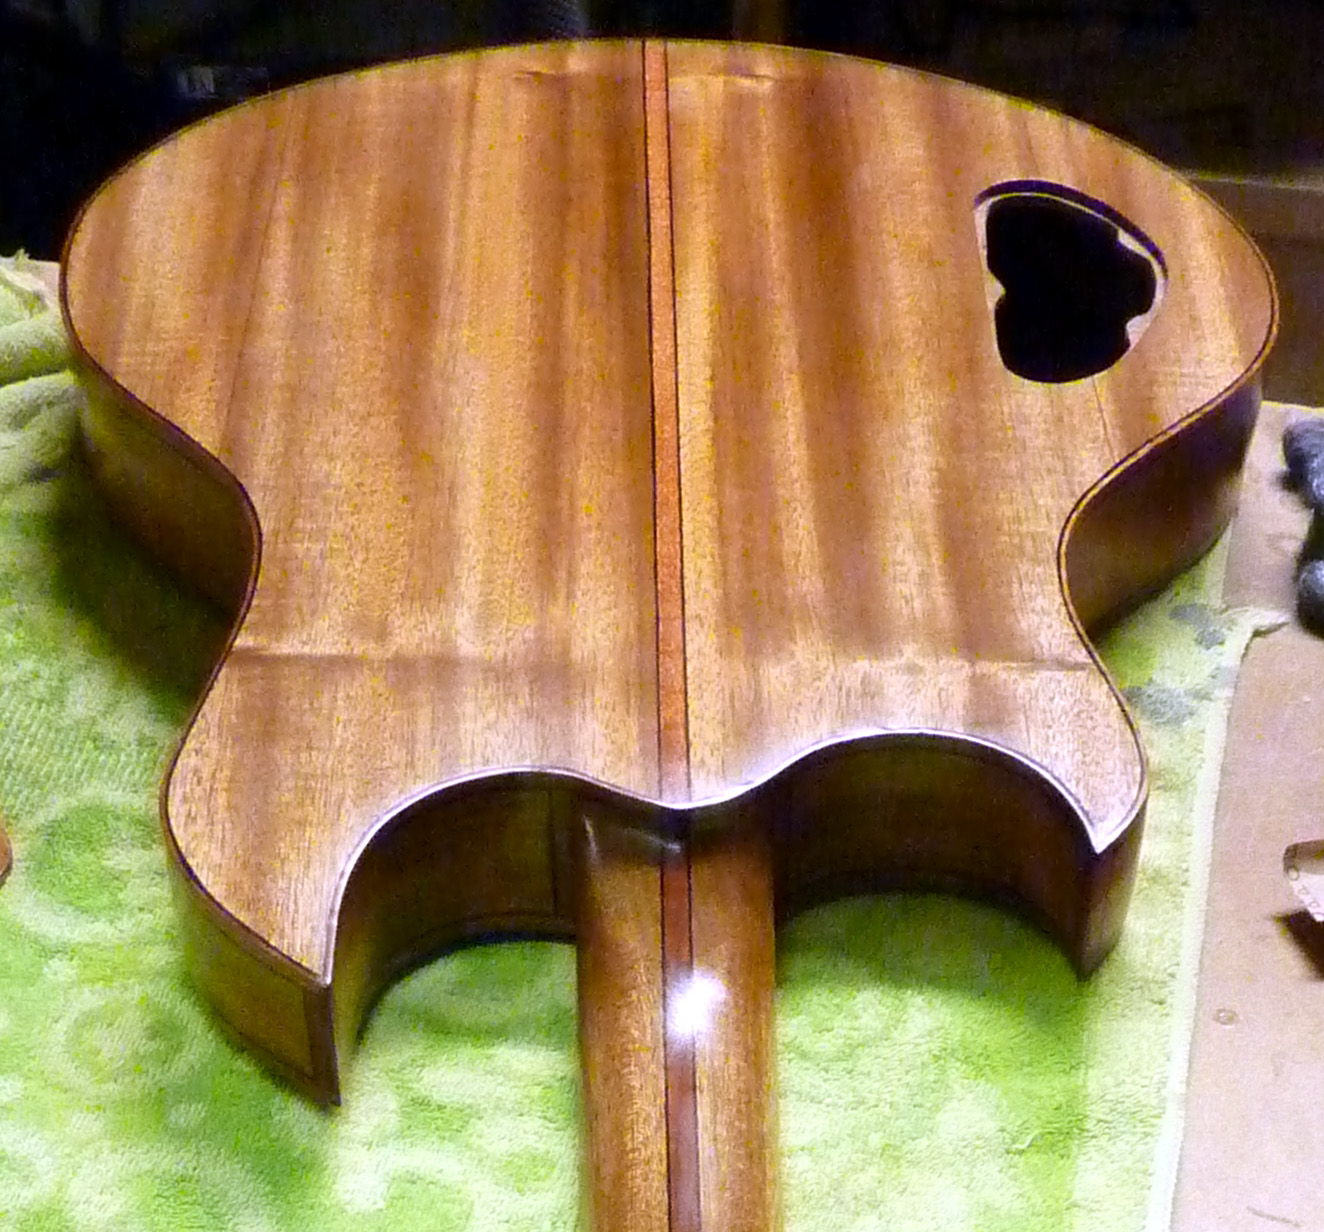
You can see the features of the finished neck here. The stripe down the middle will match and tie into the stripe on the back. Also notice the deep neck tenon.
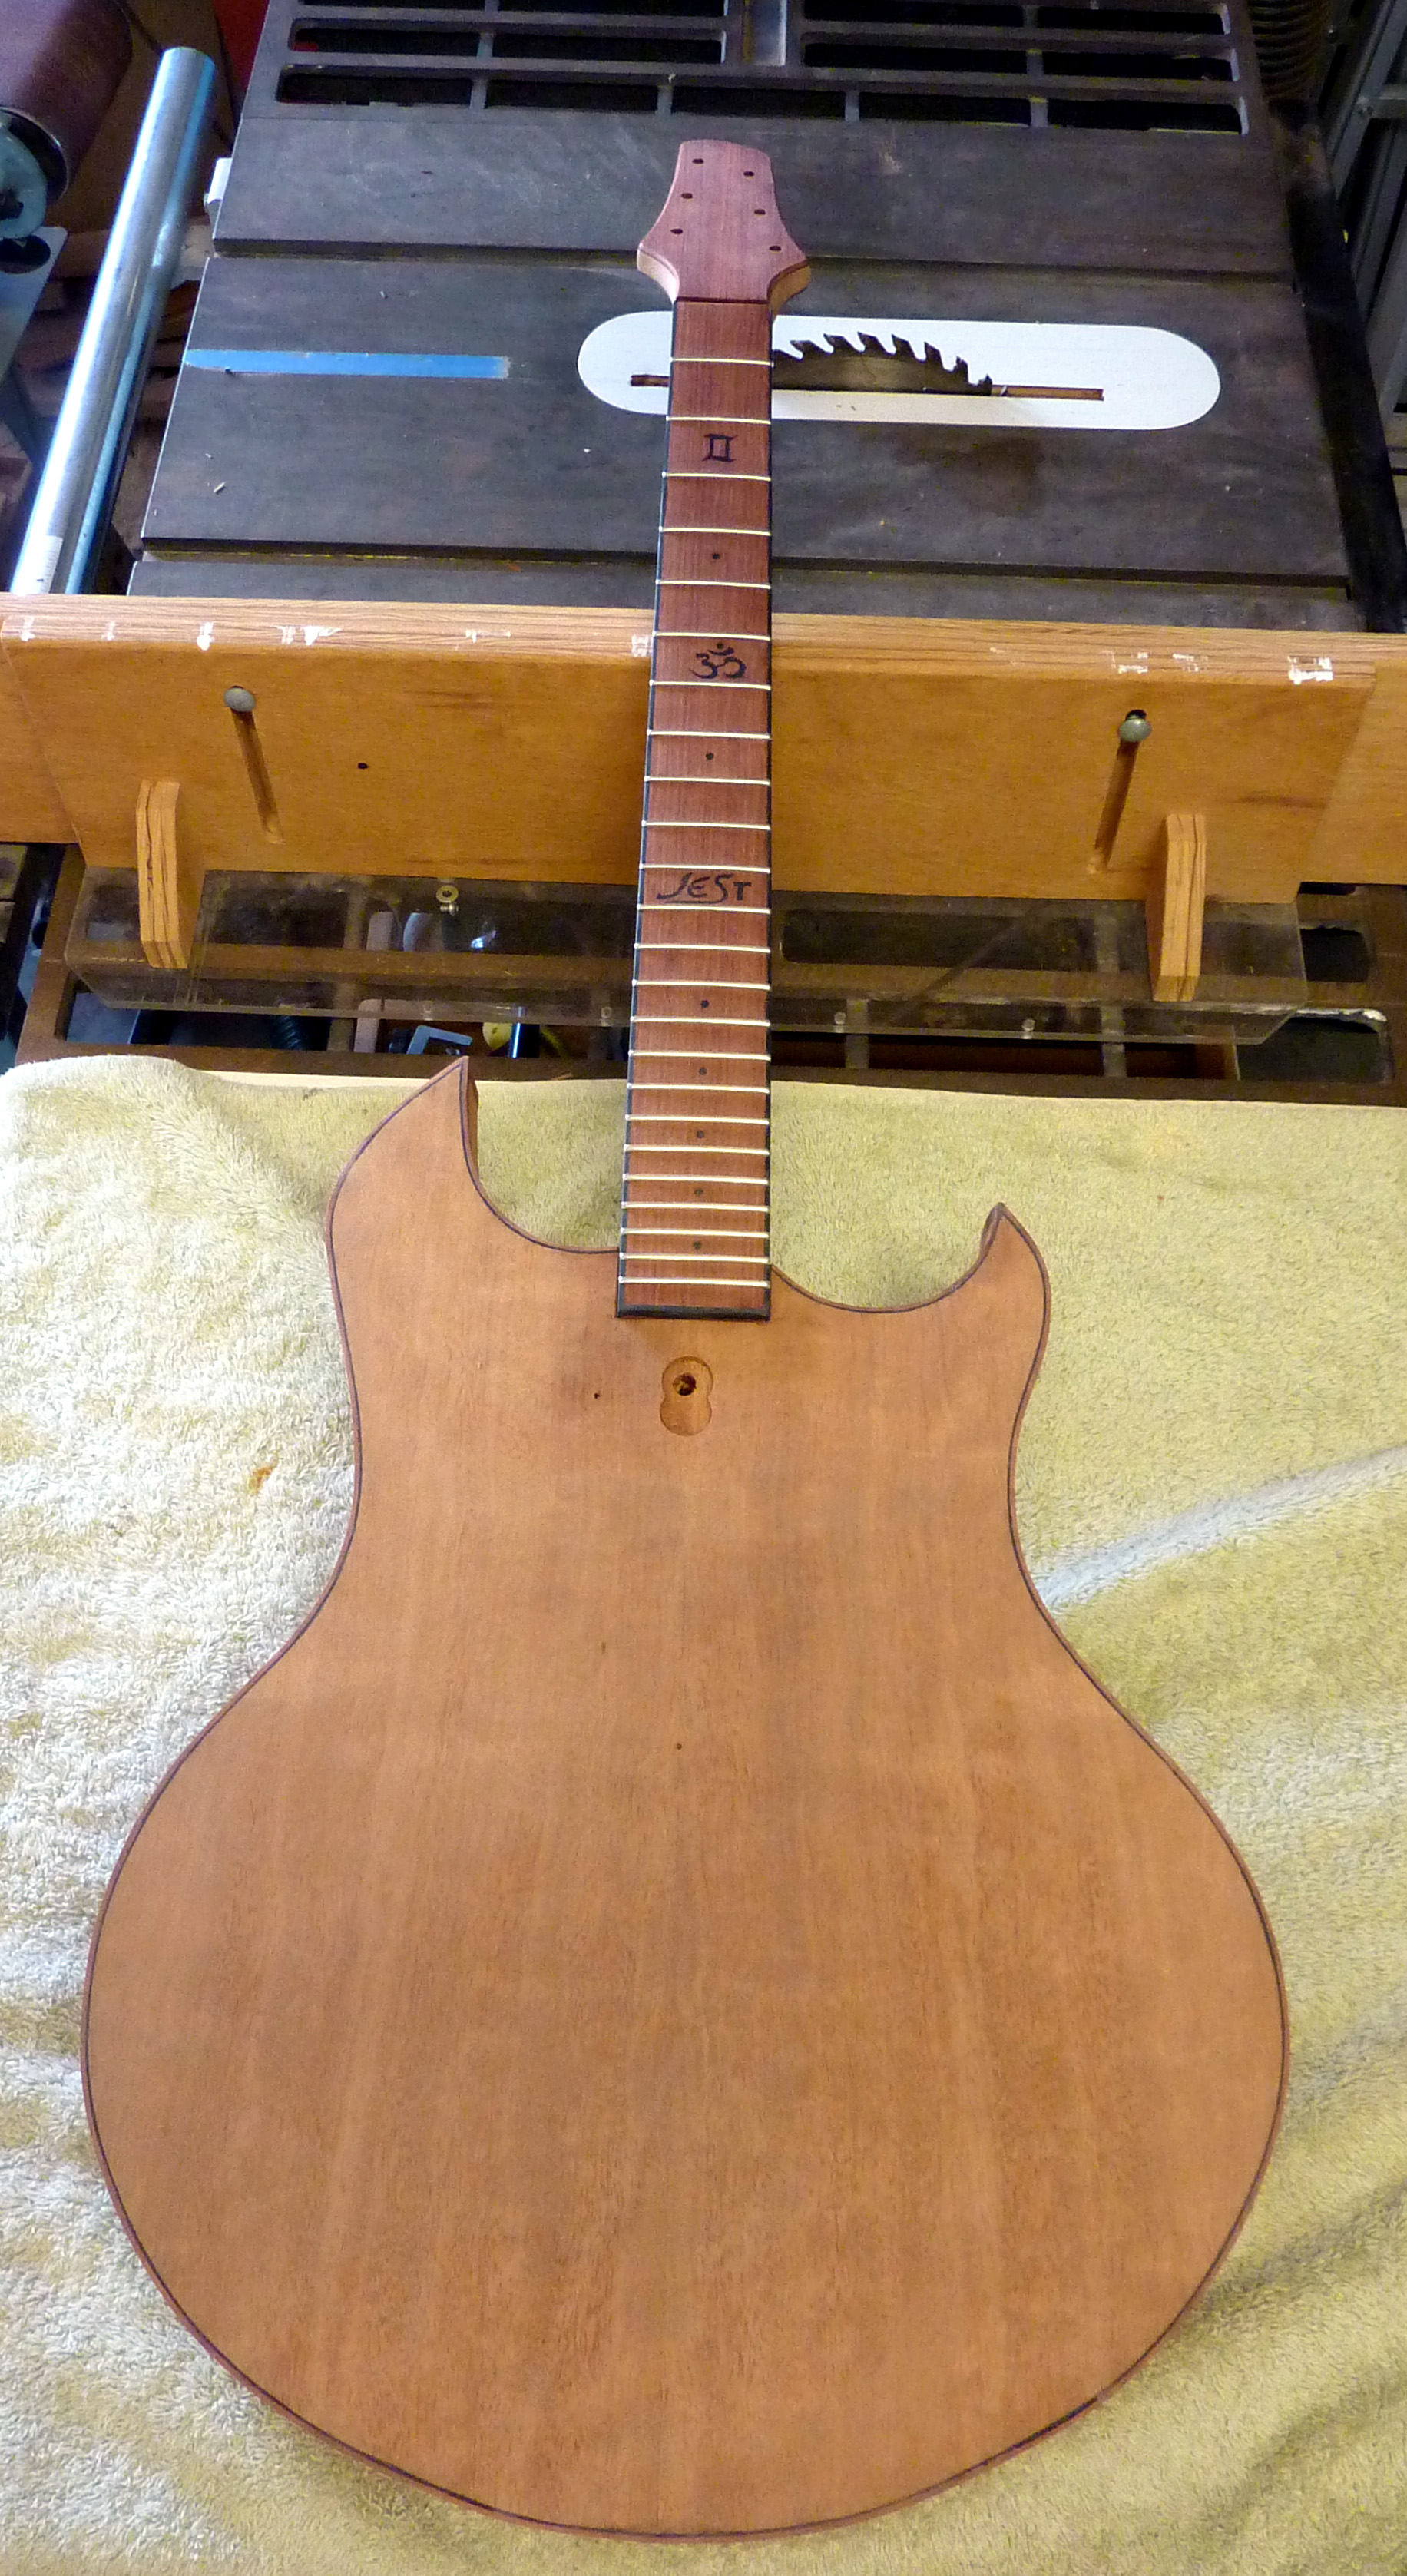
The top has been glued down and top binding has been installed. The neck has now been glued into the body. It is starting to look like a guitar.
This pictures shows the binding better. The sides still need to be cleaned up and leveled. You can see a couple holes in the top that I used to register the top, body and neck for glue up. These holes will disappear when I cut out the pockets for the pickups.
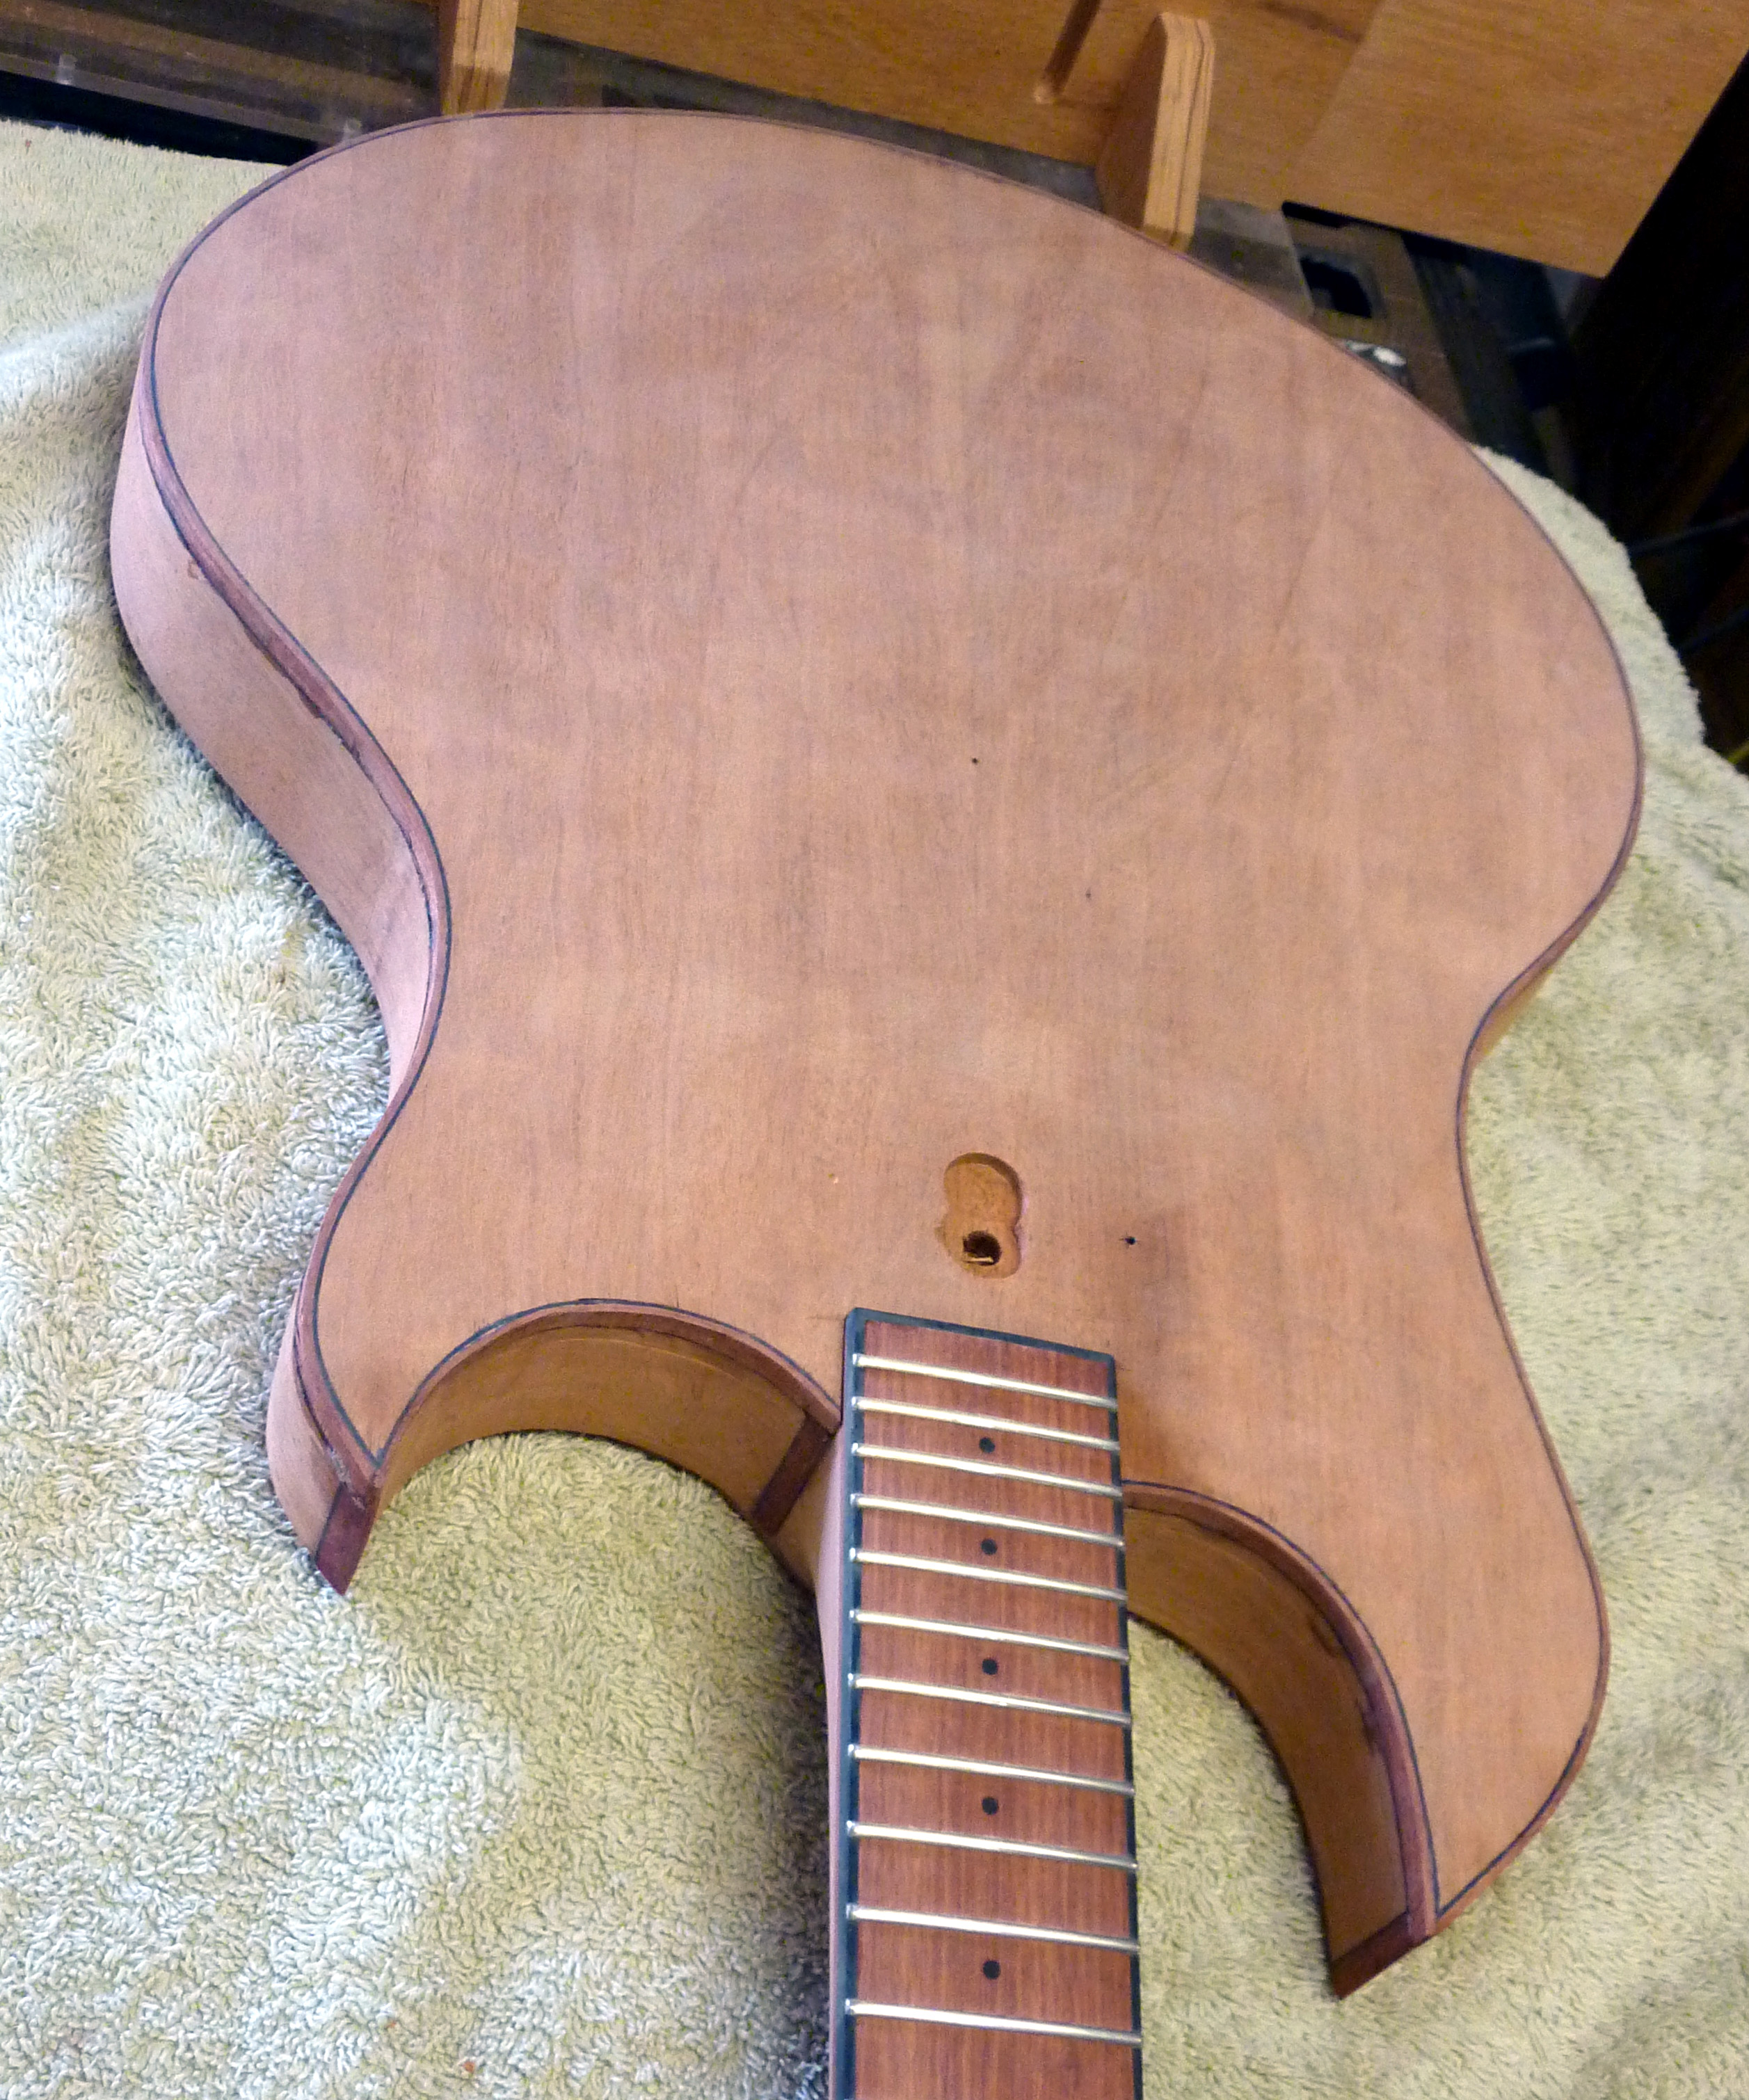
The back has been glued on, binding channels cut, and the joint where the neck heel joins the back has been shaped. I wanted to get the neck set before gluing on the back so I could get a perfect alignment with the stripe that ties the back into the neck. This turned out well and is going to look really nice when finished. However, binding around the neck heal curve is going to be a challenge.
After finishing the binding on the back, I will need to level the sides so that they are flush with the binding. I will then cut pockets for the pickups. After doing a final sanding, I will be ready to start applying finish.
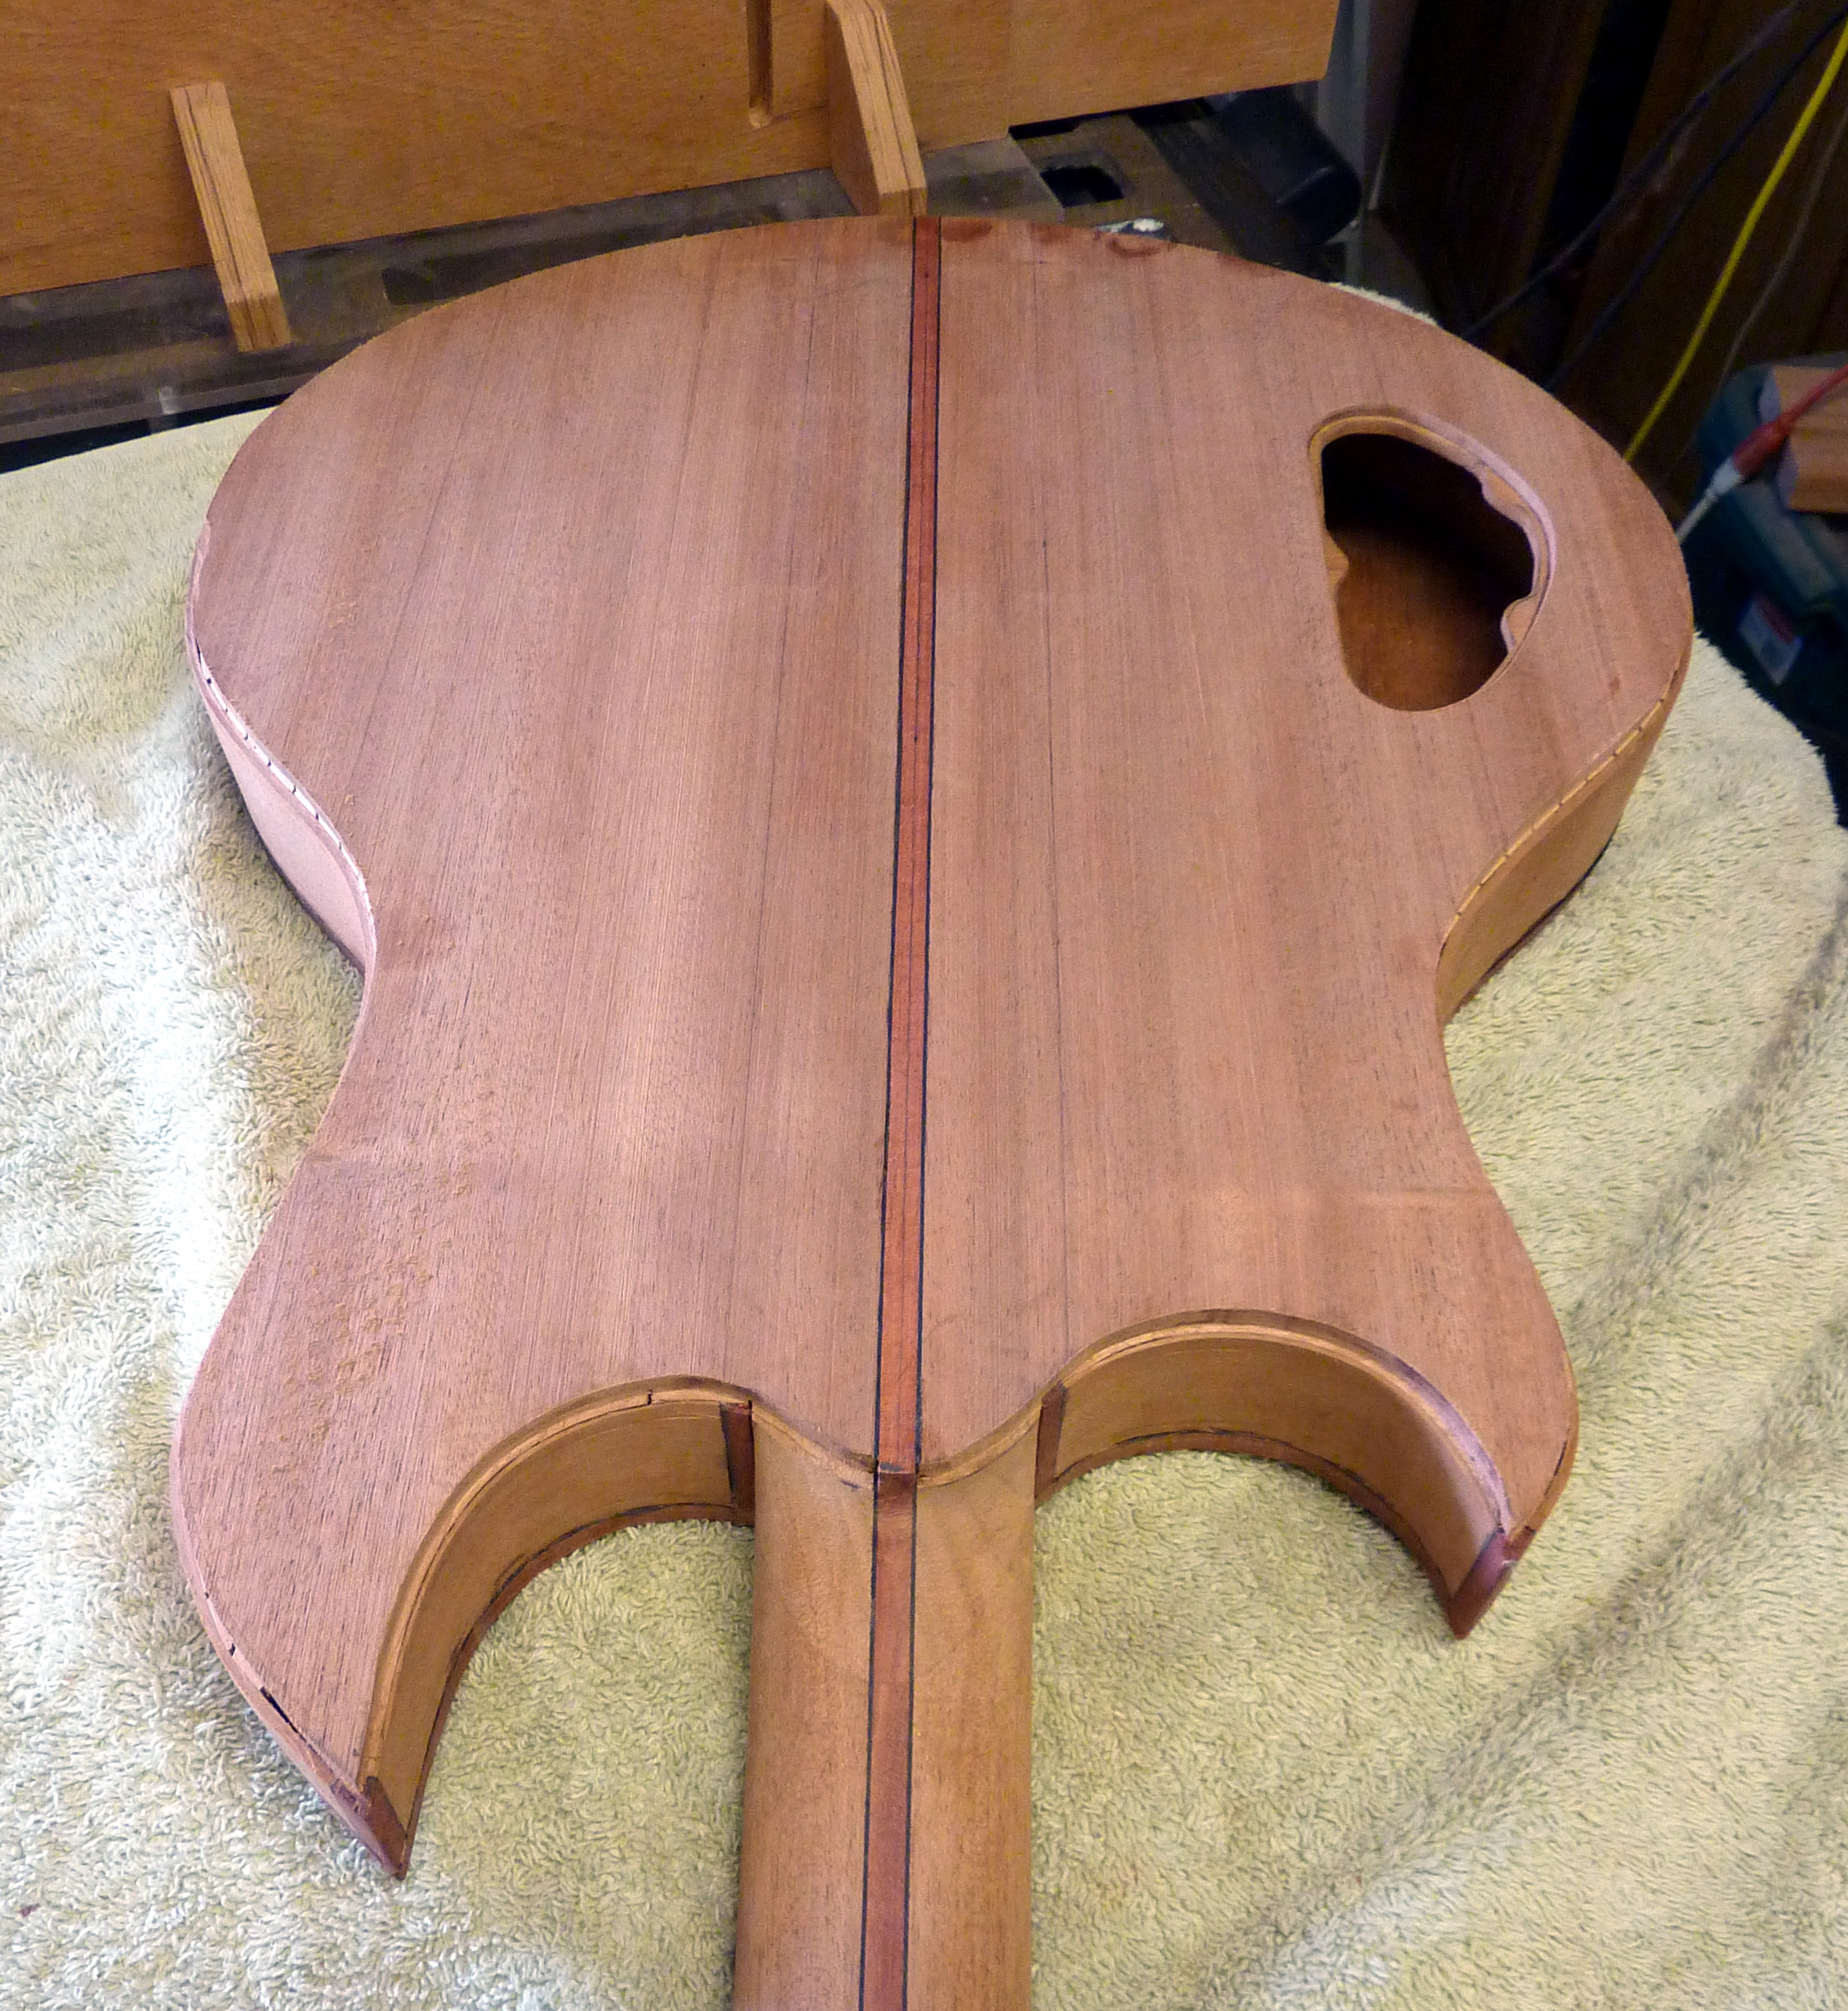
You can see at the right how the the binding on the back turned out. I have also started to apply finish. The neck and back joint was a real challenge, but I really like the way it turned out. The way the light catches the finish in this picture makes it look like a turkey buttered up and ready for the oven or an oiled body builder on Venise beach; the reflection hides some of the details of the binding around the neck/body joint, but trust me, it is beautiful.
The bloodwood and mahogany makes a very nice combination in my opinion. The two woods have a very similar texture, and differ mainly by color. It results in a subtle contrast that I think is quite elegant.
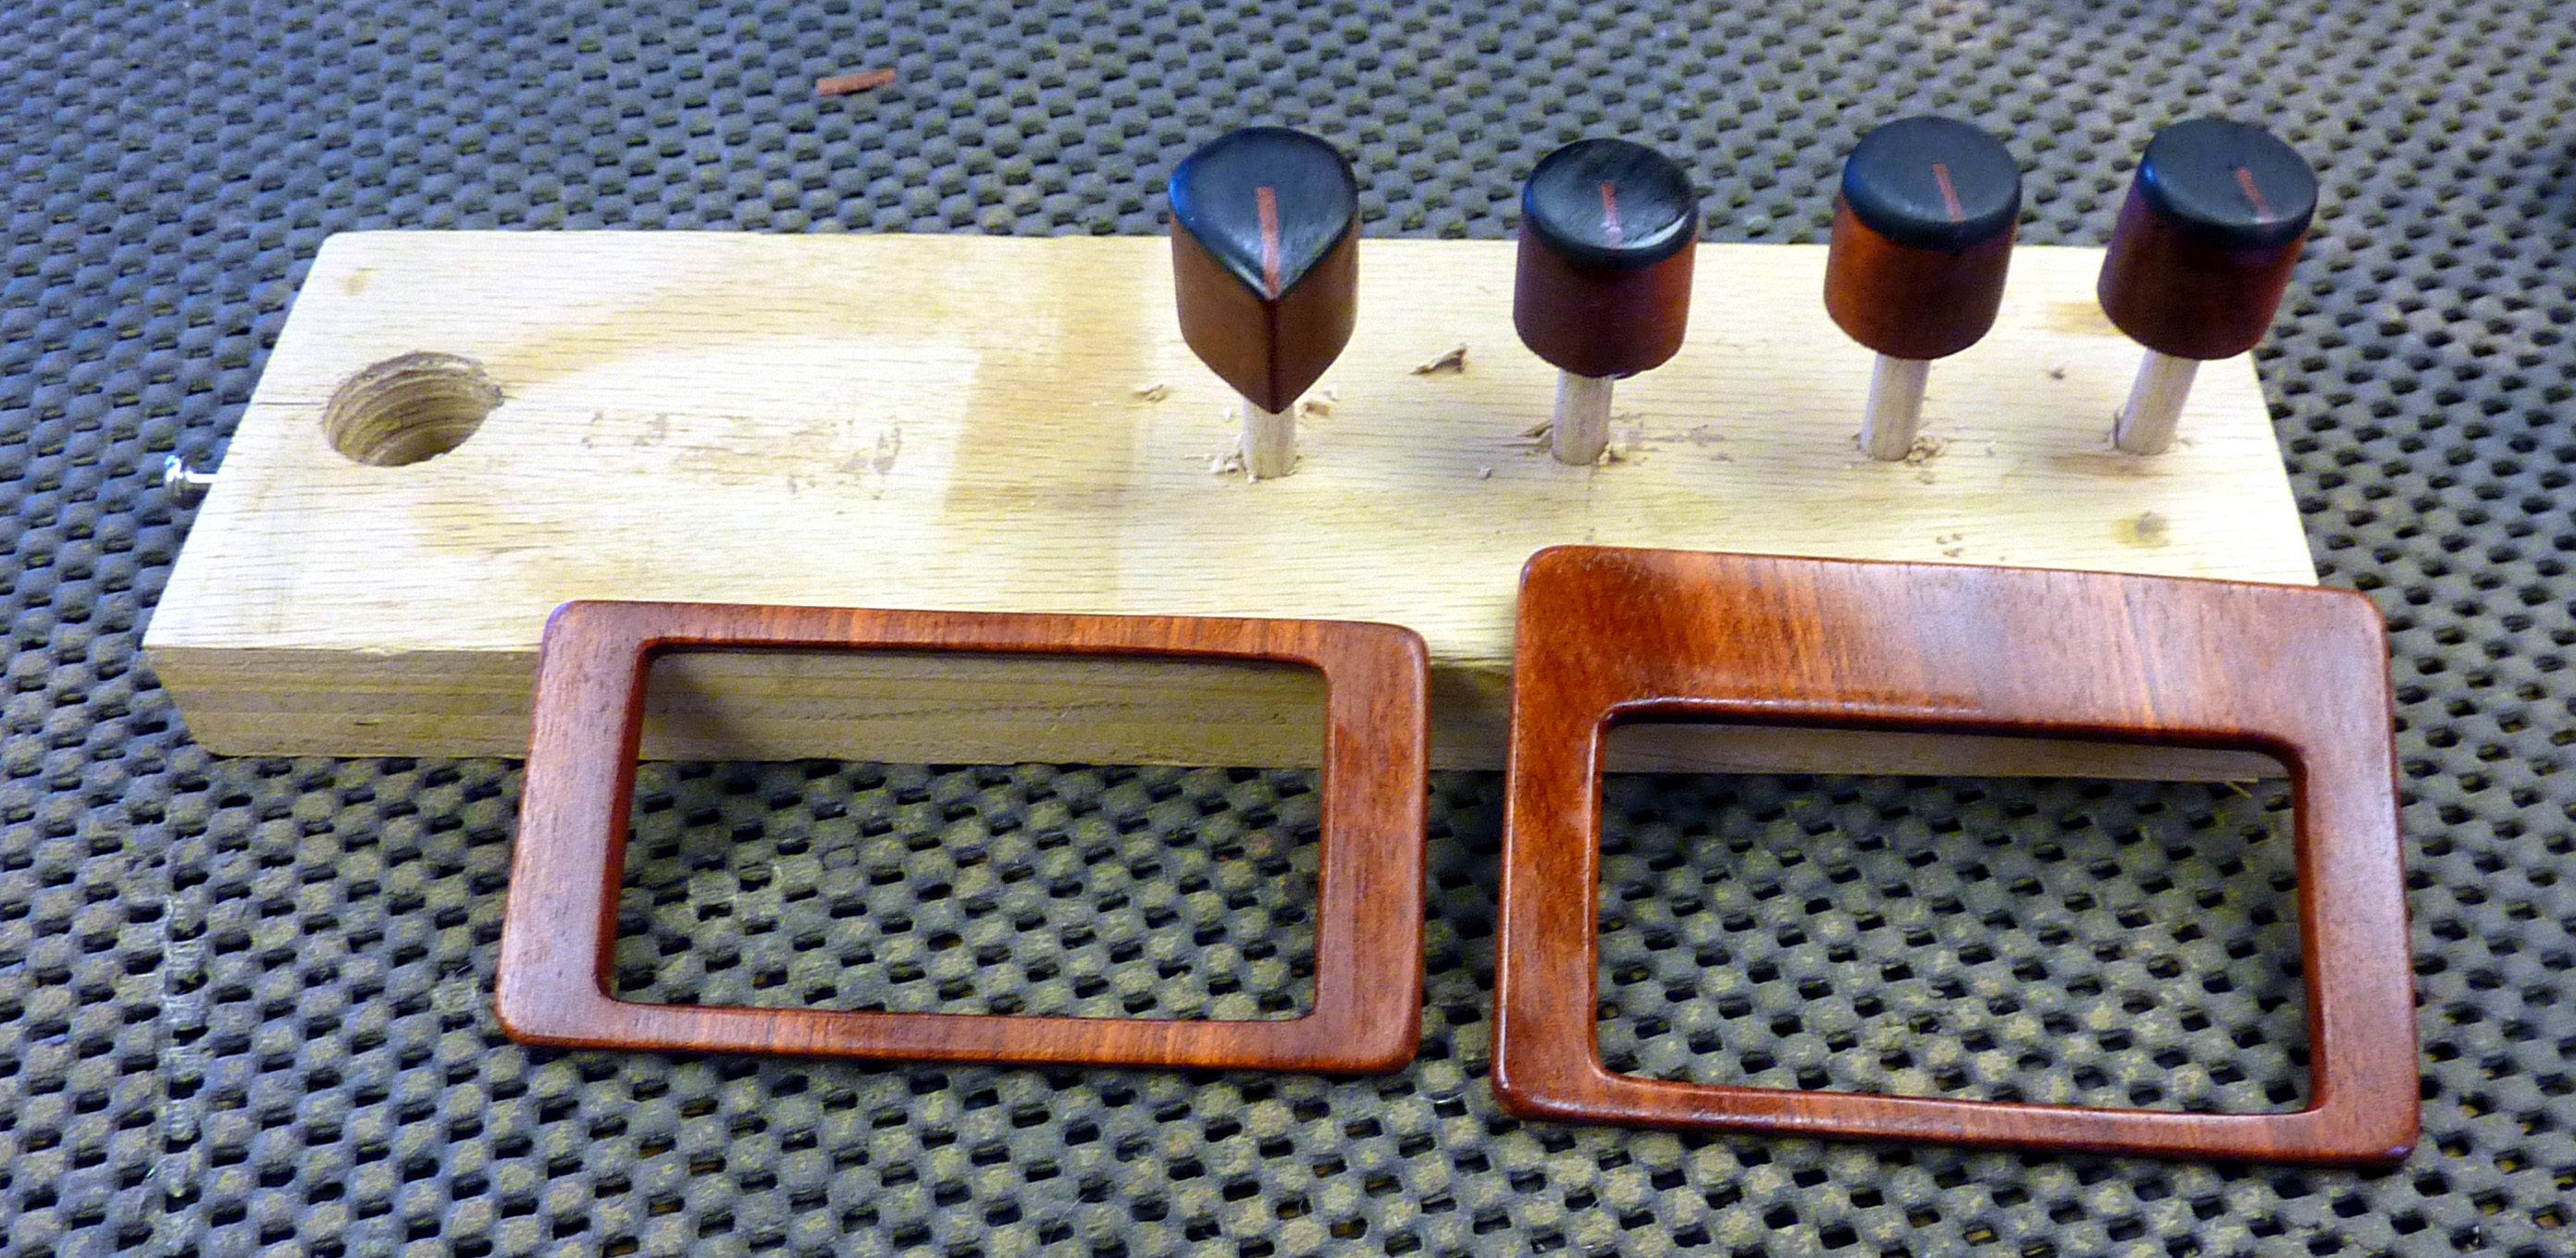
At right you can see the pickup rings and knobs in progress. The pickup rings are blood wood. The knobs are bloodwood with an ebony cap, and inlaid bloodwood position indicator. I normally use standard metal hardware, but I wanted to custom make the wood items to tie everything together for this special project.
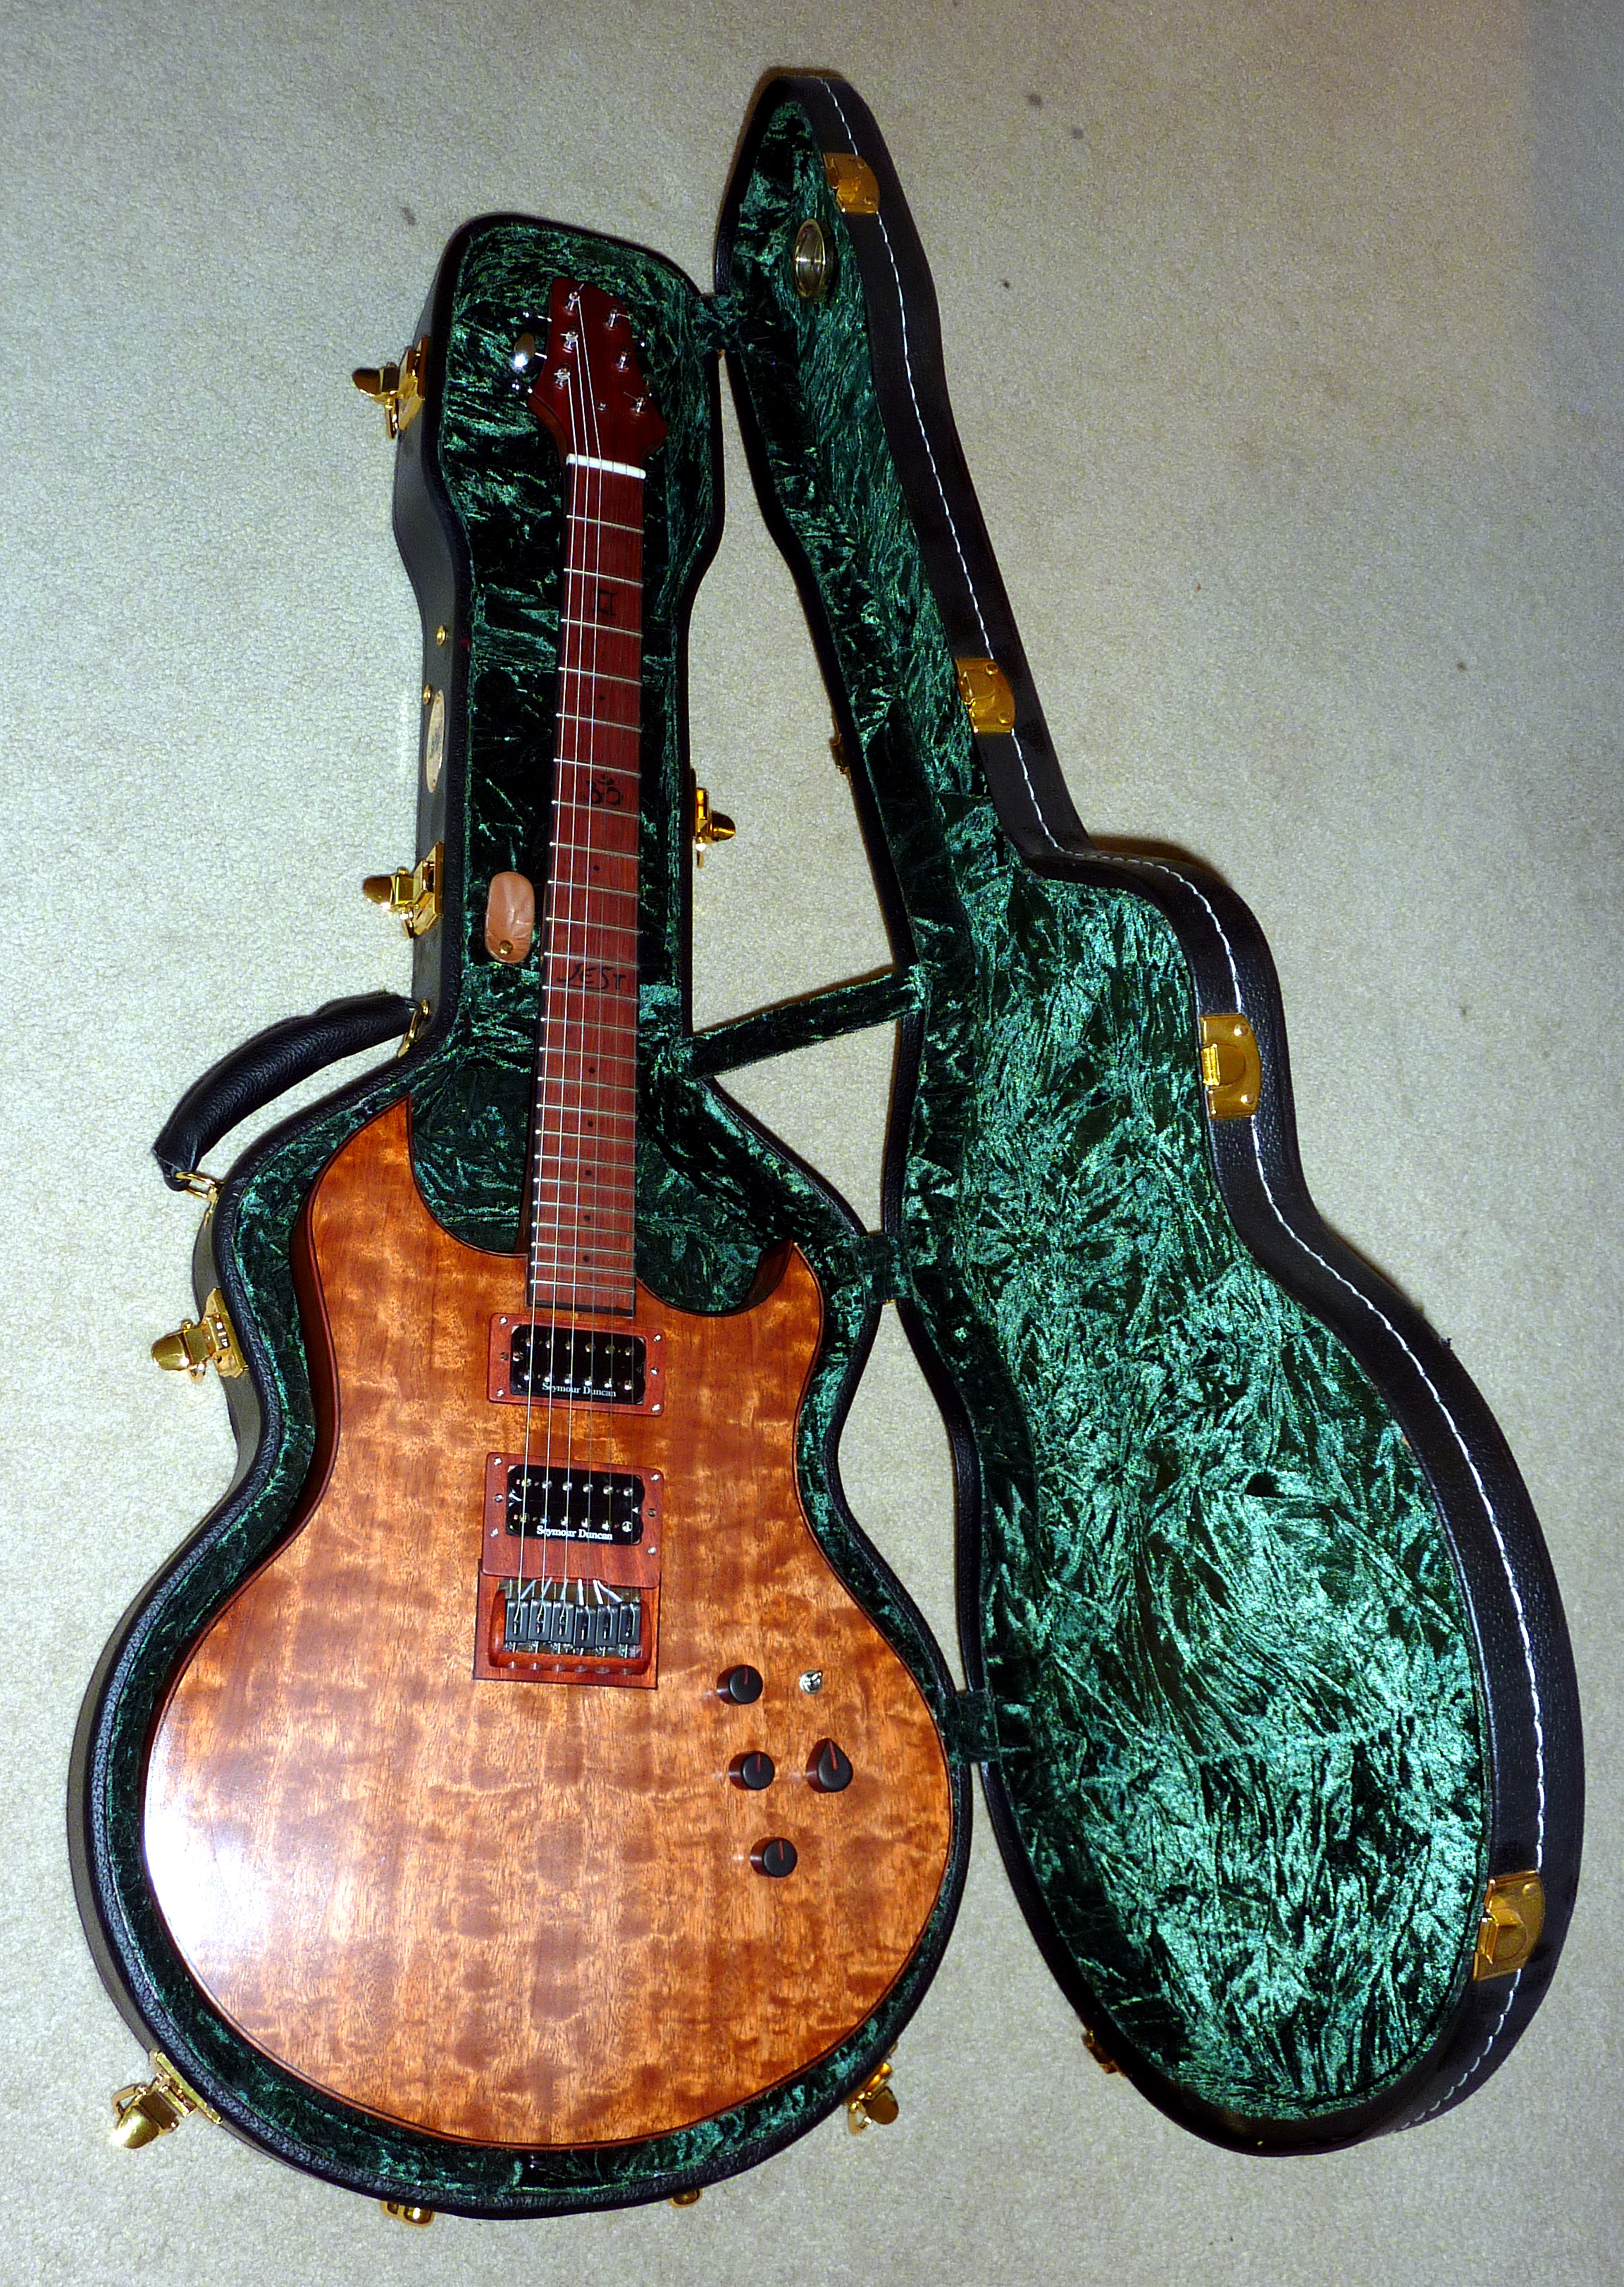
Here is the finished product resting in its case. It has been a while since I posted an update. There were a number of things that delayed completion. First of all, the wrong piezo saddles were sent. This took several weeks to straighten out. Then one of the magnetic pickups was bad and had to be replaced. It took me a while to fuss with the bridge placement to get the string angle right. It also took a while to get all the electronics working properly, as the wiring is fairly complicated. In any case it is now finished and ready to deliver to Mark.
If you read through my What’s New post on Chili 1, you may begin to get the idea that every project has some difficult moments. It seems that this is inevitable, at least for first time projects. I propose that to luth (what luthiers do) is not to do things perfectly, but to be able to either fix or hide what went wrong. In fact, it is my belief that the tradition of inlay was developed to hide screw ups.
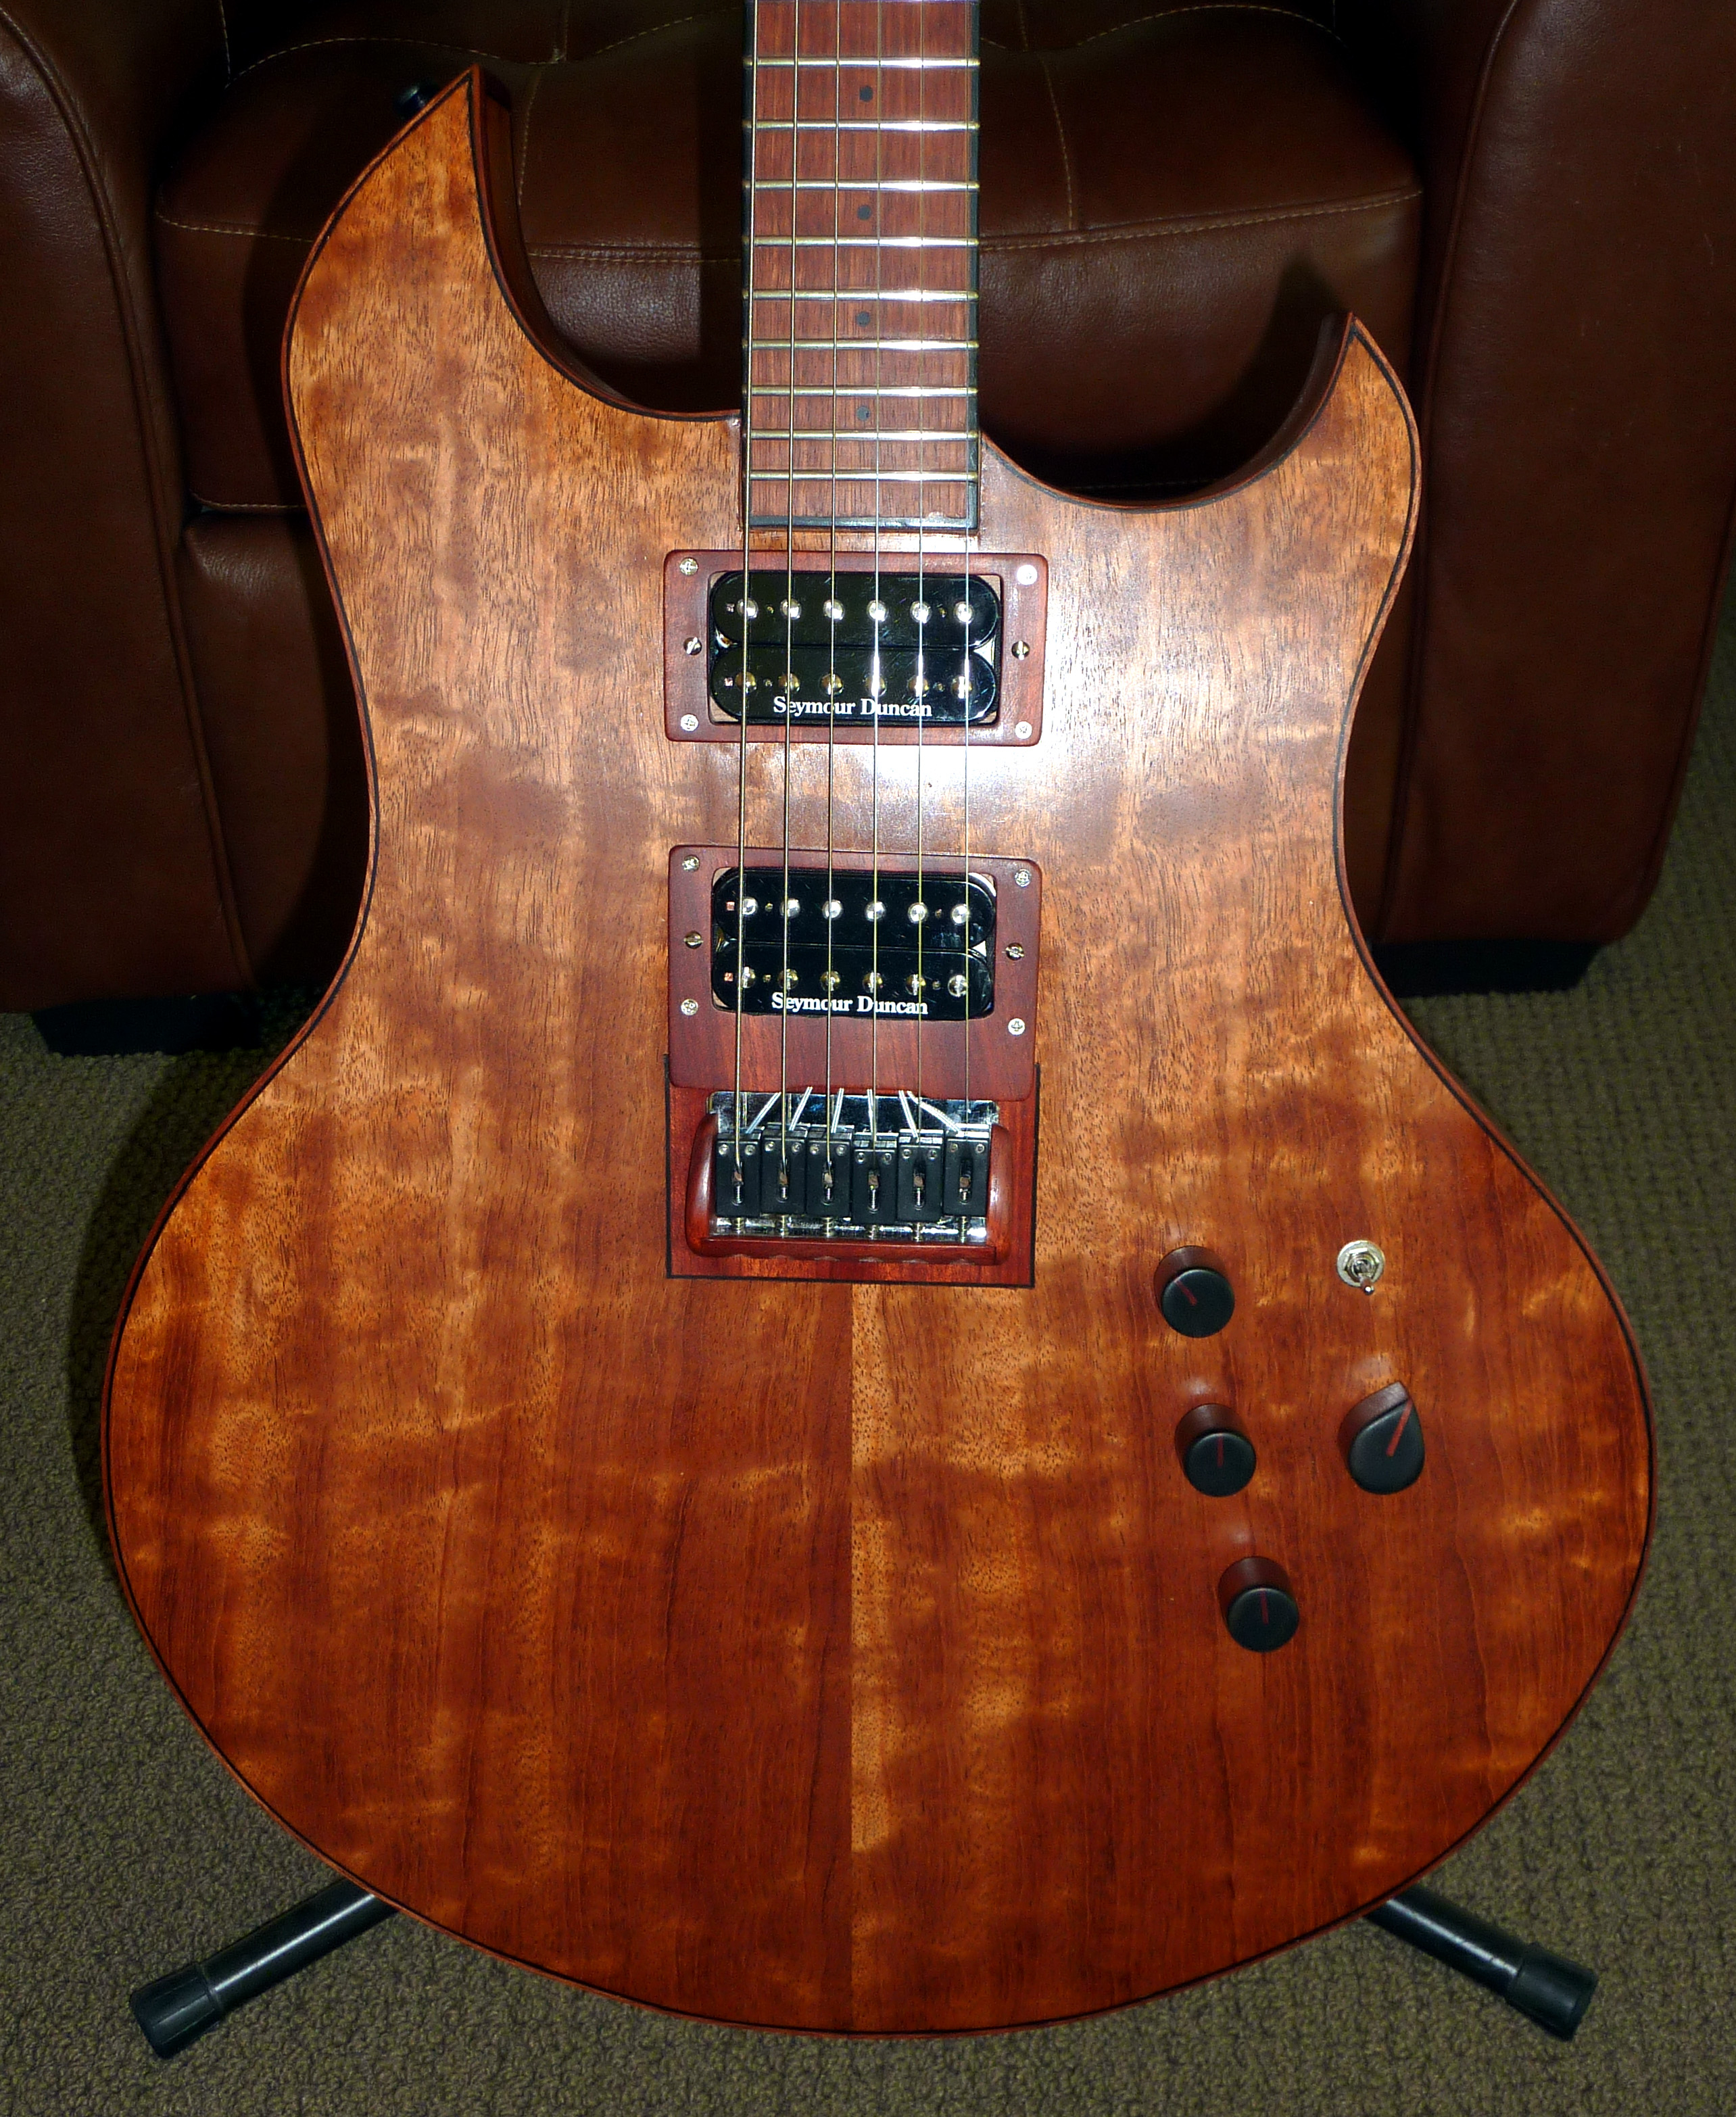
Here is a close up of the guitar front. I set the bridge into the body, with a bloodwood surround to match the bloodwood pickup rings. You will notice that the bridge pickup ring is extended on the bottom to cover the piezo wires as they enter into the picup cavity (and then into the control cavity.
A word from Mark after it was delivered:
“A quick note to say how much I am loving the guitar. I think I played for about
5 hours on Saturday and another 2 or so yesterday. It's pretty much the only thing
I want to do right now. I'm really happy with how the reality of the design elements
are satisfying me as much as I imagined they would. Hate to say it, but I love the
out-
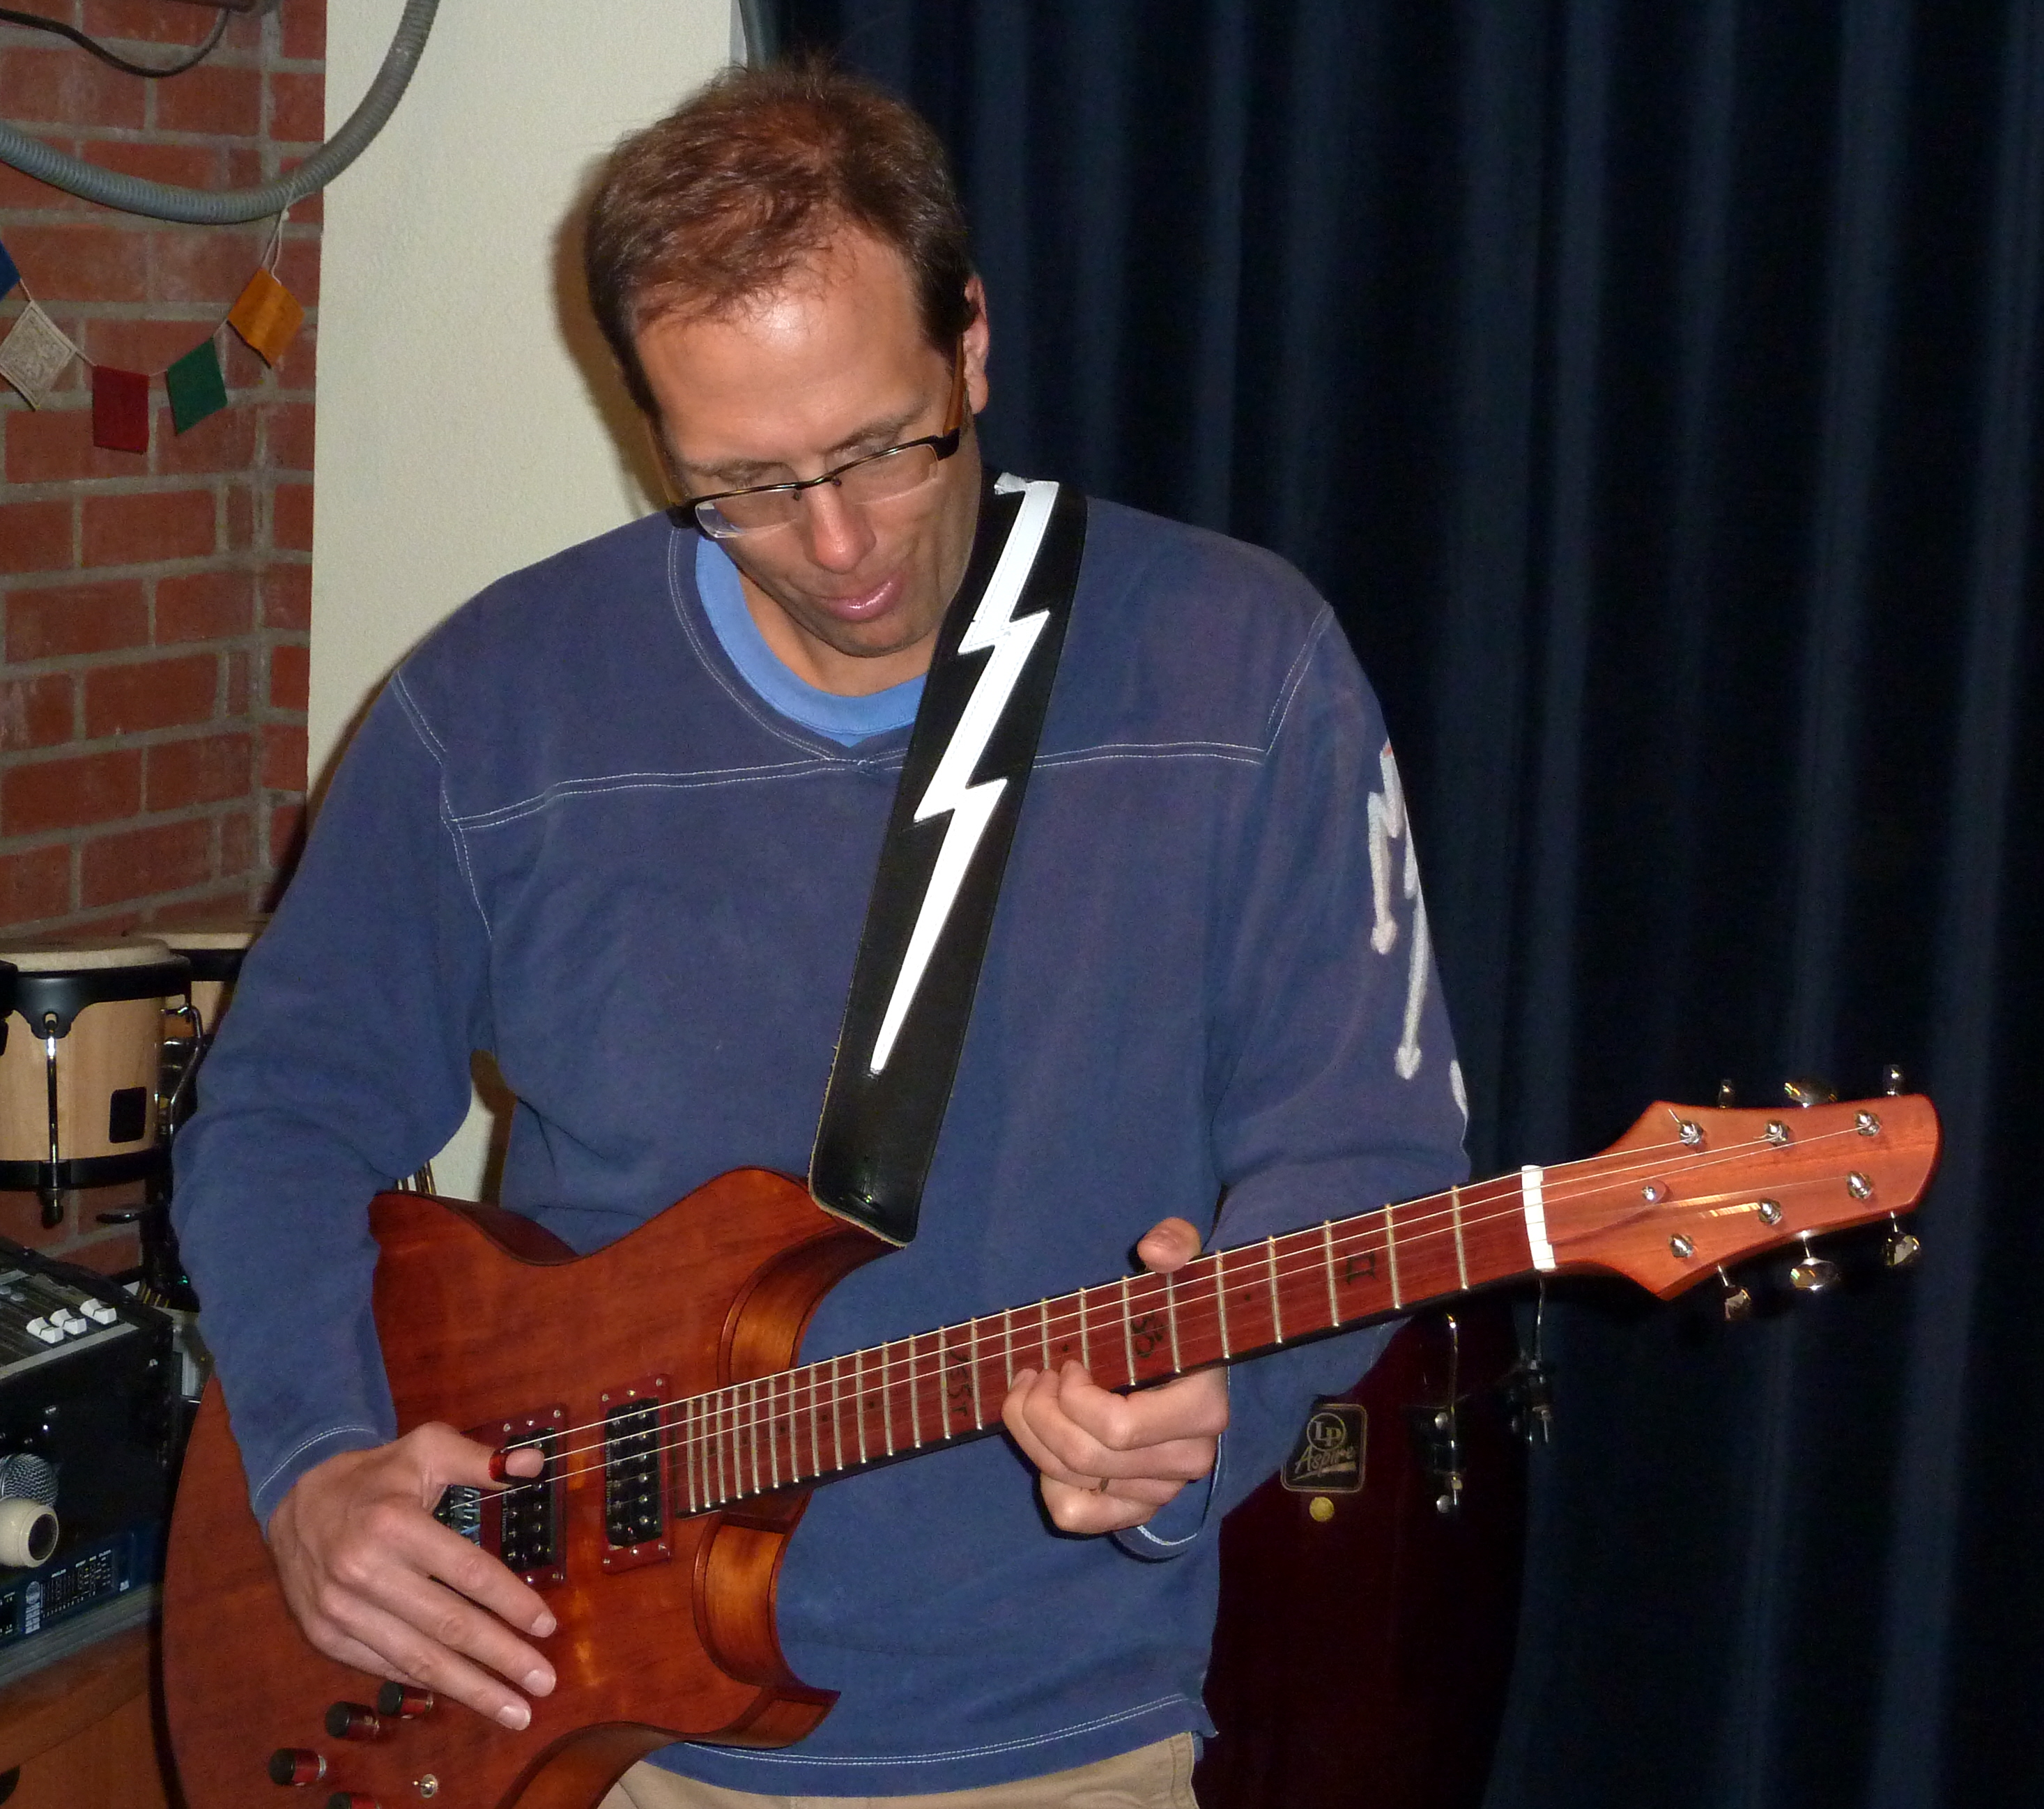
And, so finally, we have a picture of the happy customer playing the guitar in his home studio, rehearsal space.
Star -